Create different headers with the Kadence Theme - Conditional Headers
Today we pushed out an update to Kadence Theme and the Pro addon plugin. The main enhancement is a brand new feature for Pro users, Conditional Headers. Take your Website to a whole new level and create a unique experience for your visitors.
Kadence Conditional Headers are different headers that you can create freely according to your needs. So you create a specific header, for a specific area of your website. For example, for all online courses, a blue background and the word Academy in the logo.
The main enhancement is a brand-new feature for Pro users, Conditional Headers.
Conditional Headers enable you, to keep your website visitors focused.
A common use of Kadence conditional headers are:
- Show different header on your blog sites, depending on the category your user is reading.
- For Membership sites. It shows the users a different header once they are signed in to your site.
- It also simplifies the header during the checkout experience on your WooCommerce site
I will show you exactly in this tutorial how to use different Headers with Kadence.
How to Enable and add a new Conditional Header
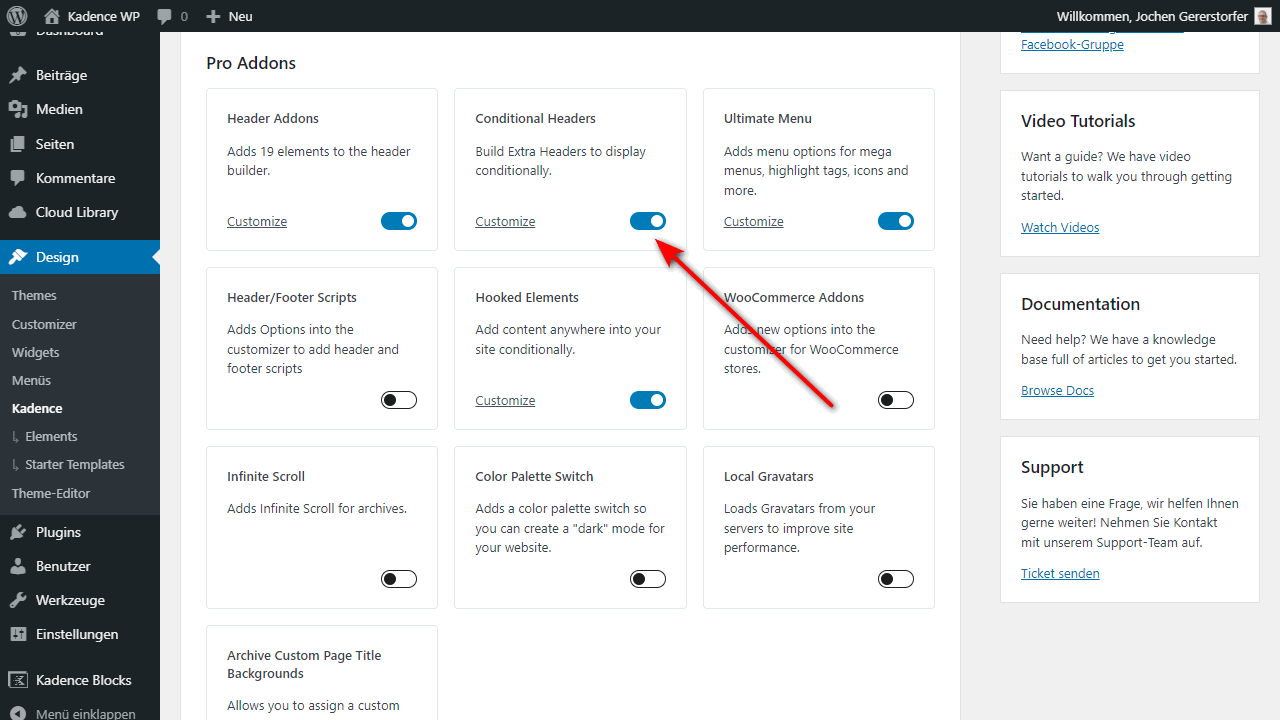
You need to go to Appearance > Kadence to see a list of all the Pro Addons you can enable. Find Conditional Headers and click the toggle to turn on the feature.
Next, you go to Appearance > Customize and open the WordPress customizer and open the header customization options. Now scroll to the bottom of the header section, you will see “Conditional Header“.
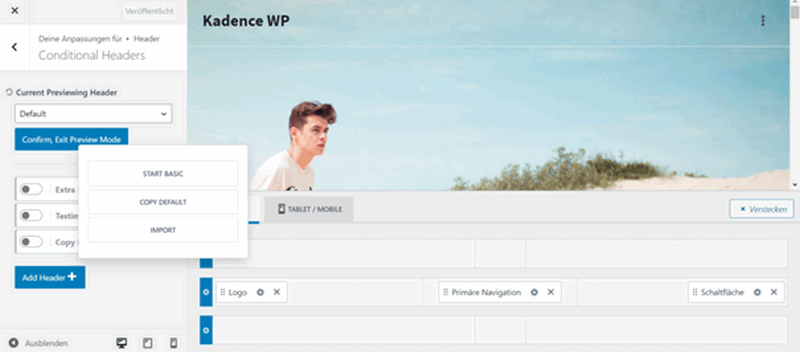
What do you see now? A label, saying Current Previewing Header with a drop-down, showing Default in it. So currently, you are viewing the Default header you initially set up and use throughout your website. Now, to add a Header, click “Add Header”. A popup window appears with the options:
- Start Basic – will allow you to start with a basic header and design. This option will suit you if you want a header which is much different from your default header.
- Copy Default – this allows you to copy the entire default header and use that as a starting template. Use this option if you want a header which is similar to your default header, but you want to swap out a few pieces.
- Import – this option allows you to import a header. This option is useful if you want to predesign your header and import it to your website.
For right now, use the Copy Default option.
Rename and Configure Display Settings
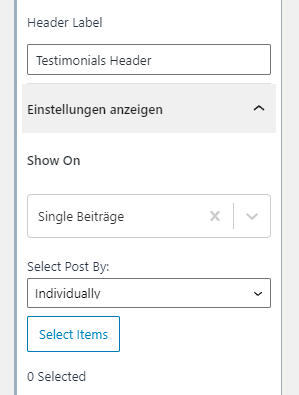
Once you have a new conditional header, rename your header to a more user-friendly name. First, you extend the dropdown. Change the header label. The name should be suitable for your website. If you used the Kadence Elements feature, you should have no problems using the next settings.
Now, the next step is to configure the display settings, which is where you can specify exactly where you want your new header to show on your website.
Click the arrow dropdown to the right of Display Settings and expand it, then you have the option to Show On, and here are all those familiar options you are already familiar with. For our purpose, choose “Single Pages” and select Page by “Individually”. You will get the option to select a page or pages, that you want to show this new header on. Choose the page and hit select.
How powerful is that? You have the ability to drill down and choose exactly which pages or posts you want this new header to show on.
Configure User Settings
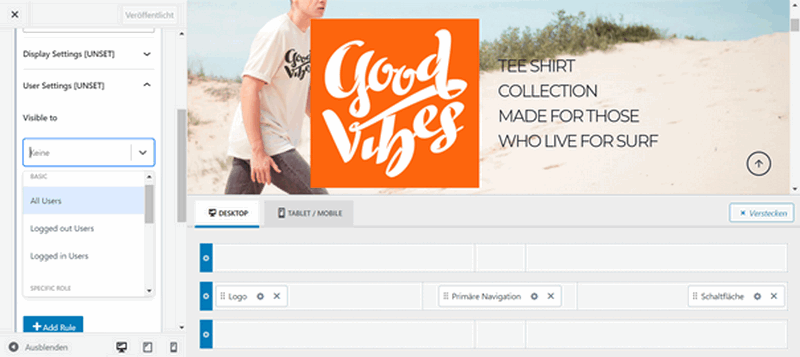
Now let’s set which users will be able to see your newly created Header. If you open the Visible to dropdown, you will see a set of users and roles that you can show your conditional header.
- Basic – All Users, Logged out Users. Logged in Users
- Specific Role – Administrator, Editor, Author, Contributor, Subscribers (This is an excellent feature especially if you have a membership type of site).
You also have “expires settings“. By using this setting, you can specify a date and a time that you want your header to expire. When the time is hit, your entire header will expire, which should bring it back to the default header that your site uses.
Build the Conditional Header
So now that you have all your settings configured, it is time to actually build out your header to look the way you want. First, you scroll up and collapse all the options. What you want to do next, is to preview your header. So where it says “Current Previewing Header” you choose the header you just created. As soon as you choose to preview a header that is different than the current header, you will get a message that says:
“Previewing another header requires reloading the customizer in a preview mode. Click confirm below to save your settings and enter into preview mode.” Hit the Button (Confirm, Save Settings).
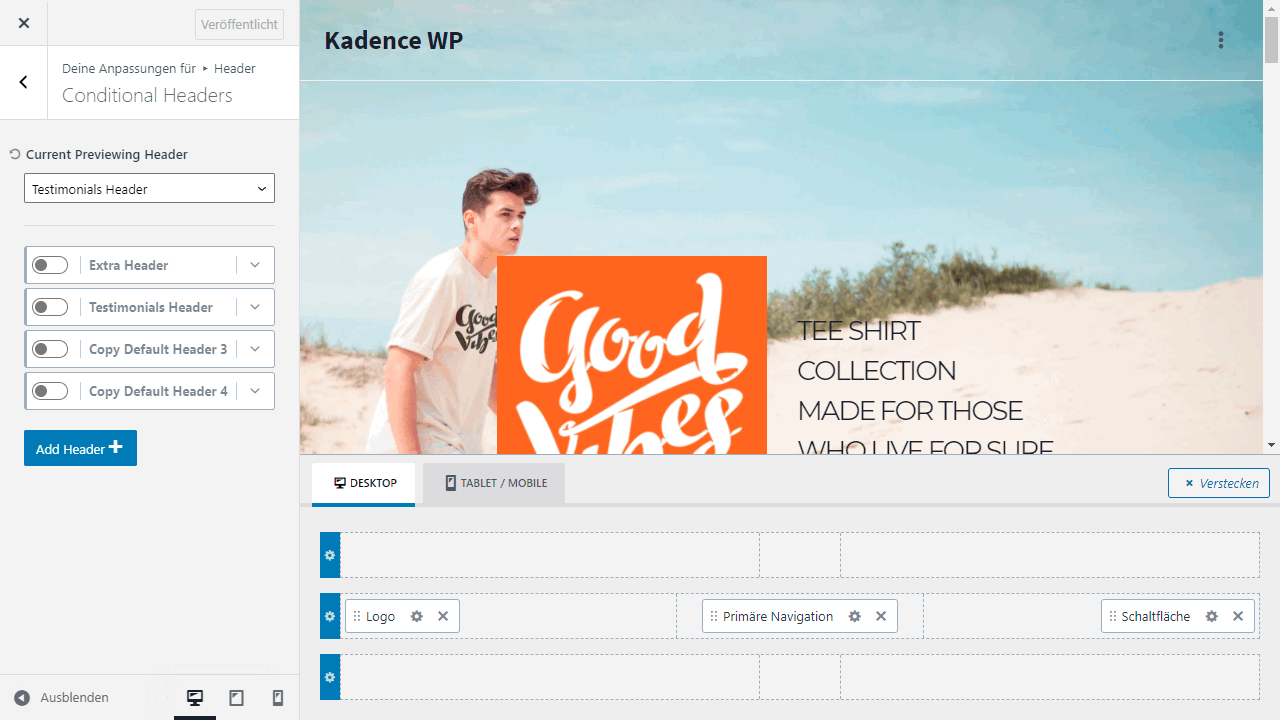
You are now previewing your new header and can build it out to look exactly the way you want. In the customizer, you will see all the header elements available to you. With all the header elements you can then use the Kadence header builder to drag and drop your elements on to and build out your new conditional header however you would like. Keep in mind that there is a tab to build out the desktop version along with a tab for tablet/mobile.
After you finish with the header the way you want, click the publish button in the upper-right corner of your customizer to save your changes. Then go back into the conditional header options to enable the header, toggle the switch on and the header has been created.
So when you click on publish and then you exit the customizer, you are on the homepage. Click on the page you used for the new header, you should see the different header experiences that you created. The feature allows you to create a different experience on different parts of your website.
Another great use for this is when you have, for an instant, a WooCommerce Store. You keep your customers focused on the purchase and keep them in the store by changing your navigation.
How to delete a Header
Now go back to the customizer and click on Header. You can see, it remembers the last Header you were previewing so you might want to go back to the default Header. Scroll down to Conditional Header, choose this option, and for the Current Previewing Header click on Default and then confirm. It will reload everything, and here you are back at the header.
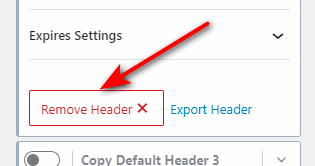
Go to the conditional header. There you have an additional header that was created by default. Expand the menu, and you can easily remove the header by clicking on Remove.
Note: This will permanently delete all the header settings connected to this conditional header.
How to Import and Export a Kadence Conditional Header
You will see the import options if you want to create a new header. Click on the Add Header, it will give you the three options (Start Basic, Copy Default, Import). Select Import on the popup window, upload your file and click on import, and create new. Now you have a new header.
Import
Follow the steps below to import a Kadence conditional header:
- Navigate to the Conditinal Headers section in your Kadence customizer
- Click the Add Header button
- Choose the Import option
- Use the file uploader to choose your Kadence conditional header file
- Now click Import and Create New
It is not carrying over the name of the header or your display settings because you might want them to be different. But this feature now enables you to make your headers portable. You can share headers and export them from one site to another site. It is a very powerful feature that you KnowHow.
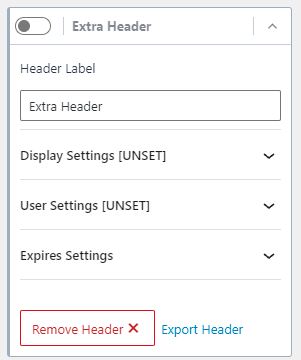
What if you have 2 or more customed headers that have the same rules as far as displaying the header? You can rearrange the header, the one on the top will always have the priority. Don’t forget to hit publish when you are done.
Export
To Export a Kadence conditional header, you need to navigate to the “Conditional Headers” section in your Customizer. Expand the header settings for the header you want to export and click “Export Header” button.
A file will be downloaded to your computer. You can take and import it to another website of yours, or you can send it to somebody else so they will be able to put it on their personal site.
Ideas and Visibility
Let us go over several use cases and what you would choose for “Display Settings“, and your “User Settings“.
- Logged out users: Display Settings: Entire Site User Settings: Logged out Users
- Logged in Users: Display Settings: Entire Site User Settings: Logged out Users
- Blog Posts with Category: Display Settings: Single Posts – Group – Categories User Settings: All Users
- Pages with Tags: Display Settings: Single Pages – Group – Tags User Settings: All Users
- Conditional header on the front page of your site only: Display Settings: Front Page User Settings: All Users
Hopefully, this will give you a better understanding of how to use those settings to show your header on the correct pages of your website.
Conclusion
This is a feature found in Kadence Theme Pro and if you are not a Pro Member you can visit Kadencewp.com to purchase a license.
