5 tasks you can do with If-So
I want to show you 5 tasks that you can do with the WordPress plugin If-So. This way you can add or replace content in different ways. Edit your website based on the profile of your users. Because this way they will engage, convert and buy significantly more.
With If-So, you can dynamically change or add information to your website. This makes for more engaged and more likely to buy visitors. There are 5 different tasks available to you for this purpose.
Your website visitors are unique and deserve material tailored to them. Therefore, you should pay close attention to the tasks below. This way you can offer your visitors an appropriate user experience. Tailored to each individual, this increases the conversion rate enormously.
1. Create dynamic triggers with If-So
The advantage is that you can create your content in minutes. Moreover, you don’t need any programming skills. The Dynamic Trigger is a basic unit of dynamic content created with If-So. Therefore, each dynamic trigger includes the following:
- Dynamic versions: (state and content).
- Default Content: This displays when no condition is met.
- Shortcode: You paste this code or even PHP code somewhere on your website. This is how you display the trigger content.
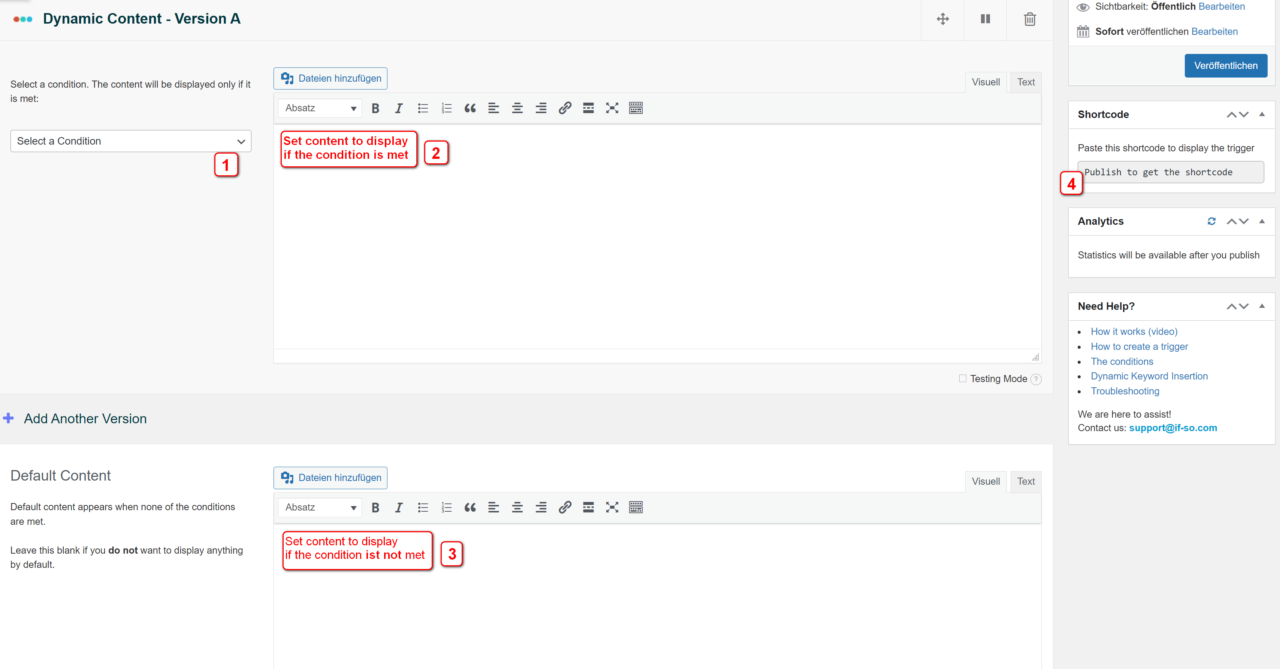
How do you create a trigger?
If you are a developer, you can embed the trigger directly into the page templates. To do this, select the PHP code (for developers) item. Then insert the code into your files accordingly. Otherwise, proceed as follows:
1. In your WordPress Dashboard go to If-So > Add New.
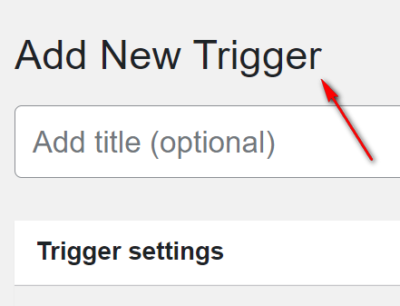
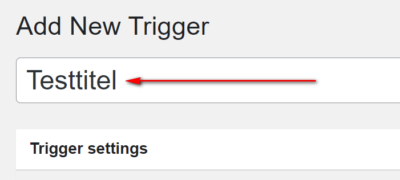
2. Then enter the title . Here you can proceed relaxed. Because this title is only for your personal use. Therefore it is not visible for your users.
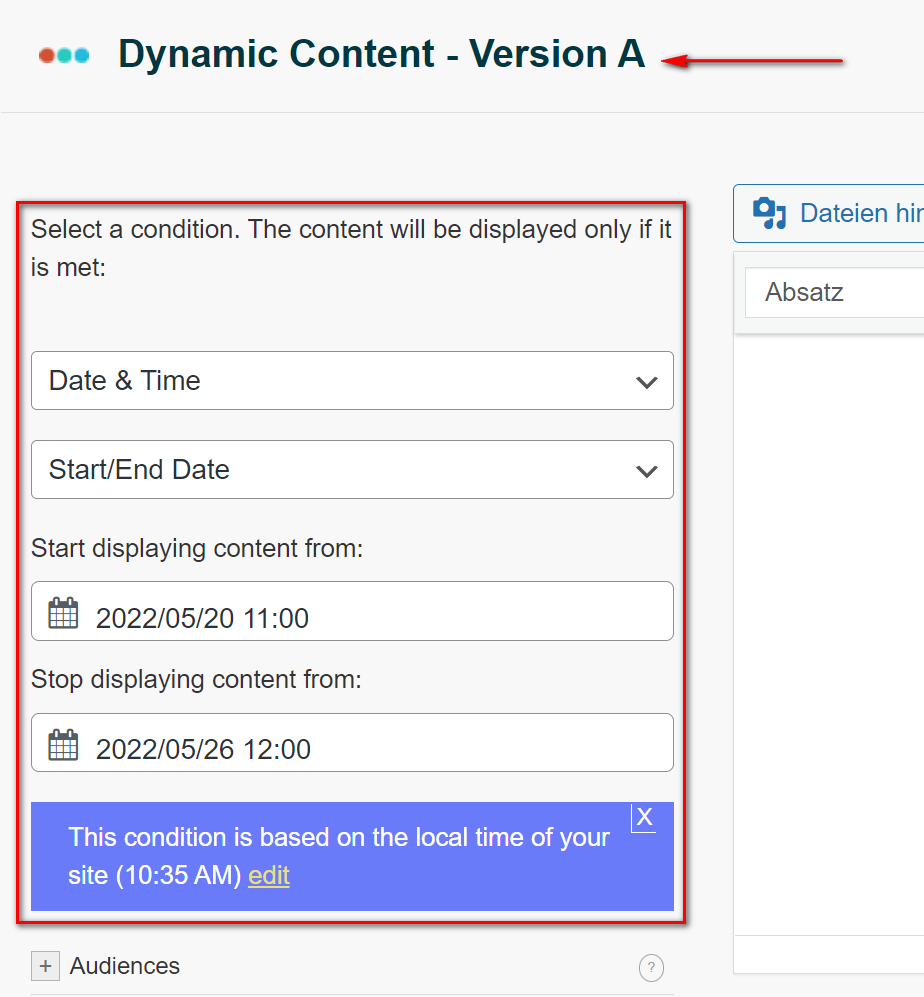
3. Set the condition so that version A is visible. However, it will only be displayed if the condition is met.
4. Now you set the content for version A. You can optionally fill in the default content. If none of the conditions is met, it will be displayed accordingly. If you leave the field empty, nothing will be displayed.

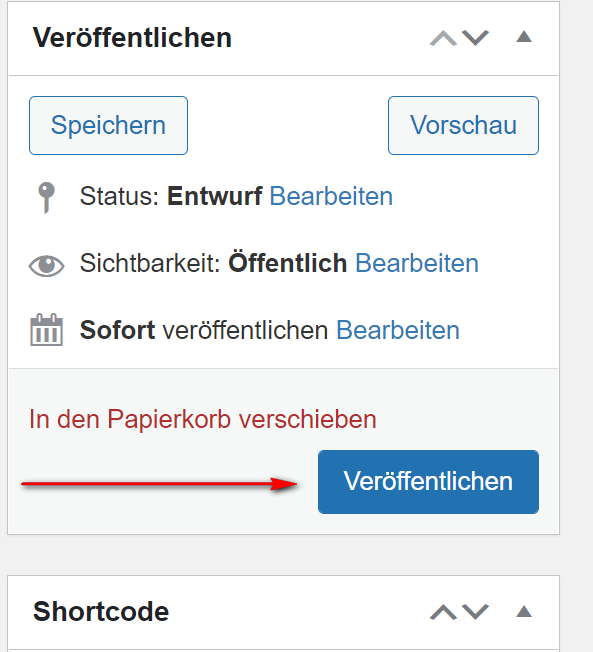
5. Now click on Publish.
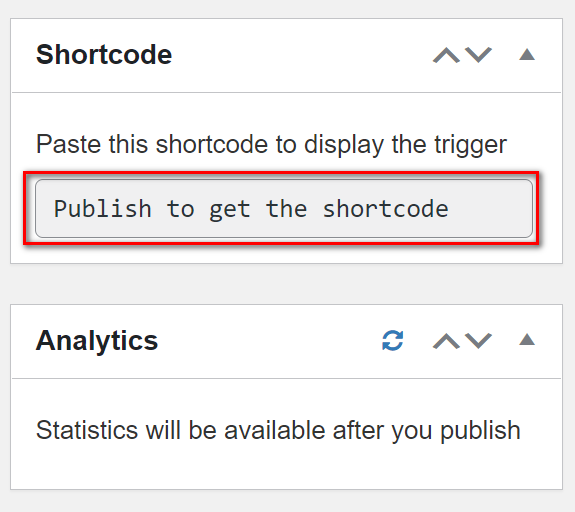
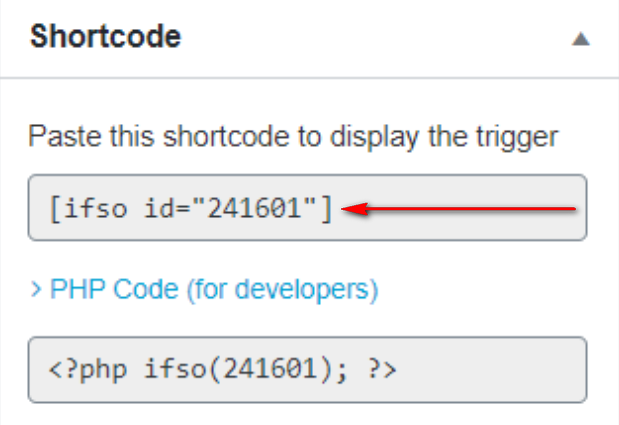
6. Finally, copy the shortcode.
Paste it where you want to display the content of the trigger. For example, on the page, in posts, or in widgets.
Applying a trigger with a shortcode
To apply a trigger with a shortcode, you paste the shortcode in any area on your website. However, that area must also accept shortcodes. For example, if you want to use a Page-Builder, you insert shortcodes in the following areas:
- Text
- Title
- Shortcode widget or block
- HTML widget or block
If you want to create dynamic menu items, you can also apply the shortcode in menus or in the page title field.
Applying a trigger with a PHP code
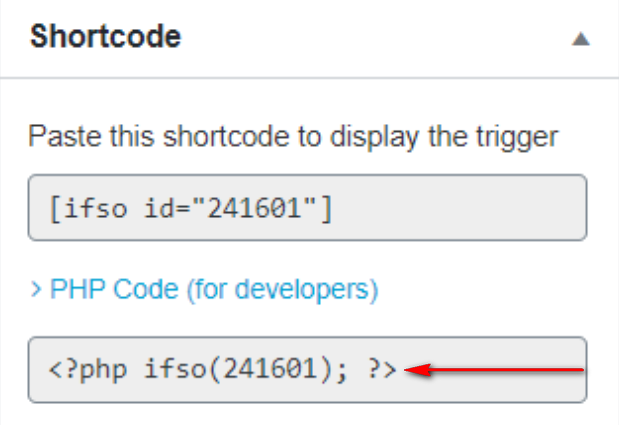
Another way to apply a trigger with If-So is to use PHP code. This can be used directly in the page template, for example. This option makes sense if you want to insert a trigger on all or at least several pages.
However, the PHP code can also be used where shortcodes are not accepted. To insert a trigger into the page template, proceed as follows:
- Click on PHP code (for developers). You will find this under the trigger shortcode on the edit page.
- Copy the code and paste it accordingly.
Alternatively, you can use echo do_shortcode ( ... );:
<?php echo_shortcode ( '[ifo id="XXX" ajax="yes"]' );?>Replace the “XXX” area with the ID of your trigger.
How If-So decides which version to display
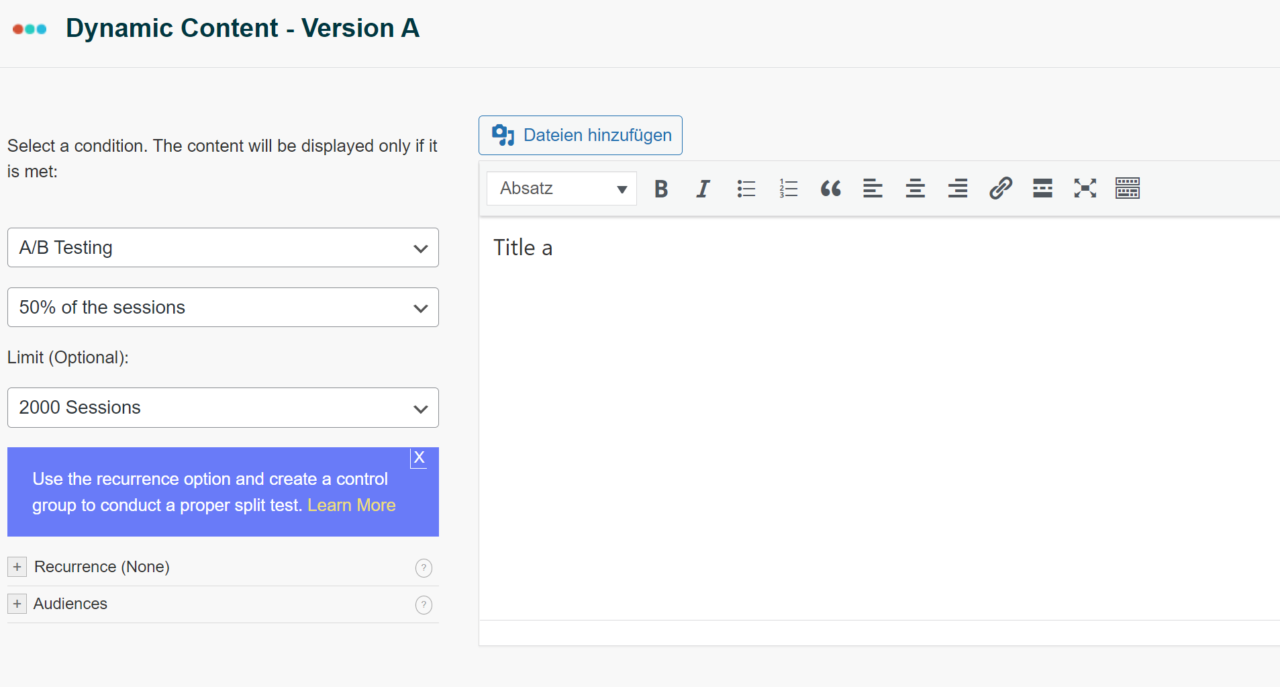
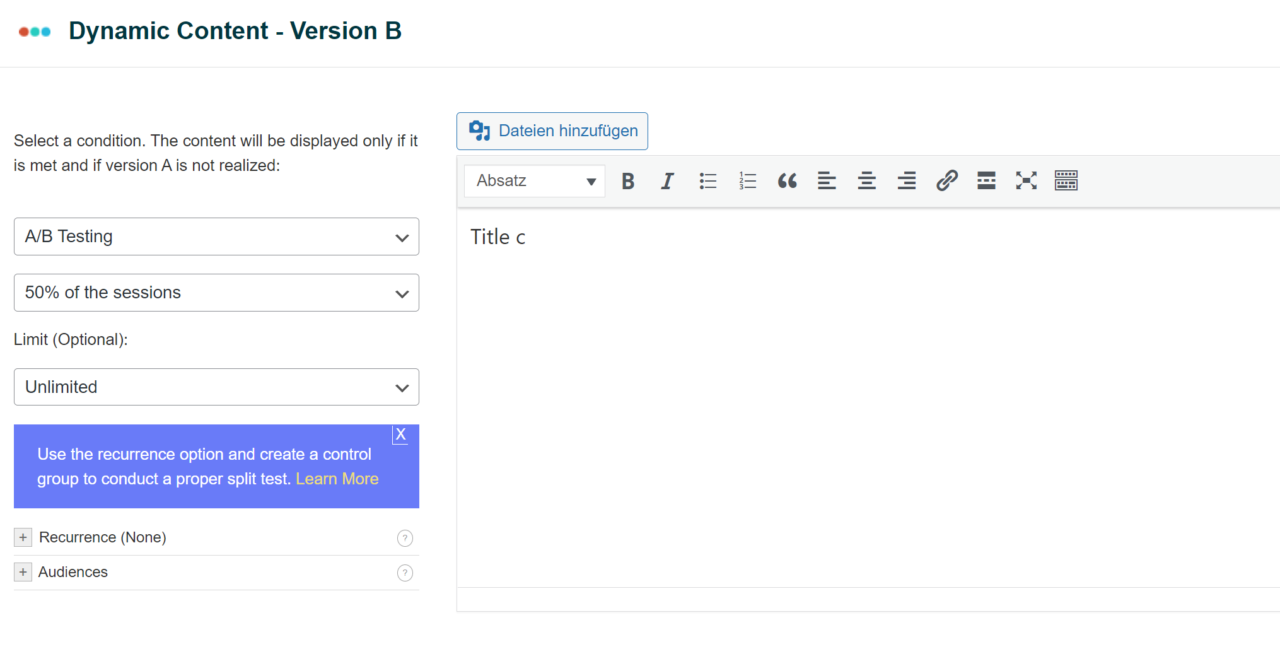
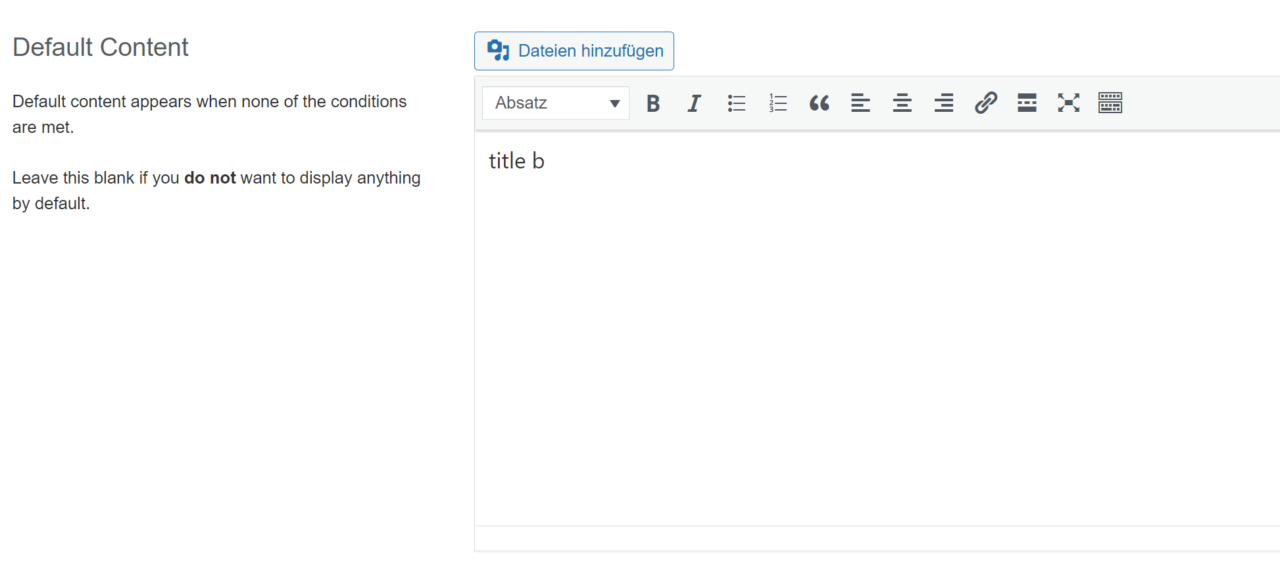
The function of If-So is systematic. That is, it checks the condition first. And this from the first dynamic version. If this is fulfilled, the content is displayed accordingly. However, if this condition is not met, If-So checks the condition of the next version.
If none of the conditions are met, the default version is displayed. If you leave the default content empty, nothing will be displayed. It is important to know that you can set as many versions as you want.
How does reorganization of dynamic content versions work?
A specified order of versions affects the order of checking the conditions. So you have the possibility to reorder the different versions. To do this, follow these steps:
1. Click and hold the upper drag area. You can find the area in the upper right corner of the version.

2. Then drag the version vertically. This way you can place it where you want it.
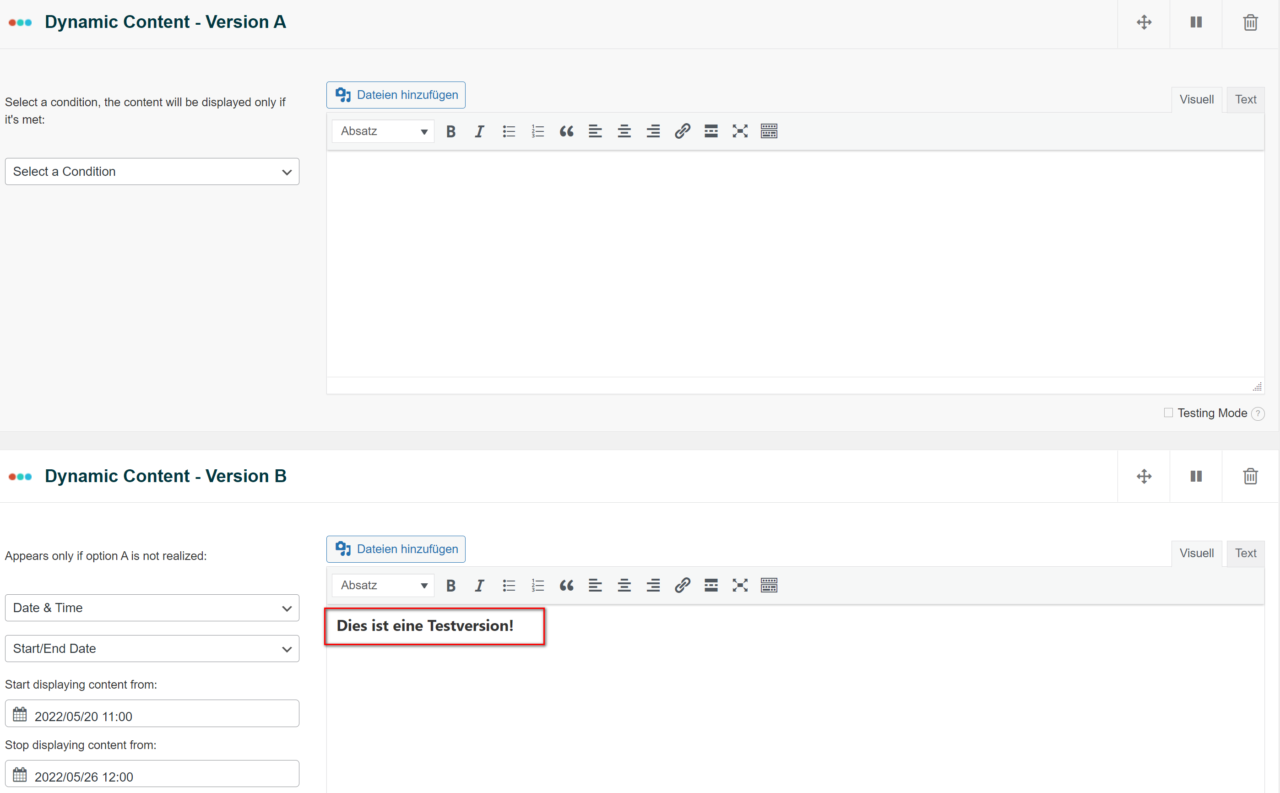
3. If you have changed the order, you have to rename the version. This is to reflect the new order
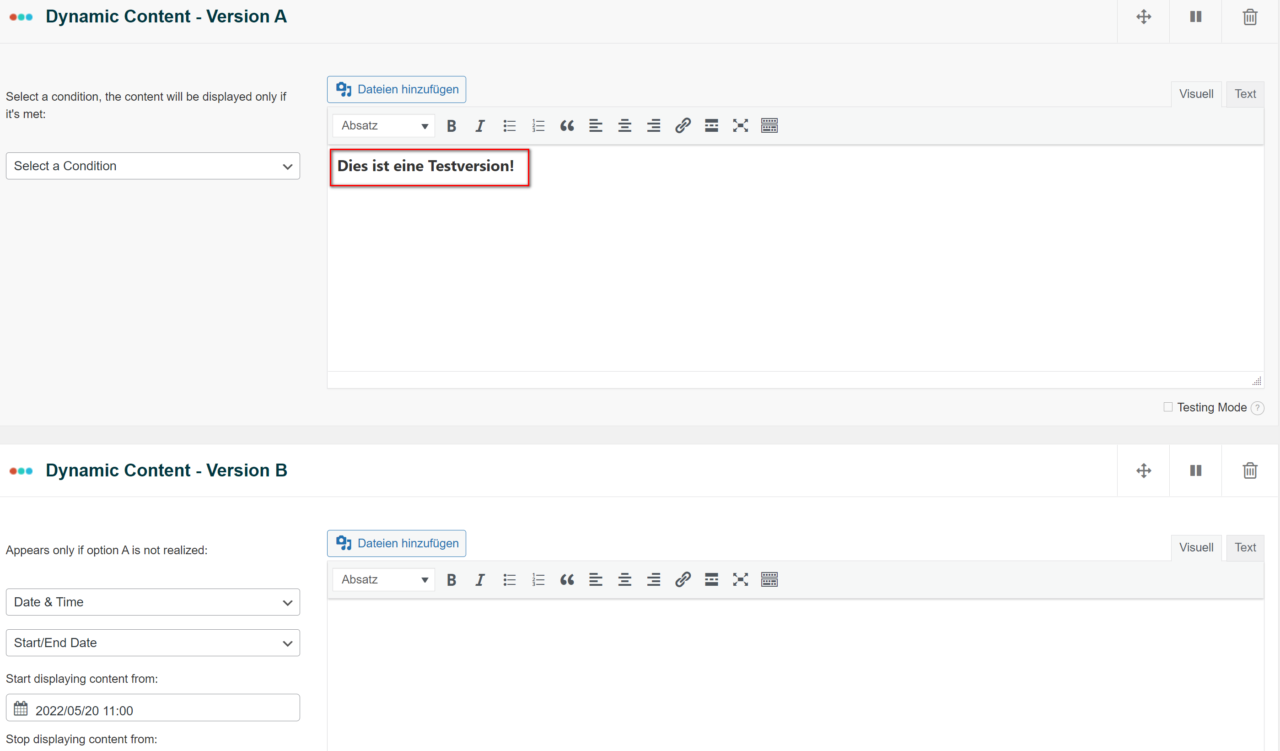
For example, if you realign two versions, version B at the bottom becomes version A at the top.
How do you disable or pause dynamic content versions?
You also have the option to disable or pause your content versions. To do this, press the Pause button. You can find it on the title of the corresponding version. In the next step, select the Update item. This is how you save your changes.

Preview in the test mode
Test mode is the same as previewing a version. This means that when you select the Test Mode button, all other versions are suspended. This forces the display of the selected version. And this is regardless of whether the condition is met or not.
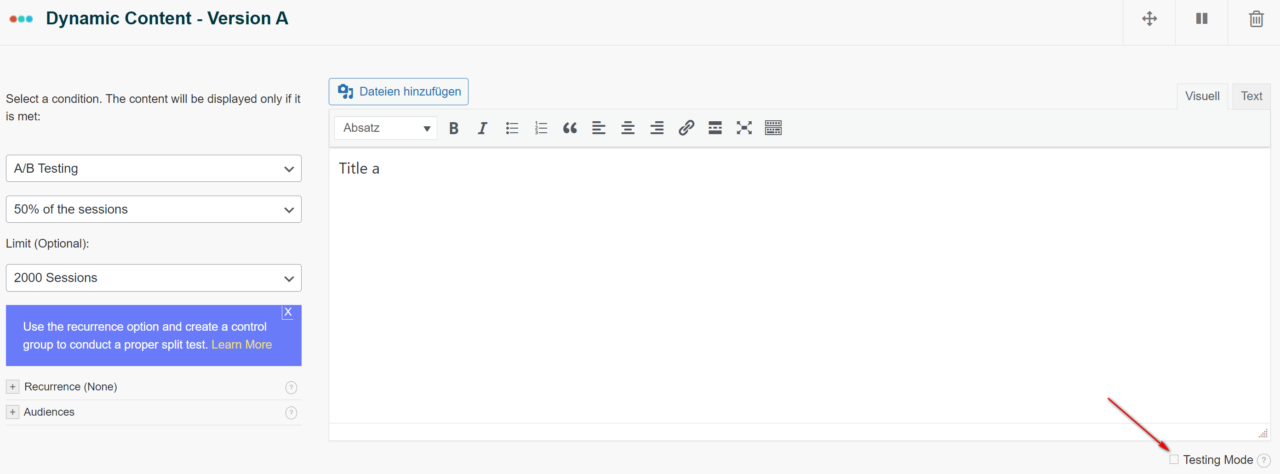
So use the test mode to show you a preview. This way your version will then be visible on your website. This is useful because in some cases you can’t see the dynamic content on your website. For example, if you have created geo-localization so that your users abroad can see other content.
2. Manage countless versions from a CSV file with If-So
Basically, creating dynamic content with an If-So trigger is very handy and easy. However, if you apply dozens of dynamic versions, creating them with one trigger is very time-consuming. In addition, you may experience delays in loading your page.
With If-So CSV you have the possibility to manage and create your dynamic content in a simple way. Because you can create and manage thousands of dynamic content versions from the CSV file. The functionality of If-So CSV includes the following:
- Is compatible with HTML as CSV content.
- Can be used with page caching.
- Shows content used anywhere on your website. The same applies to your page templates.
In the list below we show you what conditions you can set with If-So CSV:
- Query string (URL parameter)
- Geolocation
- Time zone of the user
- Deadline time
- Page URL
- Post ID
- User IP
- User data
- Reference source
How to set up dynamic content from CSV
For this tutorial you need to install the free addon “If-So CSV (Bulks)”.
The single CSV table is called a bulk. Below we show you how to align a bulk with a query string condition. Then create a CSV file with this structure:
Column A – This is about the values of the condition. Insert one value per row. For example, if it’s about the page URL, in order to display dynamic content on the current page, you need to enter a URL in this notation: https://bloggerpilot.com/
Column B – This is dynamic content, which will be displayed if the URL contains the parameter. If you wish, this can be HTML.
Column CF – This is optional to use. It contains additional columns. You can use this if you want to display dynamic versions in other places on your page.
How to align a bulk CSV table with a query string:
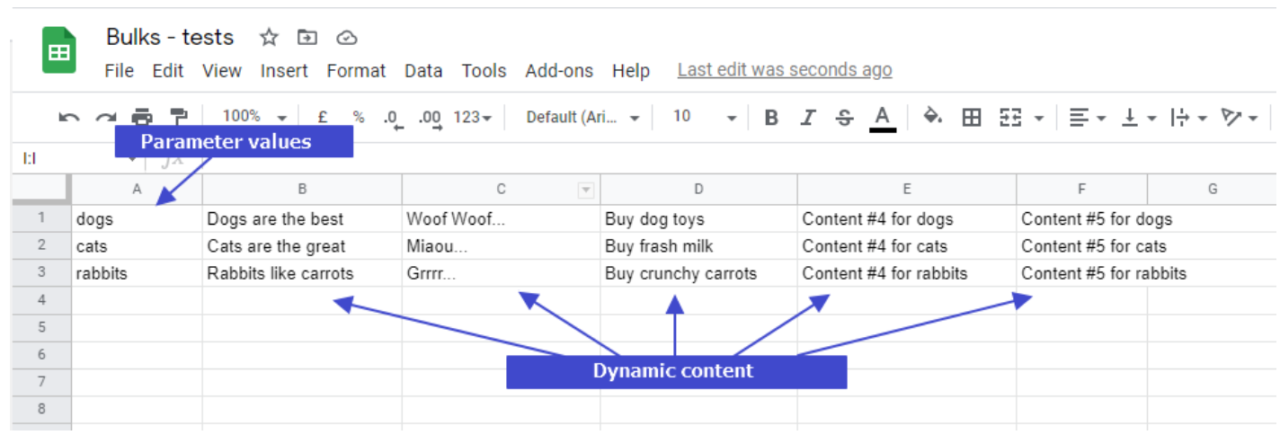
Now upload your CSV file. I have listed the steps for you below:
- In your WordPress dashboard, go to If-So > Bulks.
- Now click on “Add a new bulk”.
- Name your bulk. However, the name is for your information alone.
- For example, under the Condition item, choose: Page URL
- Choose your CSV separator. The default is a comma.
- Upload your file.
- Click on “Create Bulk”.
If you followed the above steps, you should see the bulk you created. This is on the If-So > Bulks page. Then select the View item. Then copy the shortcode . Paste this code into any area on your website.
3. DKI: Use simple shortcodes to display dynamic content
DKI stands for Dynamic Keyword Insertion. For example, you can use it to display the following:
- User location
- Value of a query string parameter
- User name
- Event time
We show you the corresponding available DKI shortcodes in the table below:
| Geolocation DKI | [ifsoDKI type=’geo’ show=’country’] | This shortcode inserts the country of the user. If the value of the show parameter is replaced, you can insert other information. |
| Google Ads-DKI | [ifsoDKI type=”google-ads” parameter=”YOUR-PARAMETER” fallback=”Your default value (optional)”] | Enter the keyword that was applied to trigger your ad. |
| Query string DKI | [ifsoDKI type=”querystring” parameter=”YOUR-PARAMETER” fallback=”Your default value (optional)”] | This shortcode displays the value of the YOUR-PARAMETER parameter. For example, if the page URL is example.com? YOUR-PARAMETER=Awesome then you will see the word Awesome. |
| Automatic location display | [ifsoDKI type=’time’ show=’user-geo-timezone-sensitive’ time=’05/12/2022 11:17′ format=’n/j/o, G:i’ | Use this to show the event time . This is based on the user’s timezone . |
| User details (for logged in visitors) | [ifso_user_details show=”firstName” fallbaack=”Default value (optional)”] | This shortcode lets you show first name, last name, email address and other details about the user. |
| Recommendation source DKI | [ifsoDKI type=’referrer’ fallback=”Default value (optional)”] | This displays the URL of the referring websites. |
| Browser language | [ifsoDKI type=’language’ show=’primary-only’] | This is used to display the user’s browser language . |
| Total number of pages visited by the user | [ifsoDKI type=’viewcount’ show=’visit-count’] | This shortcode displays the number of websites visited by the user. |
| Post ID | [ifso-show-post id=”123″] | With this shortcode you can show every page and post. The same applies to any custom post. |
| Login link | [ifso_login_link login_redirect=”https://example.com/account” ] | This shortcode displays a login or logout link. This way the user will be redirected to a page of your choice after login. |
How to use DKI shortcodes
The default is that the shortcode displays the content of a post. However, you also have the option to display the title of a post. To do this, add the following parameter
show=”title“
The shortcode will look like this:
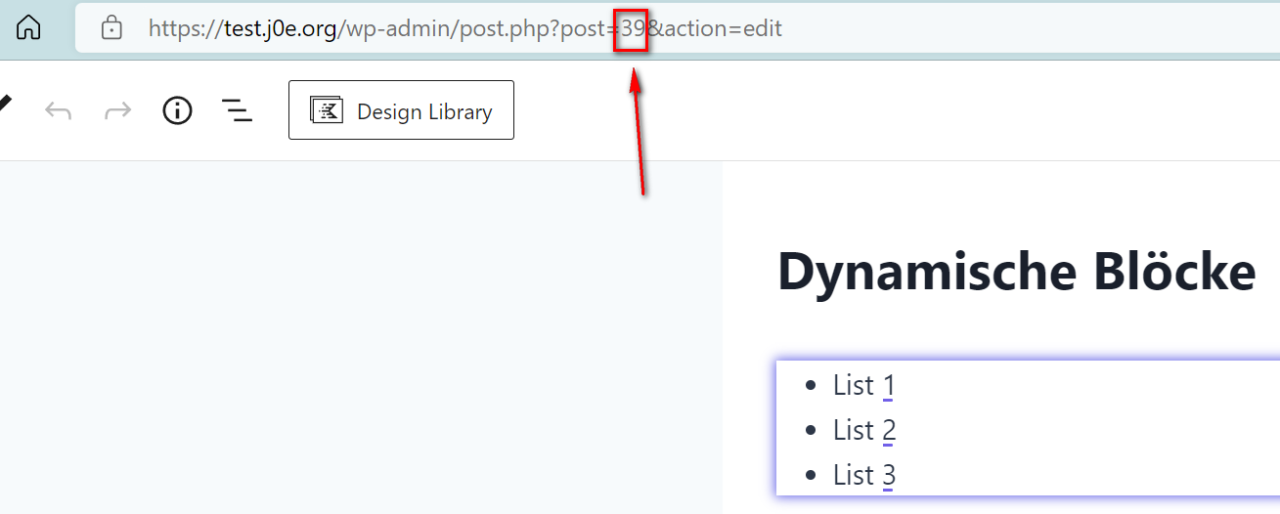
[ifso-show-post id="123" show="title"]It is important that you replace the 123 with the post id. To find it, you have to do the following:
- Open the post with the Word Press editor.
- In the URL you will find the post ID between post and &.
4. Add conditions to display the Elementor widgets
If you prefer to use Elementor Page-Builder instead of Gutenberg, it’s not a problem at all. With the If-So Elementor integration, you can set a condition for each section
- Just go to the corresponding element
- Then switch to the Advanced tab
- Then select a condition.
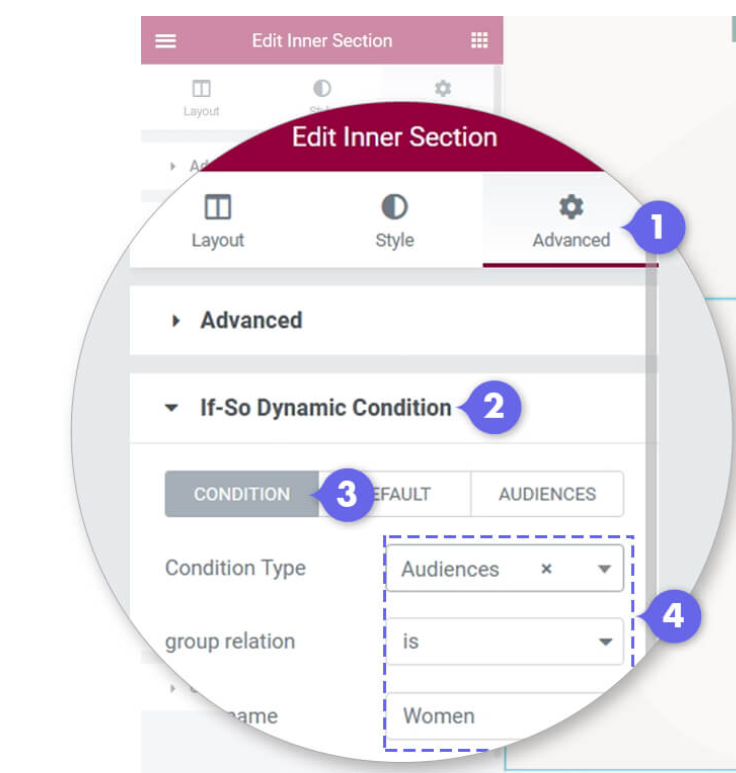
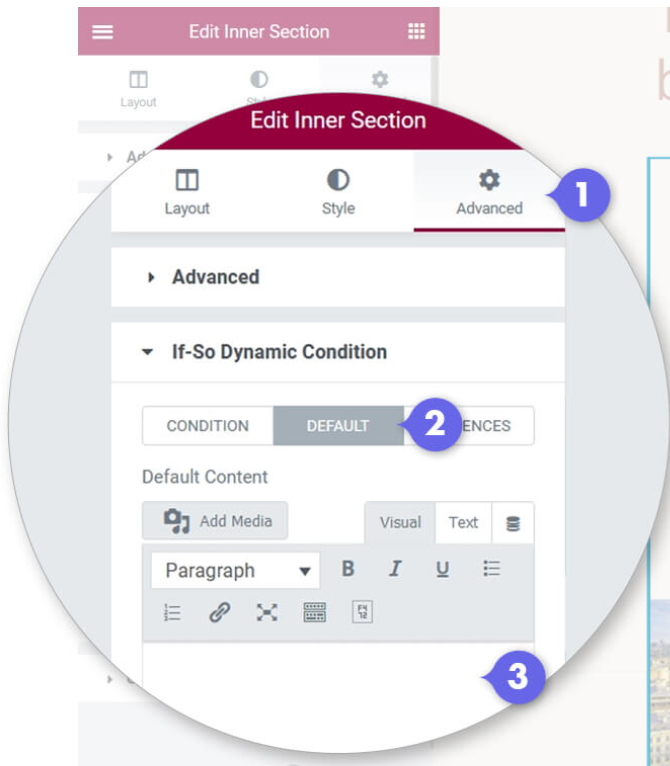
If a condition is not met, usually nothing is displayed. However, if you select the Default tab, you can specify an alternative.
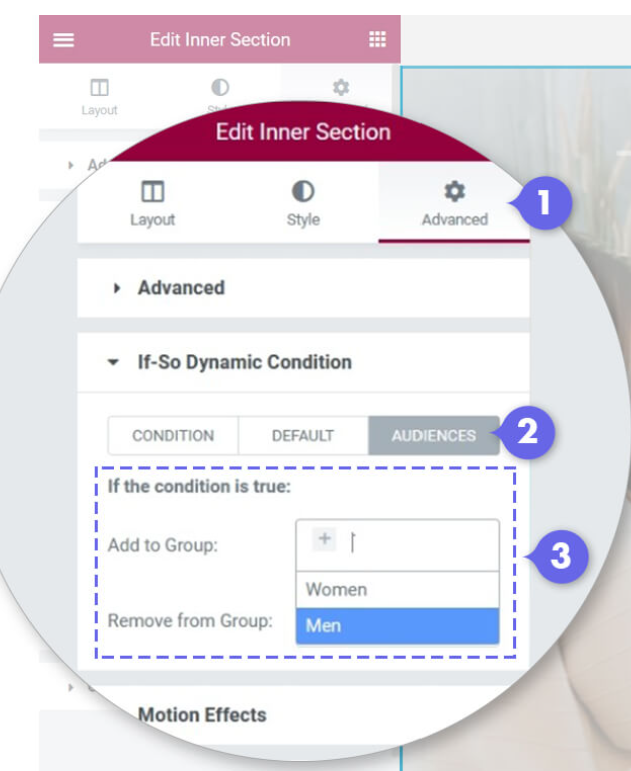
To assign or remove users, select the Audiences tab. Here you select the appropriate audience you want to remove or assign if a condition is met.
By the way, If-So is fully compatible with page caching. That is, if you use caching on your website. Enable Ajax Loading. You can find this below the condition. Then the content will be loaded with Ajax. Immediately after the rest of the page is loaded.
5. Create conditional Gutenberg blocks with If-So
With If-So you have the possibility to create conditional Gutenberg blocks. The important thing is that the Gutenberg block is only displayed if the condition is met. To set a conditional Gutenberg block, do the following:
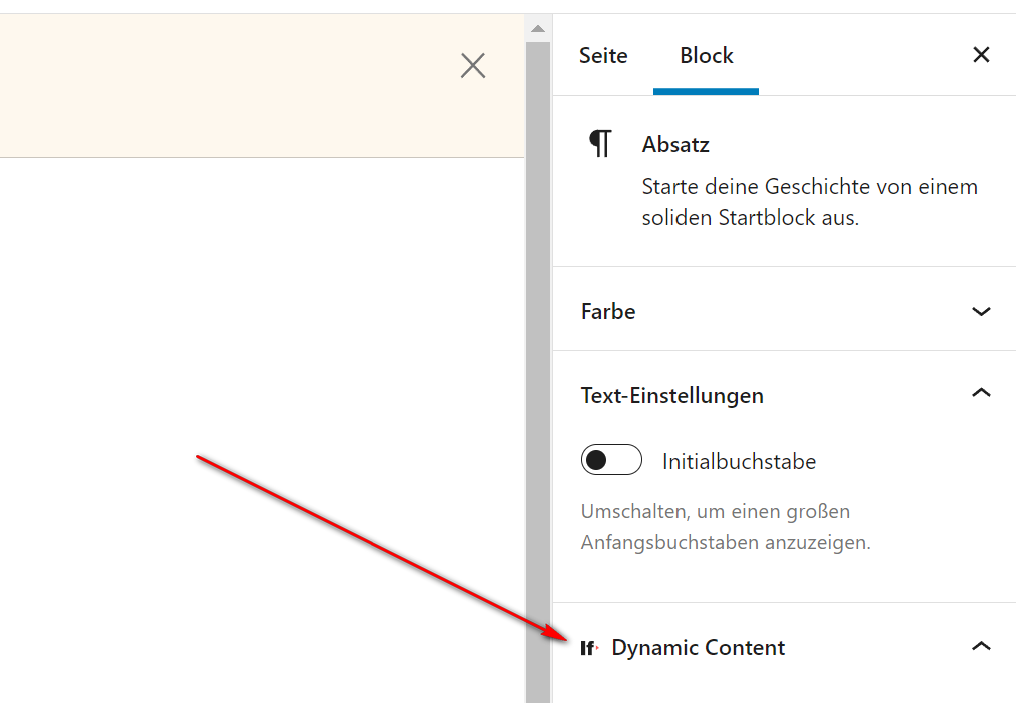
1. Click on the block you want to change.
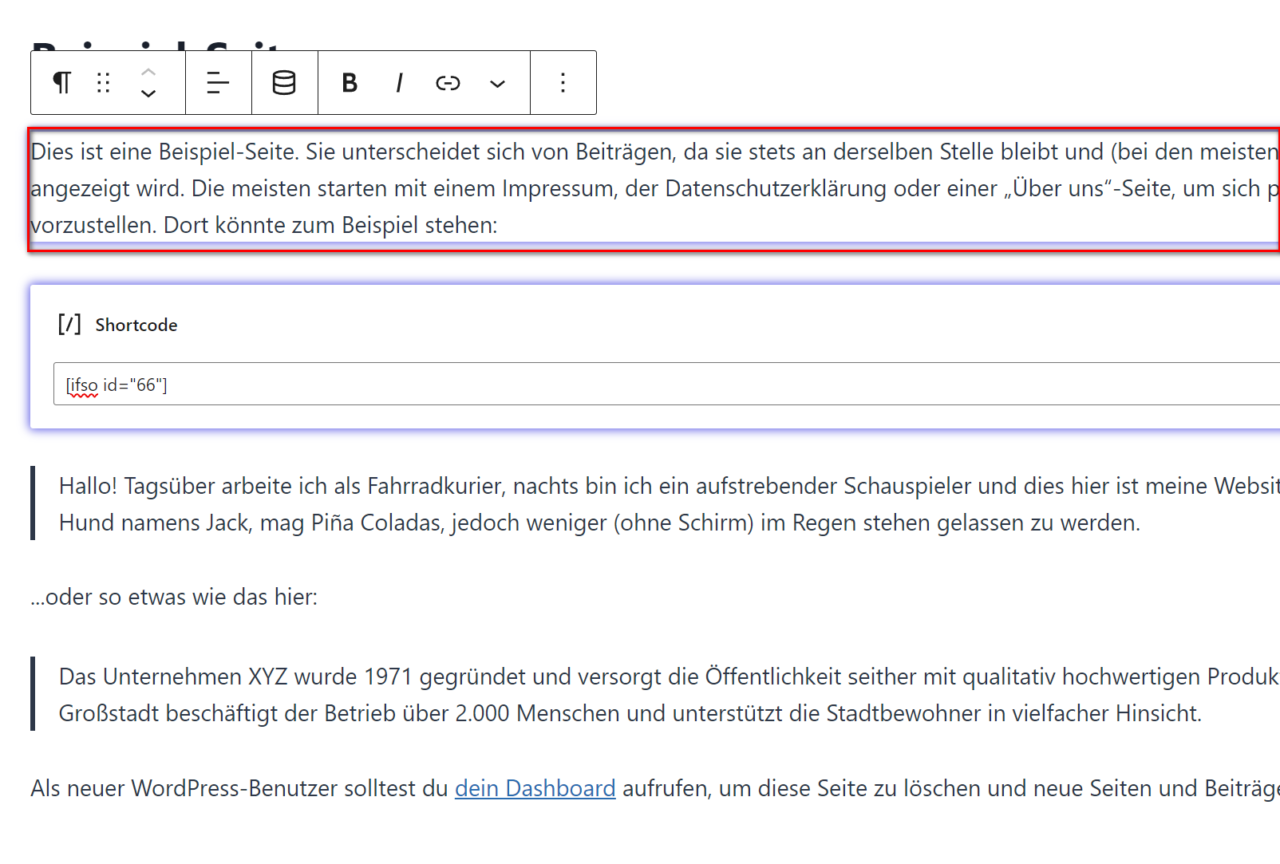
2. In the right column select Dynamic Content.
3. Now select a condition.
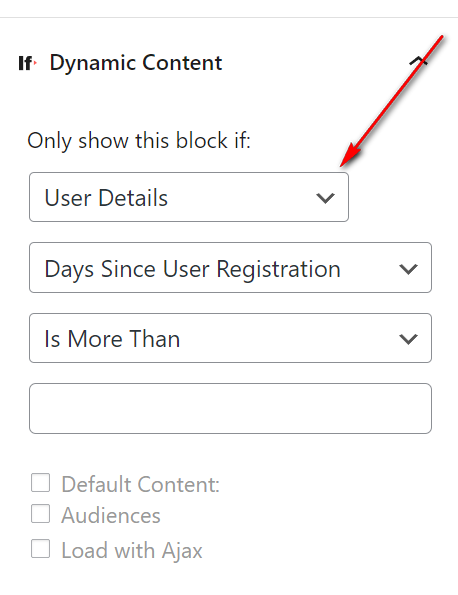
How do you set the content with If-So if the condition is not met?
If the condition is not met, there are only 2 options for you. The first one is the following:
1. You activate theDefault Content checkbox
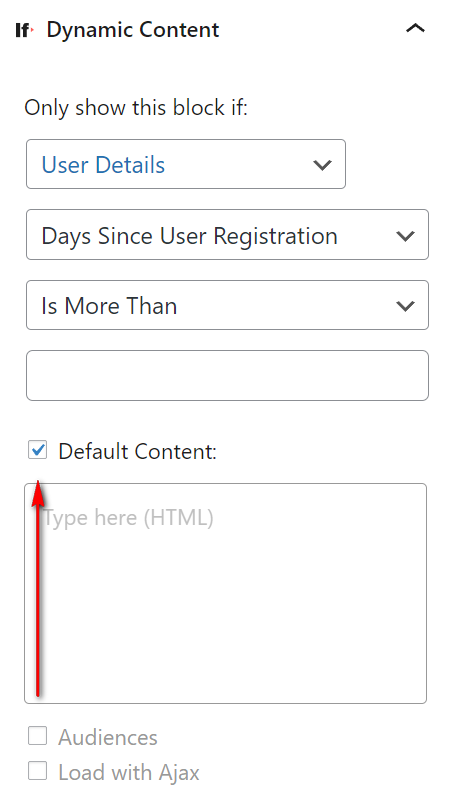
2. Then the field appears where you can set the default content. However, this field only accepts HTML.
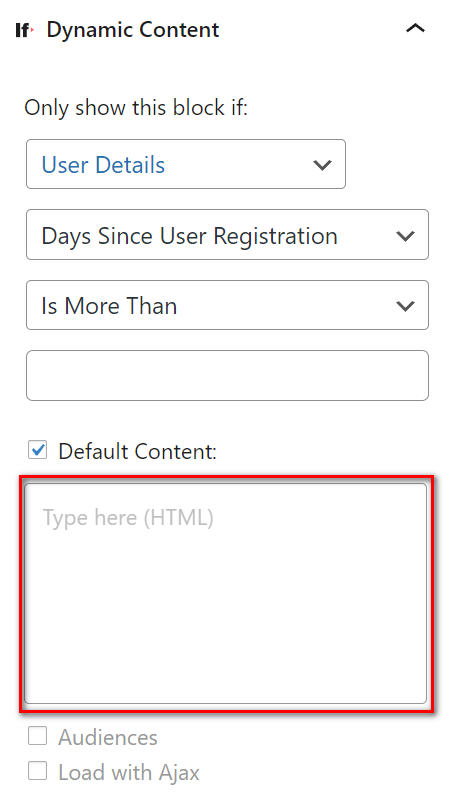
The second option is to duplicate a block. Here you set a condition afterwards. This is the complete opposite of the first one. It is the one you set before.
Conclusion
Now you know 5 WordPress tasks that you can do with If-So. I have summarized the most important facts for you here:
More articles about the plugin If-So
You don’t need any programming knowledge to create dynamic triggers. Also, each dynamic trigger includes:
- Dynamic versions
- Standard content
- Shortcodes or PHP codes
If you use a lot of dynamic versions, a CSV file is useful. Because with it you create and manage these dynamic versions. This CSV table is also called bulk.
Use simple shortcodes to display dynamic content. For example, you can apply them to the user location or the event time.
To display Elementor widgets, add conditions.
Set a condition for each Gutenberg block. However, this block will be displayed only if the condition is met.
