Howto: Writing AI Articles - Unique and Human
Have you ever wondered how to stay unique and human when writing AI articles? This guide will help you do just that. Many of us face the challenge of our writing sounding too mechanical or lacking the personal element.
AI article writing requires a balance between technology and humanity. By integrating SEO, comprehensibility and the ability to touch readers emotionally, such articles can win over both search engines and audiences.
But don’t worry, with a few tricks and the right approach, you can create content that is not only informative, but also engaging and warm. This guide will show you how to connect with your audience while remaining authentic.
Preparations
A good blog post is always preceded by even better preparation and research. Even if you use modern generators to create the text.
You either already have the idea for the new blog post, or you look around at your competitors and Google Trends.
However, an idea alone is still too vague. You need a focus keyword that you can optimize your articles for. This keyword should actually be searched for and it shouldn’t be too difficult for your blog.
In this example, I’m using the AI text generator neuroflash from Germany.
➽ Get started with neuroflash for free
Create a brand identity
If you haven’t done this yet, it’s time. The more information the LLM has about you and your AI writing style, the better you can adopt the texts without making too many changes.
If you already have a brand voice, dig it out, we’ll need it in step 1. Otherwise, I’ll show you how to create this text using text generation in this step.
Do keyword research
How you do the keyword research and which tools you use for it is up to you. You probably already have your workflow for this.
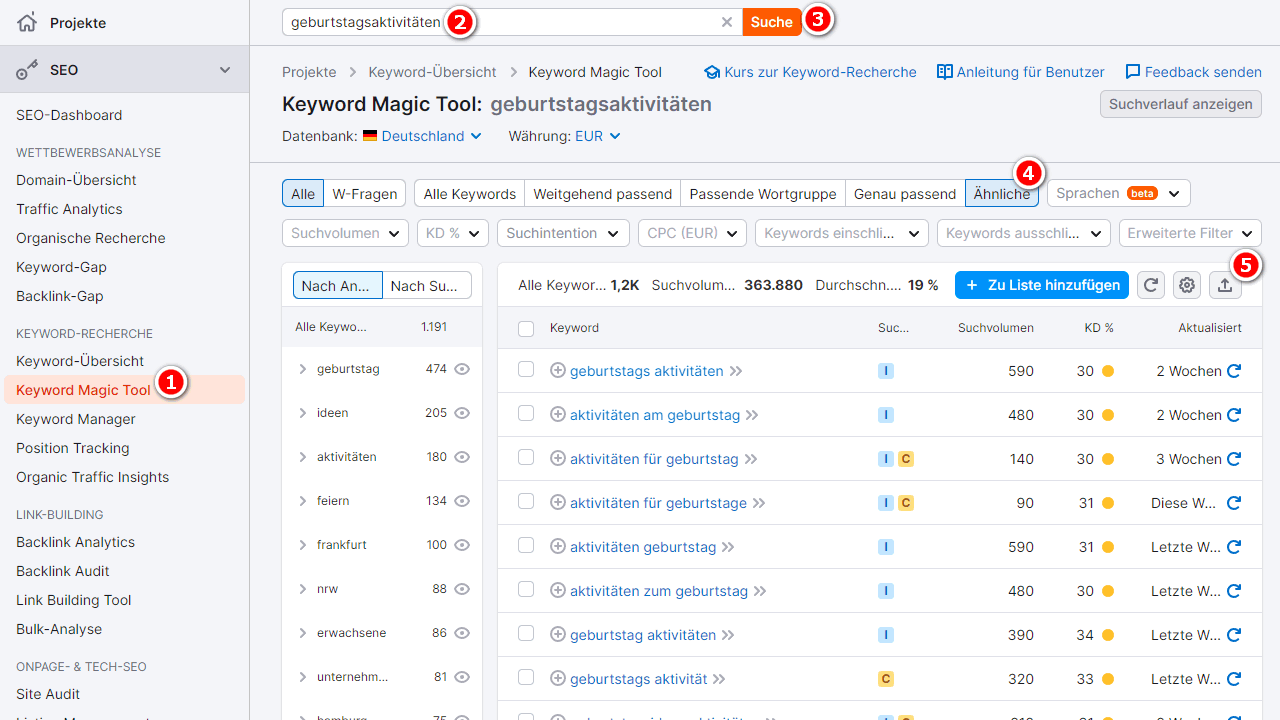
I prefer to use the Semrush Keyword Magic tool for this.
Once you’ve found your keyword, click on the “Similar” selection. This will give you a list of related keywords that would fit perfectly in your article.
At the top right you will find the download link for the entire list. Clean the list briefly and save the top 50 keywords.
Search for sample text
AI article writing is all about “show not tell”. So I give examples instead of explaining in a complicated way.
In this case, this is a similar article written by hand with high quality, or simply a text from the top 5 for the focus keyword.
Find this text and save it as a text file. This can be unformatted text, but I prefer to use Markdown. I use the Chrome extension Copy as Markdown for this. Select text > right-click > Copy selection as Markdown.
Step 1: Create a brand identity
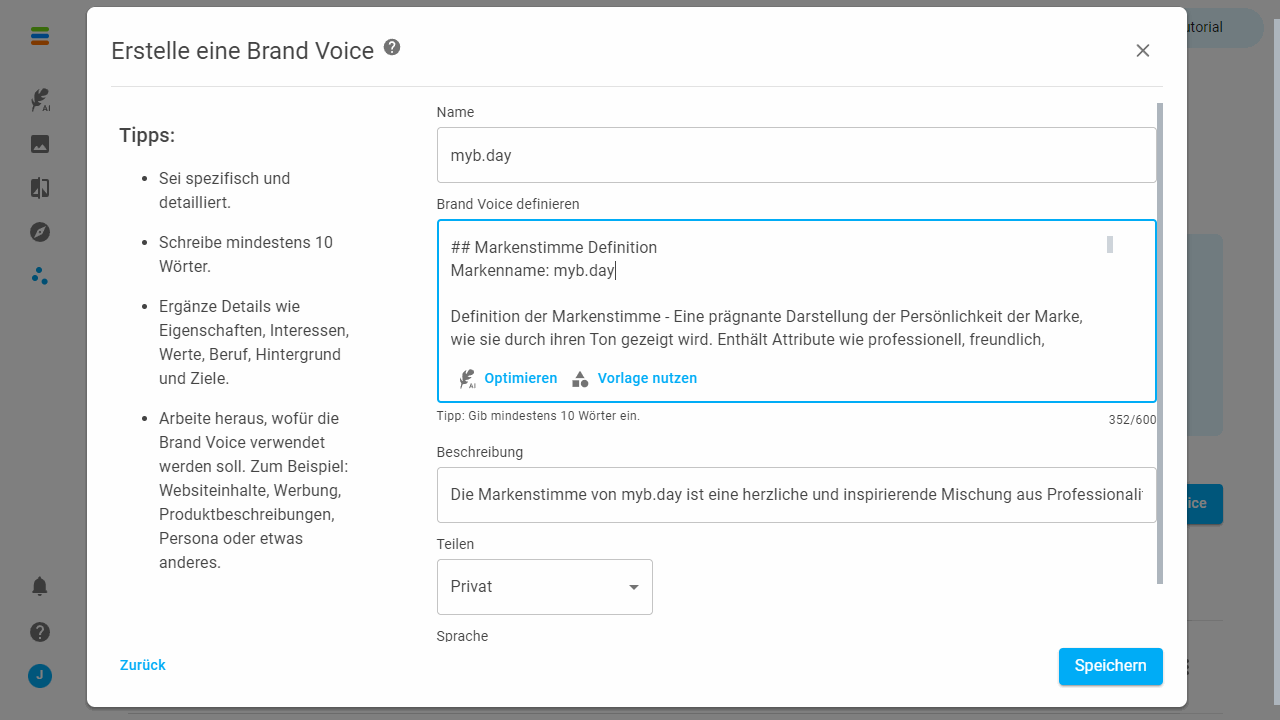
In neuroflash, switch to the ingenious Brand Hub and create a new brand voice. I always name it with the domain name.
Copy your brand voice here, or use the template on the screen to create one. The template has placeholders that you simply fill in. You can then use the “Optimize” button if you are not yet satisfied.
Save and continue.
Step 2: Save the keyword list
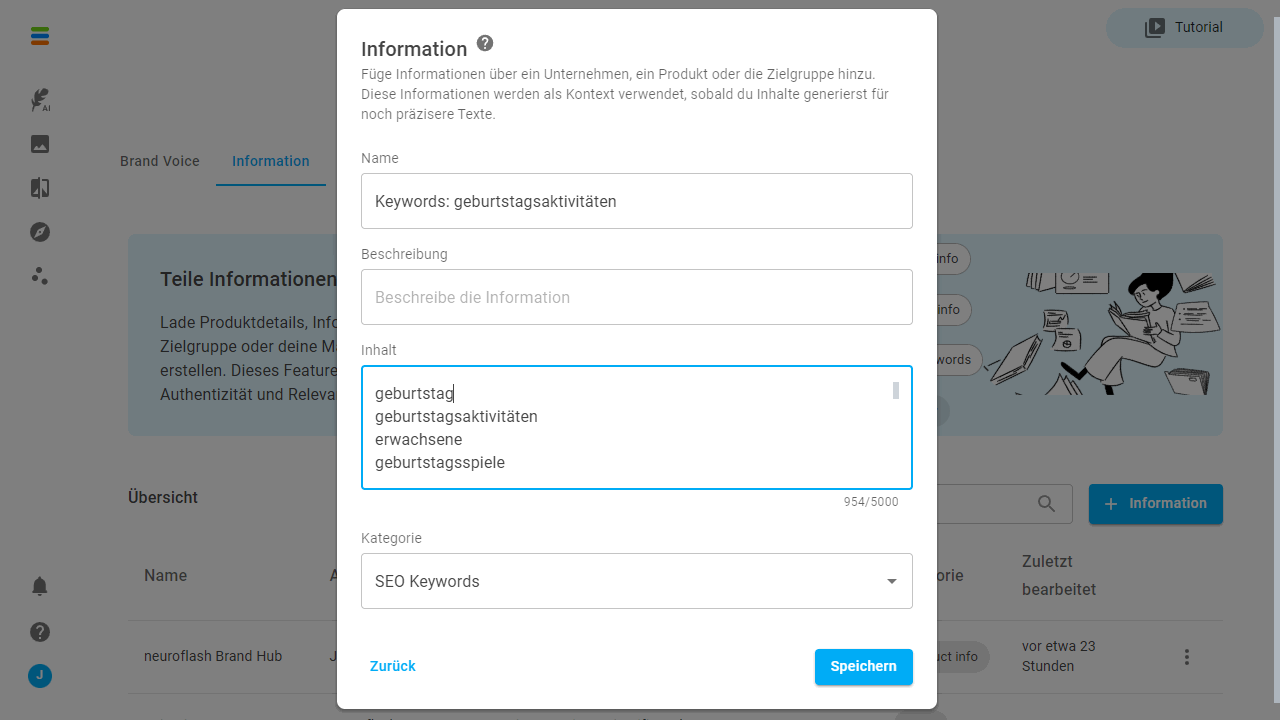
We’ll stay in the Brand Hub. But switch to the second tab “Information”. Click on the “SEO keywords” button further up.
Enter your 50 keywords here, assign a name so that you can find the list later and save the dialog.
Step 3: Create sample text or product information
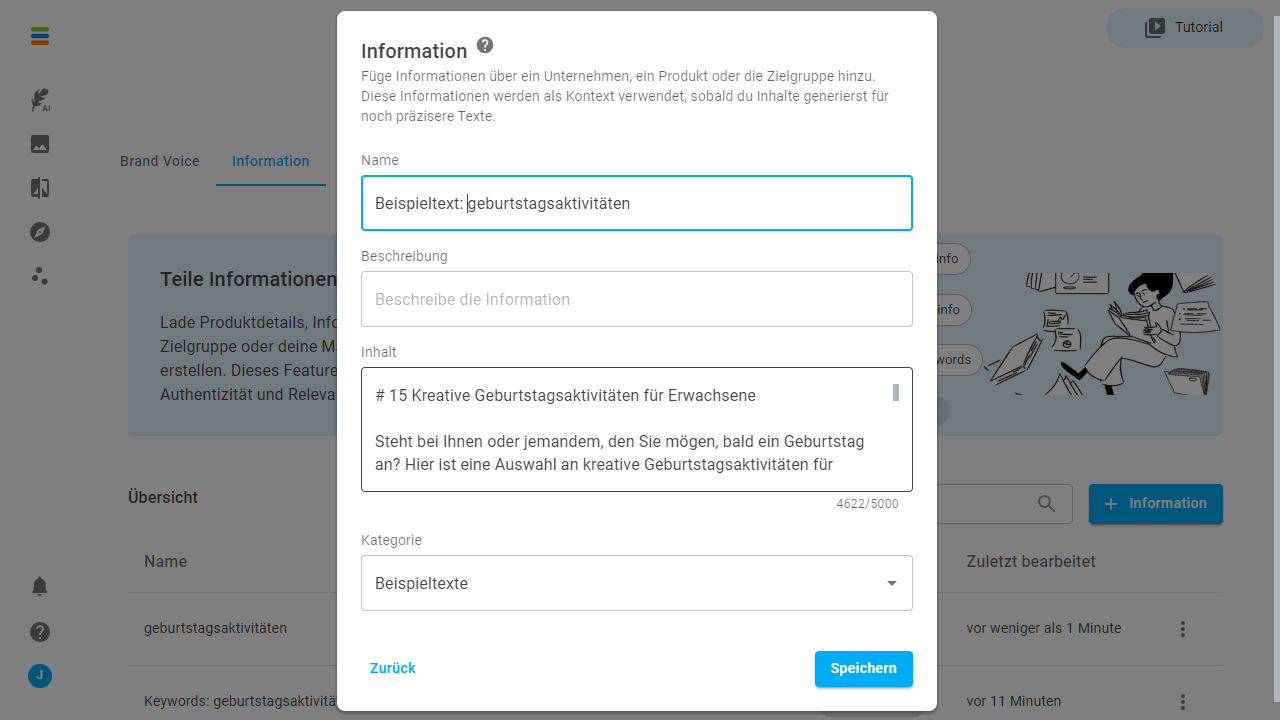
We remain in the “Information” window. I have created a category of the same name for the sample texts or product descriptions.
Then click on the blue “Information” button, select “Copy & Paste” and save your text. Don’t forget to select “Example texts” under Category.
Save and return to the ContenFlash.
Step 4: Start neuroflash blog article workflow
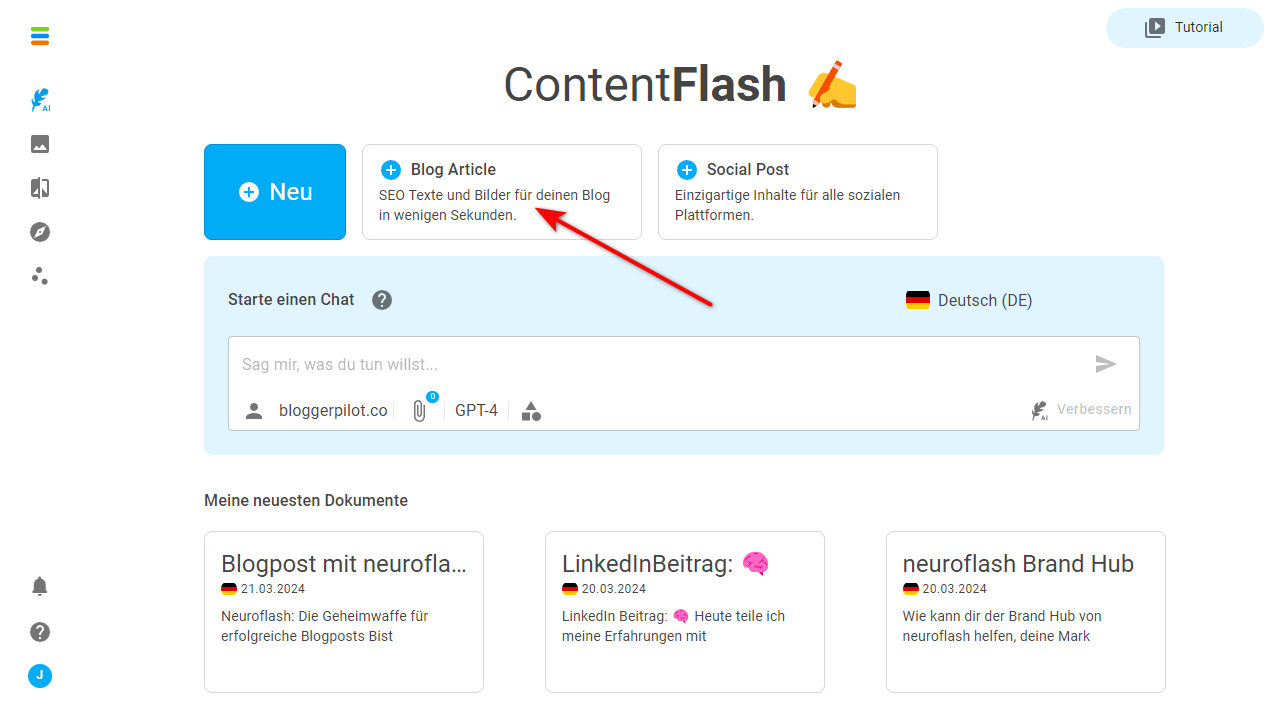
Now we finally come to writing AI articles.
I use the “Blog Article” workflow for this. The advantage is that it guides you through the process and asks for all the necessary information in the background.
Language
First select the desired language. Next.
Keyword
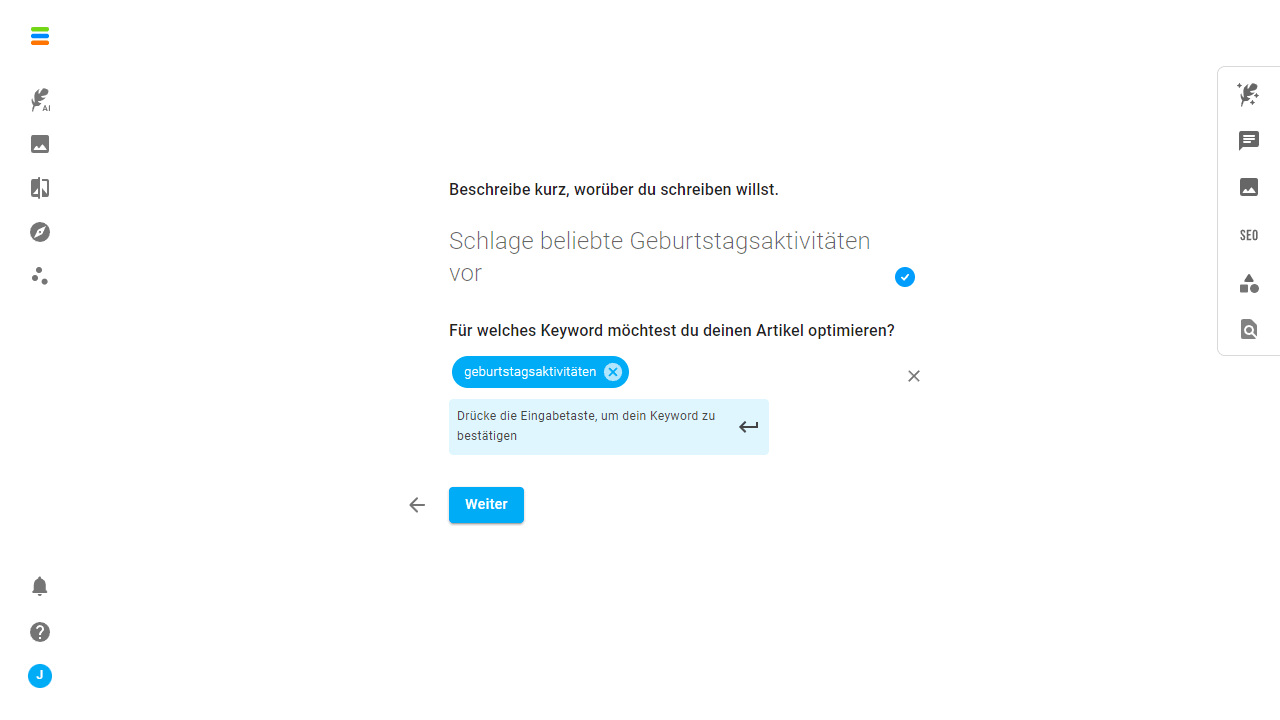
Briefly describe what the article is about and add your focus keyword. Next.
Tip: Enter the keyword in the correct capitalization, otherwise the AI may use it incorrectly.
Personalization
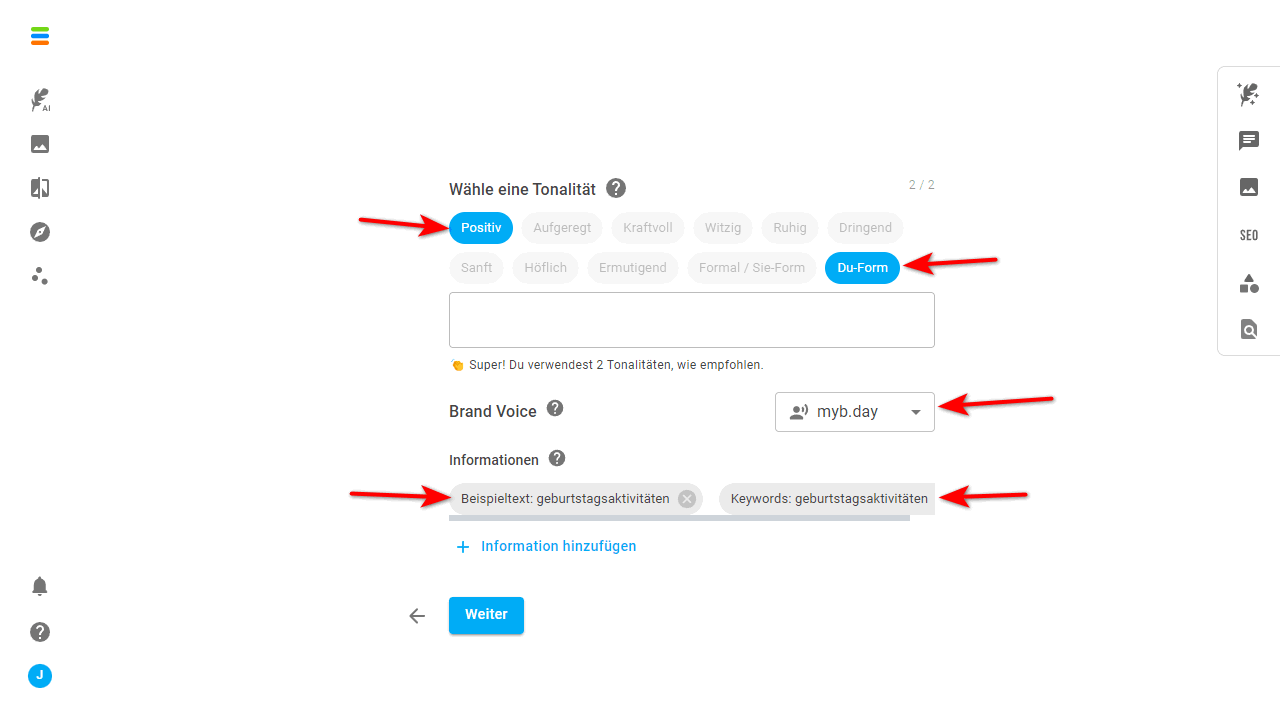
Now the time has come. Your preliminary work will help you with this dialog.
Make sure you choose the right tone of voice.
You should always have selected your brand voice. Whether in the chat, in the workflows or in one of the hundreds of ChatGPT prompt templates. Don’t leave the AI in the dark.
Under Information, select the previously created keywords and the sample text and click Next.
Add further elements
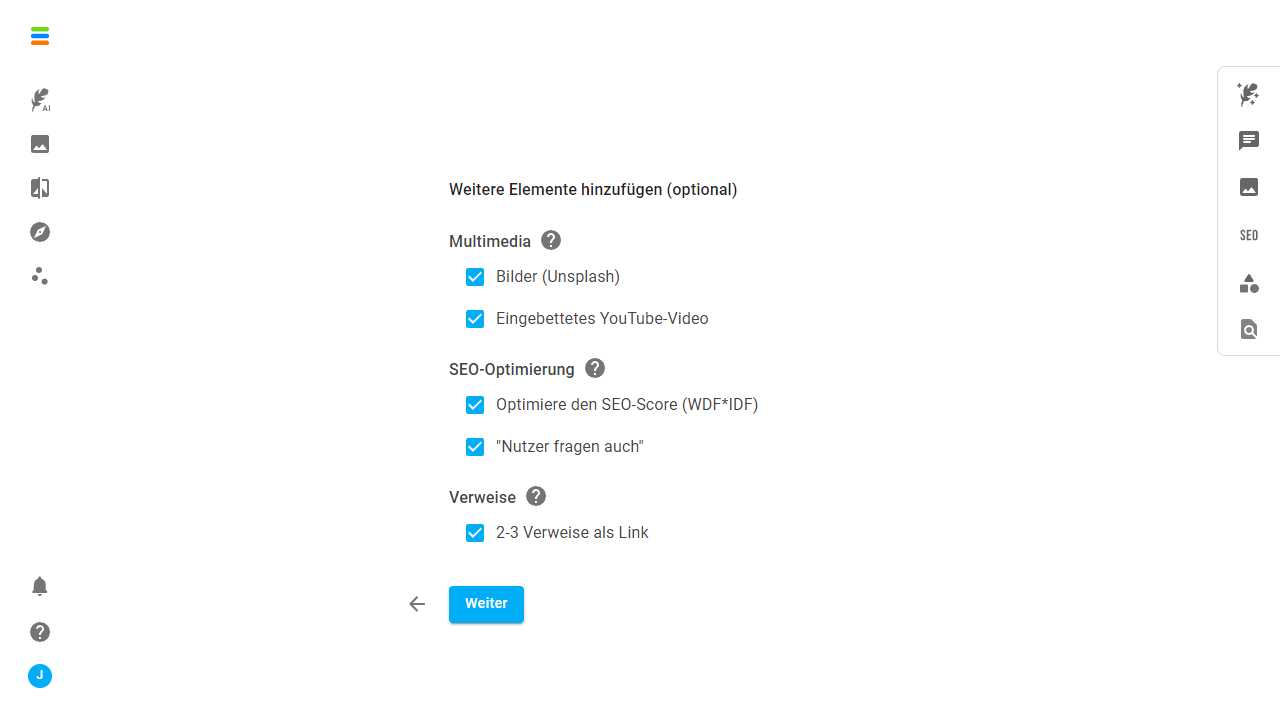
The AI tool offers you the option of enhancing the text with additional elements. The following options are available to you:
- Images from Unsplash
- Embedded YouTube video
- Optimize the SEO score (WDF*IDF)
- Users also ask
- 2-3 references as a link
You should at least tick “Optimize the SEO score”. The remaining options depending on the text type and niche.
I usually leave everything active and prefer to delete unnecessary elements later when revising the text.
Title
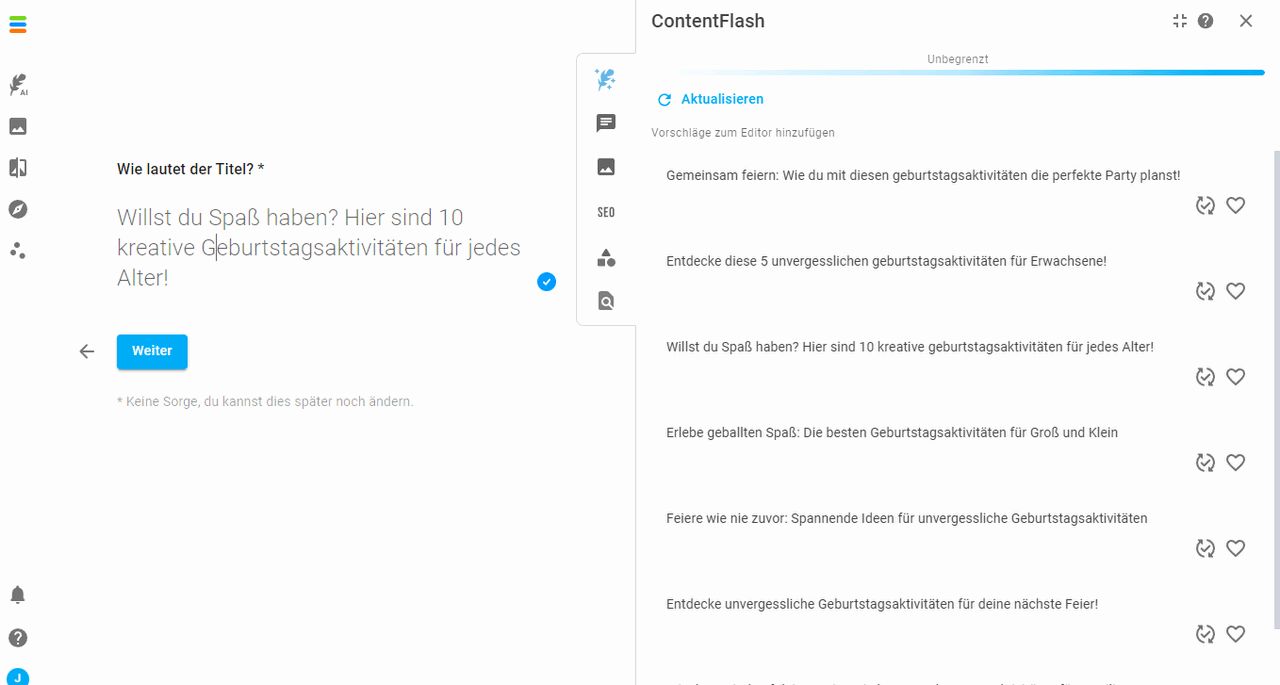
I often change the title several times while writing an article. In this step, you can enter an article title yourself or use one of the suggestions.
Outline
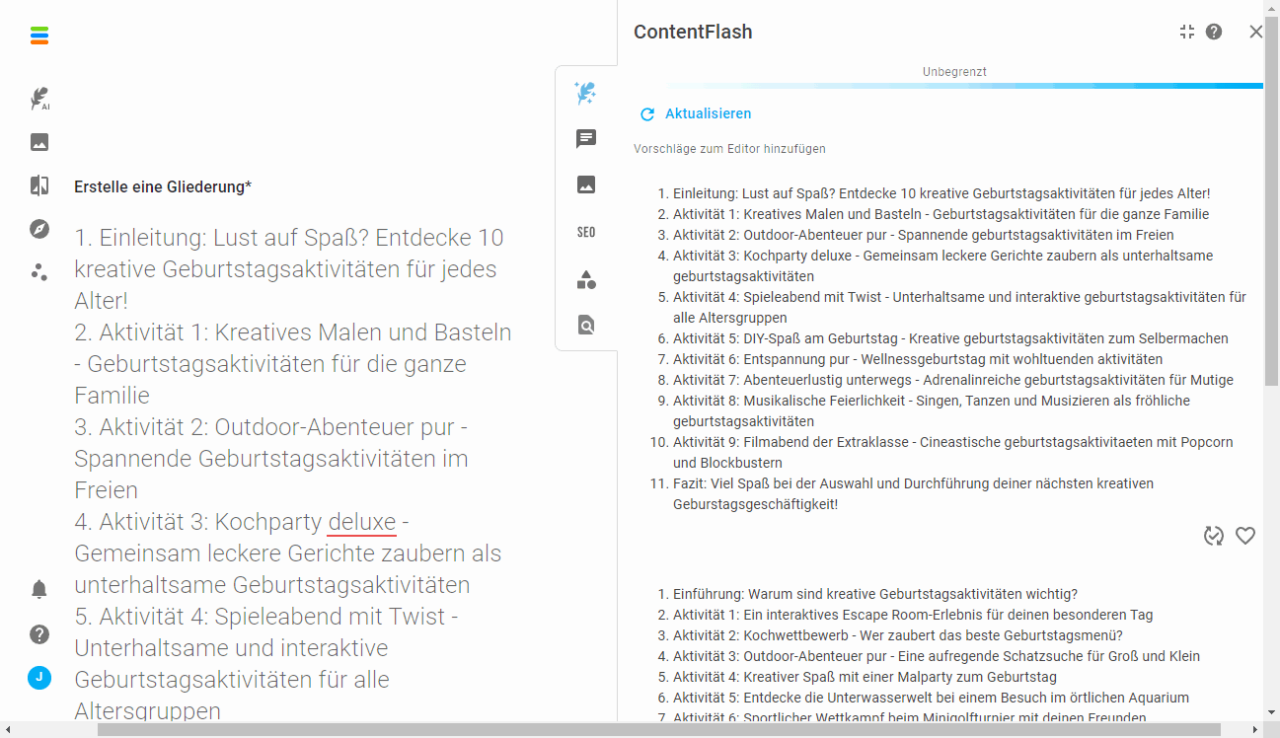
The outline is one of the most important moments when creating an article. It provides all the headings and thus also the basic framework for the topics of the work.
Tip: Take a look at the first 10 listings for your keyword on Google. This will give you an idea of which headings are important for your article.
The tool offers you several ready-made outlines. Use one of them if you like it. You can then adapt or expand the headings on the left-hand side.
Once you are happy, click on“Create blog post“.
It will now take 30 seconds for the AI to create your article.
Step 5: Revise the article
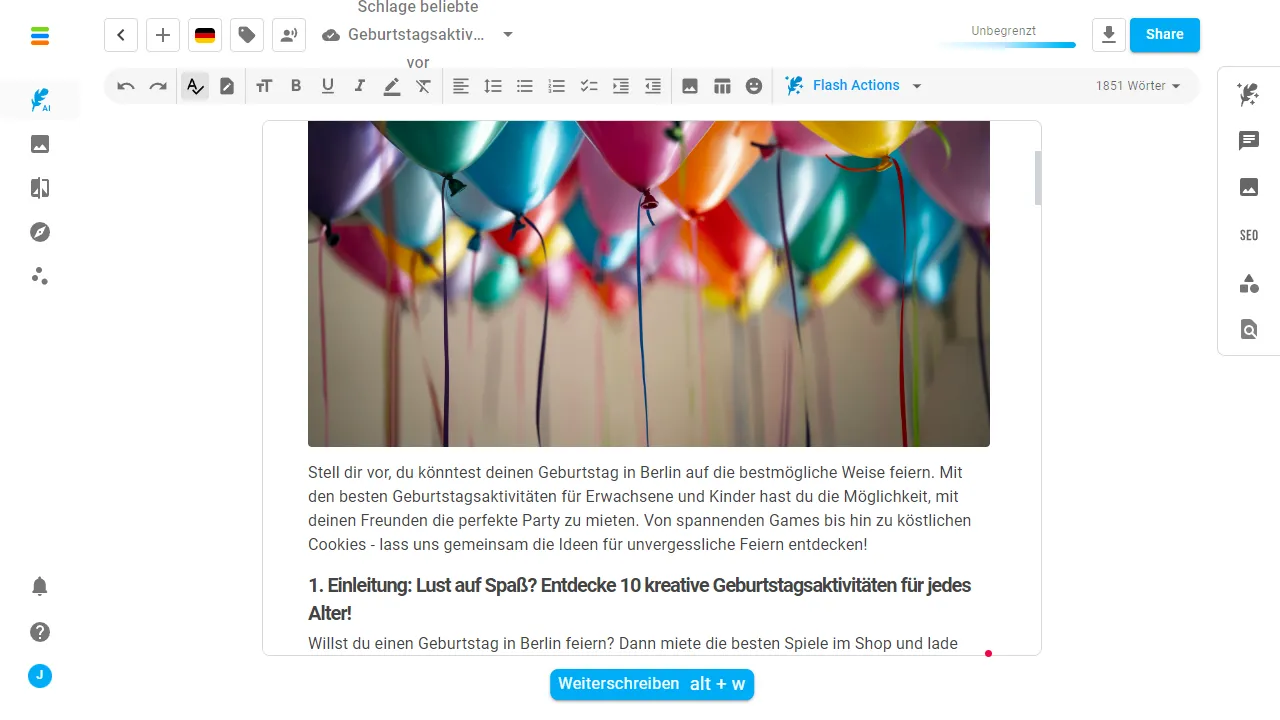
Am I satisfied with the generated text? Never!
It’s best to revise section by section now. Read every line carefully. You won’t find any spelling mistakes, but you will almost certainly find factual errors.
Optimize the formatting, add lists or tables, and divide the paragraphs sensibly.
Important: Add your opinion or knowledge, which only you have, to the paragraphs. This will make your article unique.
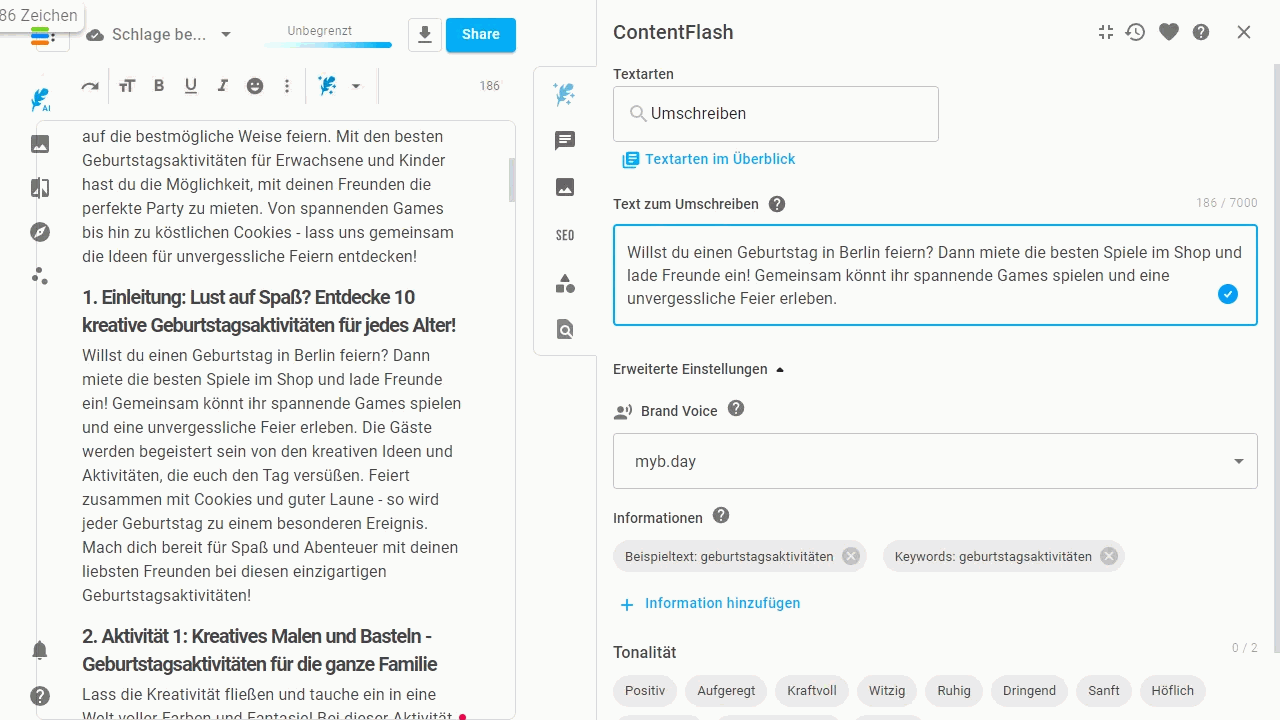
You also have several tools at your disposal for editing the text.
If you select a text in the editor, you will immediately see the pen, which gives you many options for editing. On the right-hand side, you will find the prompt templates or text types and the chat as support.
Step 5: WDF-IDF analysis
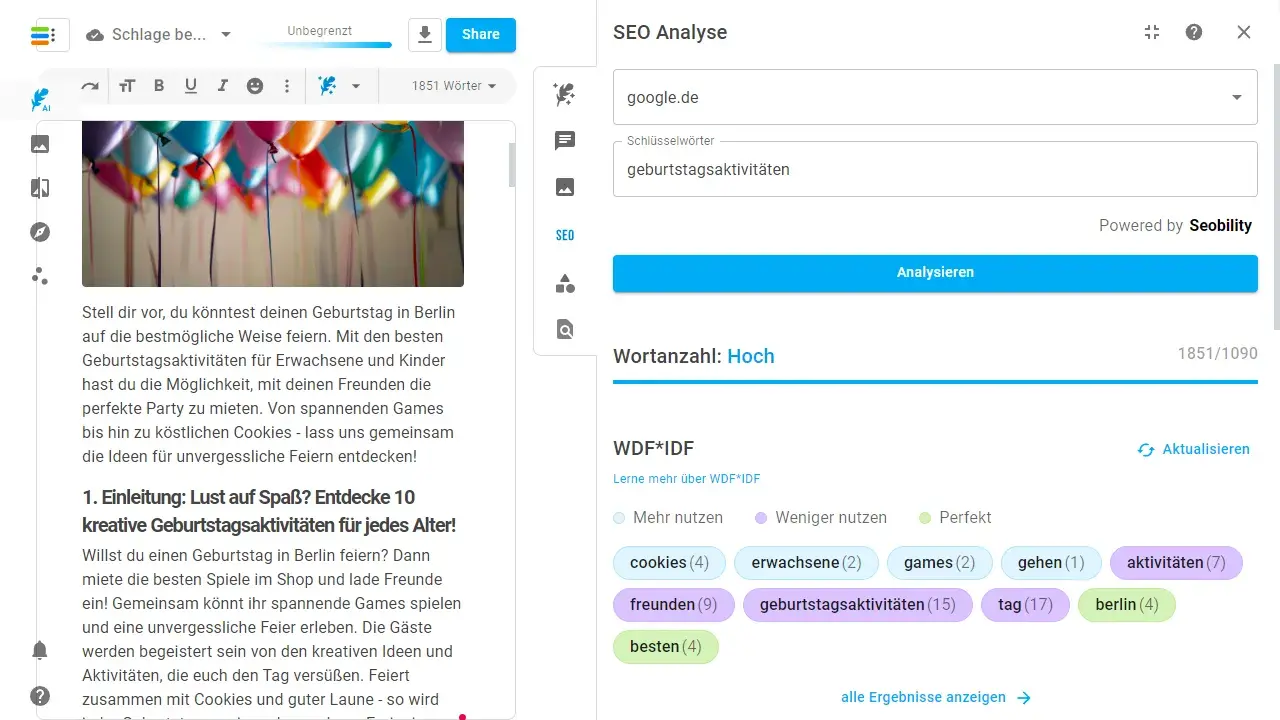
You will find the “SEO” button in the sidebar. Now start the SEO analysis.
In partnership with the SEO tool Seobility, the first 20 hits for your keyword are analyzed and calculated using WDF*IDF (term analysis). The result is a list of keywords that you should mathematically use more or less often in your content.
This is not an exact science, but it is certainly a good indication of your keyword usage. Especially if a suggested keyword is not in your text at all, I would try to incorporate it in a meaningful way. This indicates that this topic is completely missing. Missing in relation to the other 20 competitors.
You also get a suggested word count. You don’t have to get to the exact word count, but at least get close.
Automate optimization
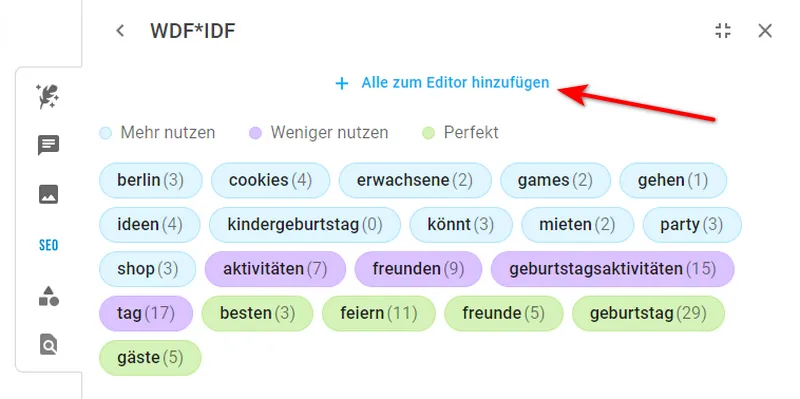
If you want to integrate all underused keywords into the text with the help of AI, you must first click on “Show all results”. You will then find the “Add all to editor” button at the top. This button only adds the “Use more” keywords to the editor.
Method 1: Formulate
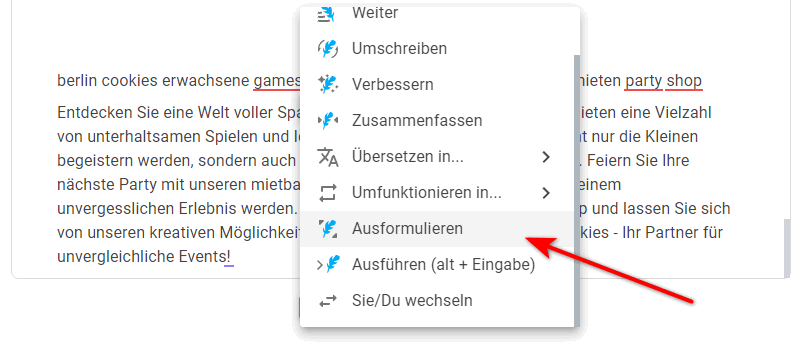
You can now select the keywords and click on Formulate in the pen menu. The magic pen will then try to generate a paragraph with all the keywords. This works quite well.
Method 2: Chat
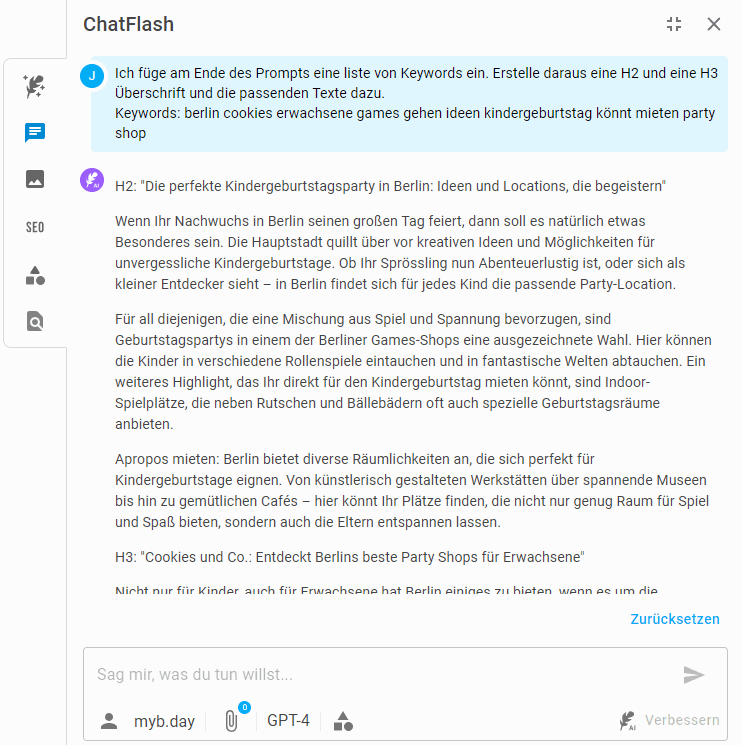
I prefer to use the chat. I have more options there, such as the GPT-4 language model and my brand voice. This way, I don’t just generate a paragraph, but a new structure with headings.
My prompt with the keywords:
I insert a list of keywords at the end of the prompt. I create an H2 and an H3 heading and the corresponding texts.
Keywords: berlin cookies adult games go ideas kids birthday party can rent party store
Step 6: Add images
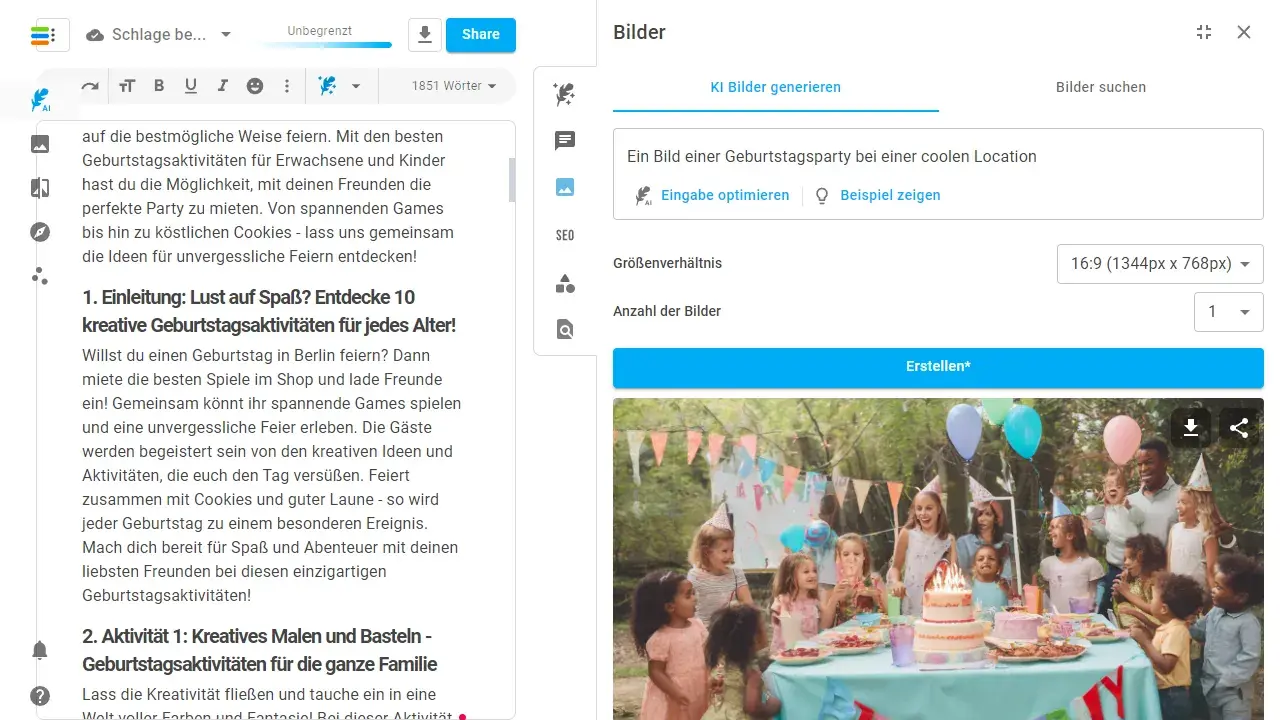
Unsplash images are not the best images for text as they can already be found on other blogs.
Self-shot photos or screenshots are of course always ideal. The second choice is good AI images.
In my experience, however, it’s not that easy with artificial intelligence images. At least, I rarely get any usable material. Faces often look creepy and hands are usually twisted funnily.
But prompts in English work much better, especially with pictures and photos.
Maybe you are a more talented AI artist.
In the sidebar you will find the menu for generating images. Enter your default, have it optimized, select the image size and click on create. Good luck!
Click on the new image to insert it directly into the editor.
Start with a voucher
If you are a new user, use the discount codes:
Standard package for 15€ instead of 30€ in the first month – discount code:
50OFF
One-time 20% discount on an annual plan – discount code:
YEARLY20
Conclusion
With the right preparation and tools like neuroflash, AI article writing can be made both efficient and personal. The balance between humanity and technology is the key to unique and engaging content.
Use this how-to for blog articles, information pages or landing pages to stay ahead of the game when it comes to text quality.
Wondering if this article was created with AI? No.
👉 This is what happens next
- Use the revision options in AI article writing to add a personal touch and your expertise.
- Expand your SEO knowledge with an in-depth look at WordPress SEO factors to optimize your articles even better.
- Experiment with different content creation tools like Jasper and find out which ones suit your style best.
