Link Whisper Review: How the link tool for WordPress works
Internal links significantly influence the ranking of websites in search engines. Within the WordPress hierarchy (also called post hierarchy), the article with the most links from other posts is in the first place. With the paid plugin Link Whisper for WordPress, you can automate the link building in your posts, optimize their ranking and save a lot of time.
Link Whisper allows you to save a lot of time on internal linking on your WordPress blog. This way you improve SEO ranking and reader satisfaction and always keep track yourself. Use the WordPress plugin for internal link building.
15$ Coupon: bloggerpilot
Don’t forget to use my coupon code for Link Whisper. You’ll save $15.00.
What is Link Whisper?
Link Whisper is a tool that analyzes all existing posts on the website for potential linking opportunities. It automatically determines all existing links and lists the articles hierarchically. The article to which the mostinternal links lead is therefore at the top of the list. Articles to which only a few links lead end up correspondingly further down the list.
Through the detailed analysis of the link structure, the plugin simplifies the search for existing linking opportunities. It thus makes it easier for you to significantly improve your SEO ranking. In addition to the analysis, the tool suggests keywords, keyword combinations or phrases from other posts that are suitable for linking to the selected post. With just one click, you can accept Link Whisper’s link suggestions, adjust the link target accordingly or select another one.
What does Link Whisper cost?
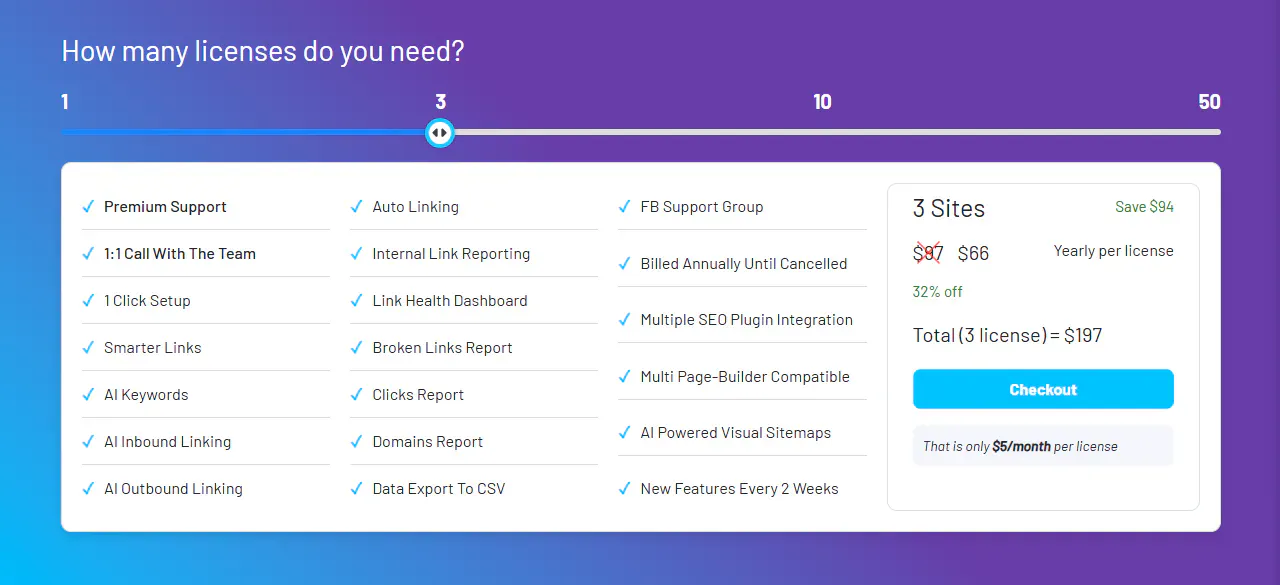
Unfortunately, Link Whisper is not free of charge. However, very attractive pricing models are available to you in good proportion to the time saved, especially for larger blogs and websites. You can choose between these licenses:
| Single Site | 3 sites | 10 sites | 50 sites | |
|---|---|---|---|---|
| Sites | 1 | 3 | 10 | 50 |
| Updastes and support | 1 year | 1 year | 1 year | 1 year |
| Price | $ 97.00 / year | $ 197.00 / year | $ 297.00 / year | $ 497.00 / year |
| To the offer | To the offer | To the offer | To the offer |
In each case, the prices and conversion rates are from September 2021. In all models, the full range of services for the selected number of WordPress pages is included. This primarily includes linking reports (analysis) and smart (automatic) linking as soon as you upload a new post.
You can find more detailed information about these features later in this review.
Installing and setting up Link Whisper in WordPress
Link Whisper, like other WordPress plugins, can be installed in just a few steps:
- Decide on a license and purchase it. The price will be charged once a year, the first time directly after purchase.
- Install the plugin in your WordPress interface. You can find out how to do that here
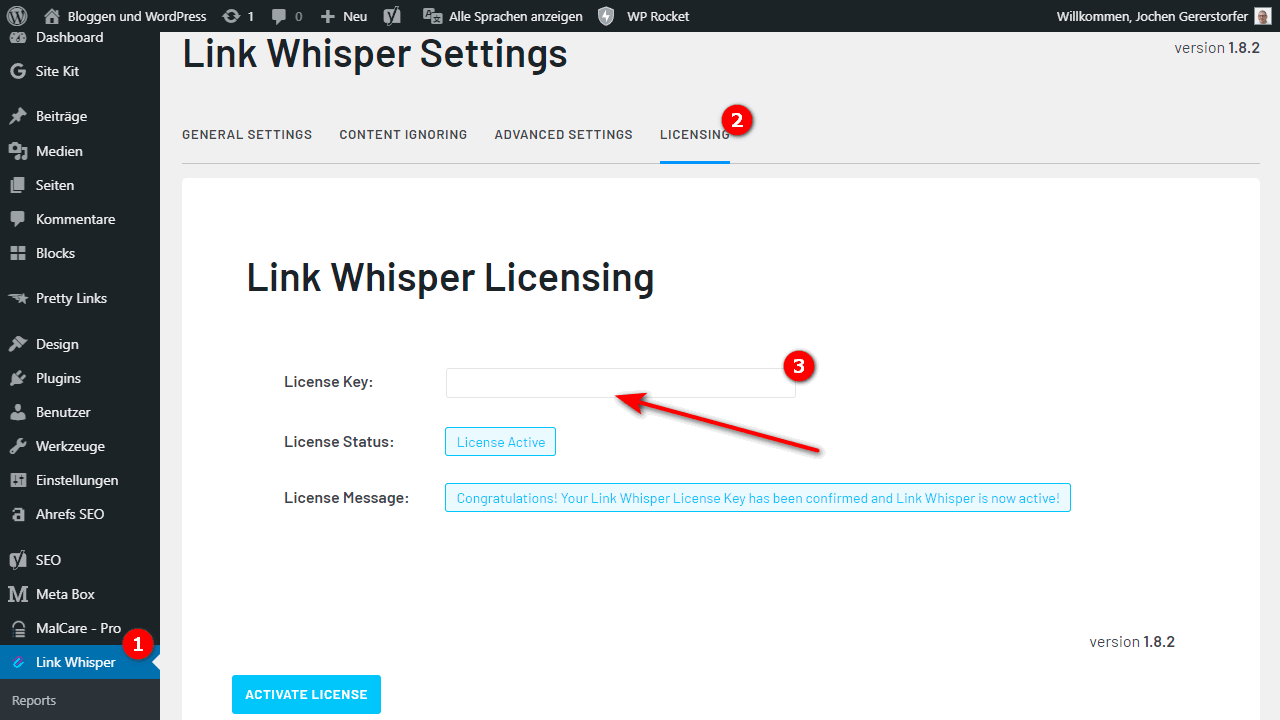
- Click on the new Link Whisper menu item on the left side of the interface and enter your license key when prompted. You can find the license key you purchased in your account at Link Whisper itself or in the email you receive after your purchase.
- Link Whisper is now ready to go, and you can start configuring it
First of all there are the general plugin settings. Here you can define, among other things, whether and how far Link Whisper should “get into” your articles.
Here is also a small step-by-step guide:
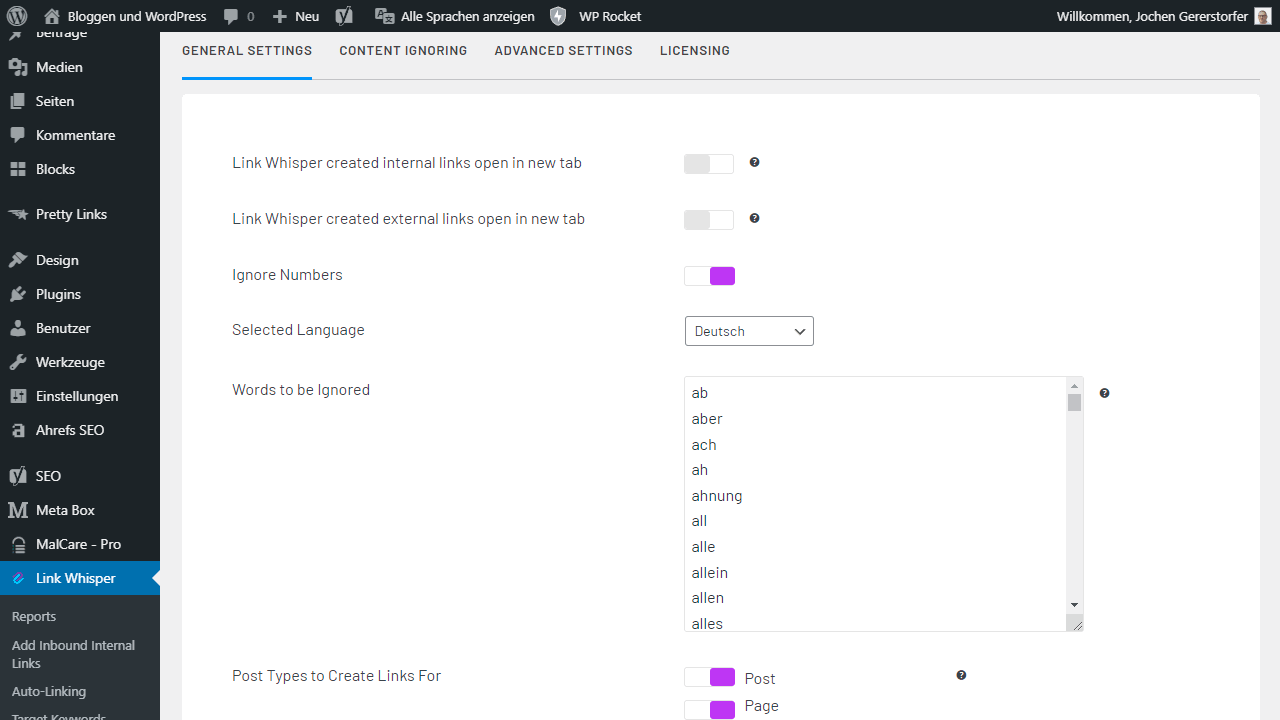
- Select the plugin and open the settings.
- Set the basics. In addition to the language, this also includes selecting whether links should always open in a new tab or the current tab. We recommend selecting the first option, as it is much clearer. The language selection is about the stop words to be ignored.
- You can also decide whether numbers should be ignored in the link suggestions. If you choose “No” here, the plugin will suggest another post with the title “7 tips for…” for an article with the number “7”, for example.
Now it’s time for the more detailed settings. Here you configure how exactly the link structure should look like and which suggestions the plugin makes for linking your articles. These setting options are available:
- Words to ignore, Categories and Posts: Here you can select for which anchor texts Link Whisper should not make any suggestions for linking. The previously mentioned stop words.
- Mark external links: With this option, external links will be marked as such, while internal links will not receive a mark visible to readers.
- Post type: Here you can decide for which post types Link Whisper will provide suggestions – and for which not.
- Post status: Here you can choose, for example, that the tool does not suggest linking for posts with the status “Private”, but only for public posts.
Content Ignoring
The second tab in the settings offers several text fields where you can enter different post types, categories, AFC fields or links to ignore.
You will notice if these settings are useful for you at all.
Advanced Settings
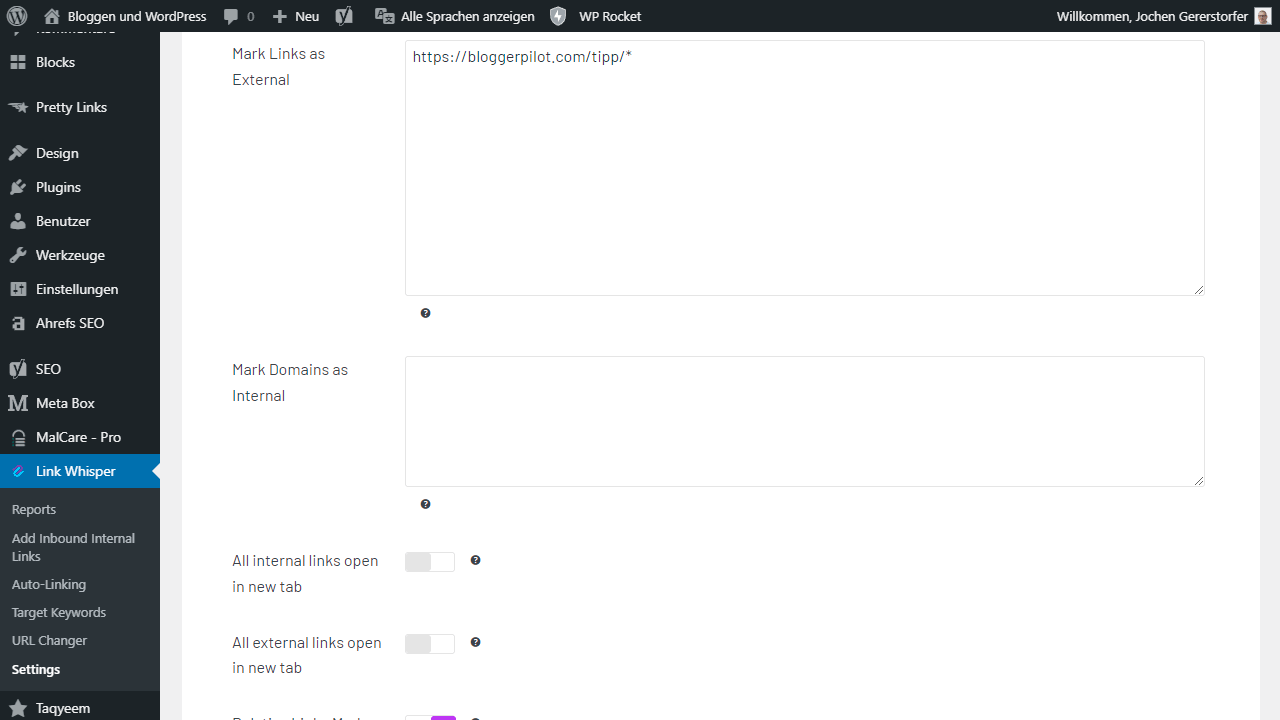
The options in this section are really numerous. To list them all would go beyond the scope of this article.
Example: If you use a plugin like Pretty Links, you can mark the short links created with it as “Mark Links as External”.
The auto-linking function: Fully automatic linking in posts
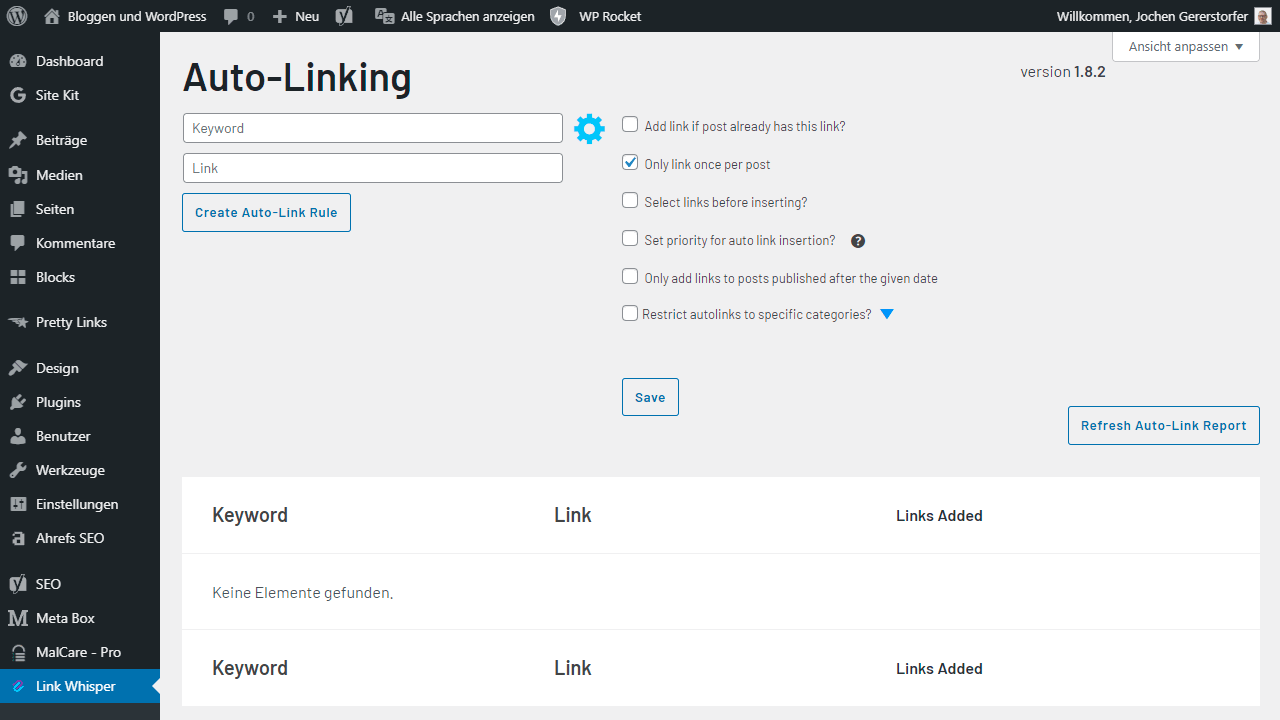
Auto-linking provides further convenience when setting links within your WordPress posts. Here you can first enter any keyword. Link Whisper then searches for the corresponding term on all pages and links it to the article. Since quite a bit of chaos or inconsistencies can quickly arise here, auto linking also offers various setting options.
My clear recommendation: Do not use it! You should also select internal links individually.
Link Whisper still offers you enough comfort, directly in the editor.
For example, you can select that the link should be set a maximum of once per post . This way you avoid that the same link is used ten times for the same keyword. Also, you can choose to set links even if they are already included in the corresponding post. You also have the option to limit internal linking to certain categories (for example, info posts).
The disadvantage of auto-linking is relatively obvious: the AI likes to make mistakes or ensure inappropriate placement of links in the text. Therefore, you should roughly skim the auto-linked posts again and check whether the keywords were actually linked coherently. If necessary, you can also rearrange the sentence or replace it.
Reporting and dashboard: overview of all your content
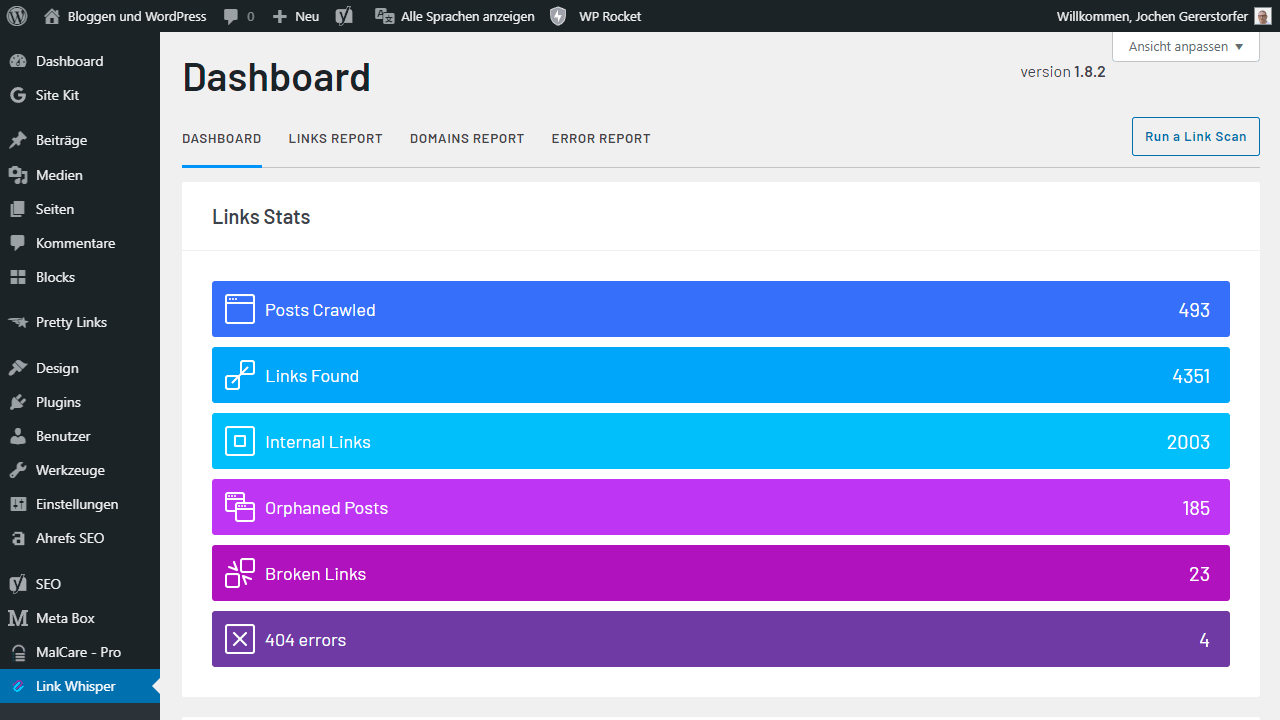
Within the Link Whisper interface, you can view your dashboard under the “Reports” tab. Here you get a clearly structured status report of your site and all content. This includes especially the number of links you have set. In addition, you will find statistics on how many links lead to your own and other websites. The dashboard is the starting point to all other subsections.
Also on the dashboard you will find the so-called“Orphaned Posts”. These are posts that have no inbound links at all. This is exactly where you can start your optimization!
Broken links and “404” errors are also clearly displayed here and can be fixed with just a few clicks. This saves time, especially for larger blogs and websites.
The Domain Report clearly shows which domains are linked on your site and how often they appear. Using the list of all posts in which the corresponding domain is present, you can directly access the individual posts and linkings and of course also adjust the latter. You also have the possibility to change the URL of the respective subpage.
The Click Report shows you on which links your visitors have clicked most often. At least if you have activated this feature: “Disable Click Tracking”
How do I add outbound internal links with Link Whisper?
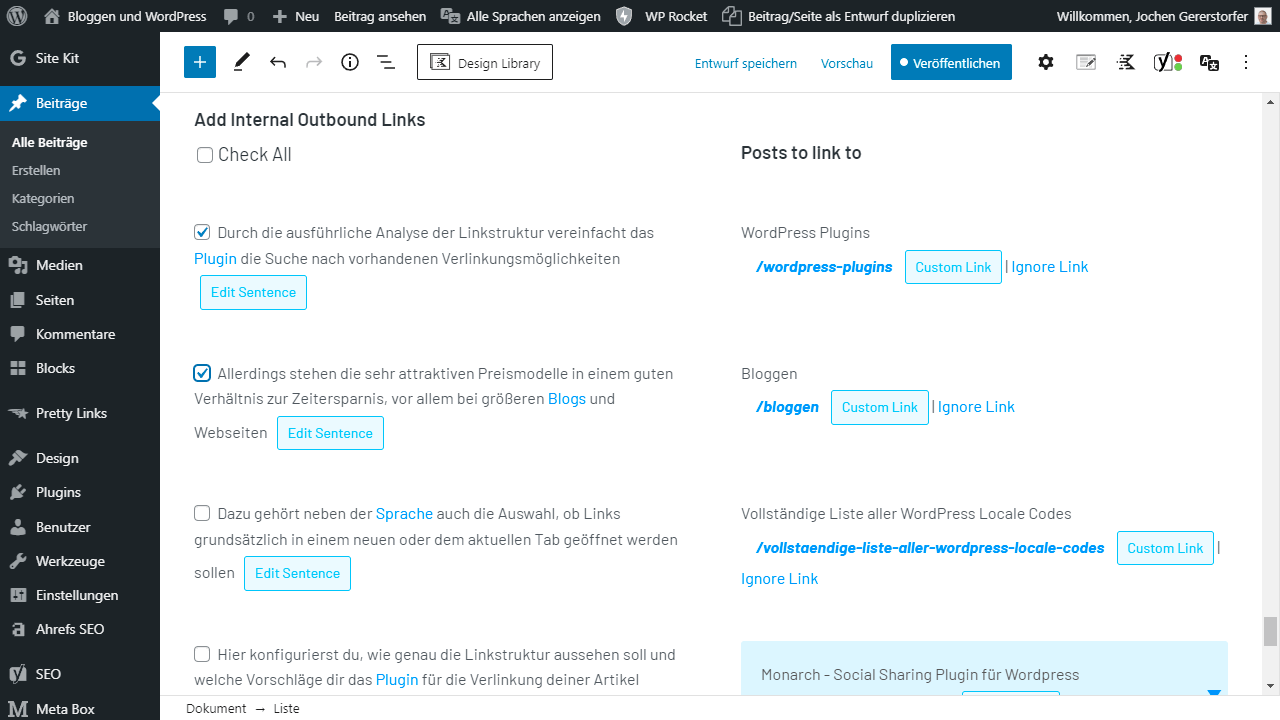
Towards the end of the review, we’d like to give you a little step-by-step guide on how you can use LinkWhisper to set the linking in your posts while you’re still writing or posting in WordPress.
- Write your article and paste it into WordPress. Make sure that you have enabled the “Link to WordPress Editor” option in the plugin’s settings. You can see this by the green check mark.
- Now Link Whisper will show you options for linking to other posts. The link suggestions are displayed directly below the editor, where you can apply them with just one click. You can also adjust the anchortext before or after the link to make the post as coherent as possible.
- After you have accepted or rejected the link suggestions, click on “Insert Links Into Post”. Now your post will be provided with the selected linkings – and that’s it!
This little tutorial also applies to existing articles. Here, too, you simply open the Gutenberg editor and let Link Whisper show you the unused potential for internal linking. Then you update the post.
Insert internal inbound links
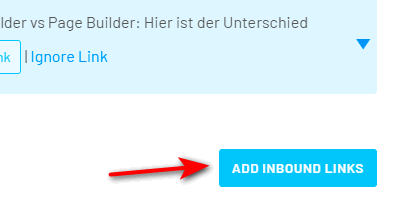
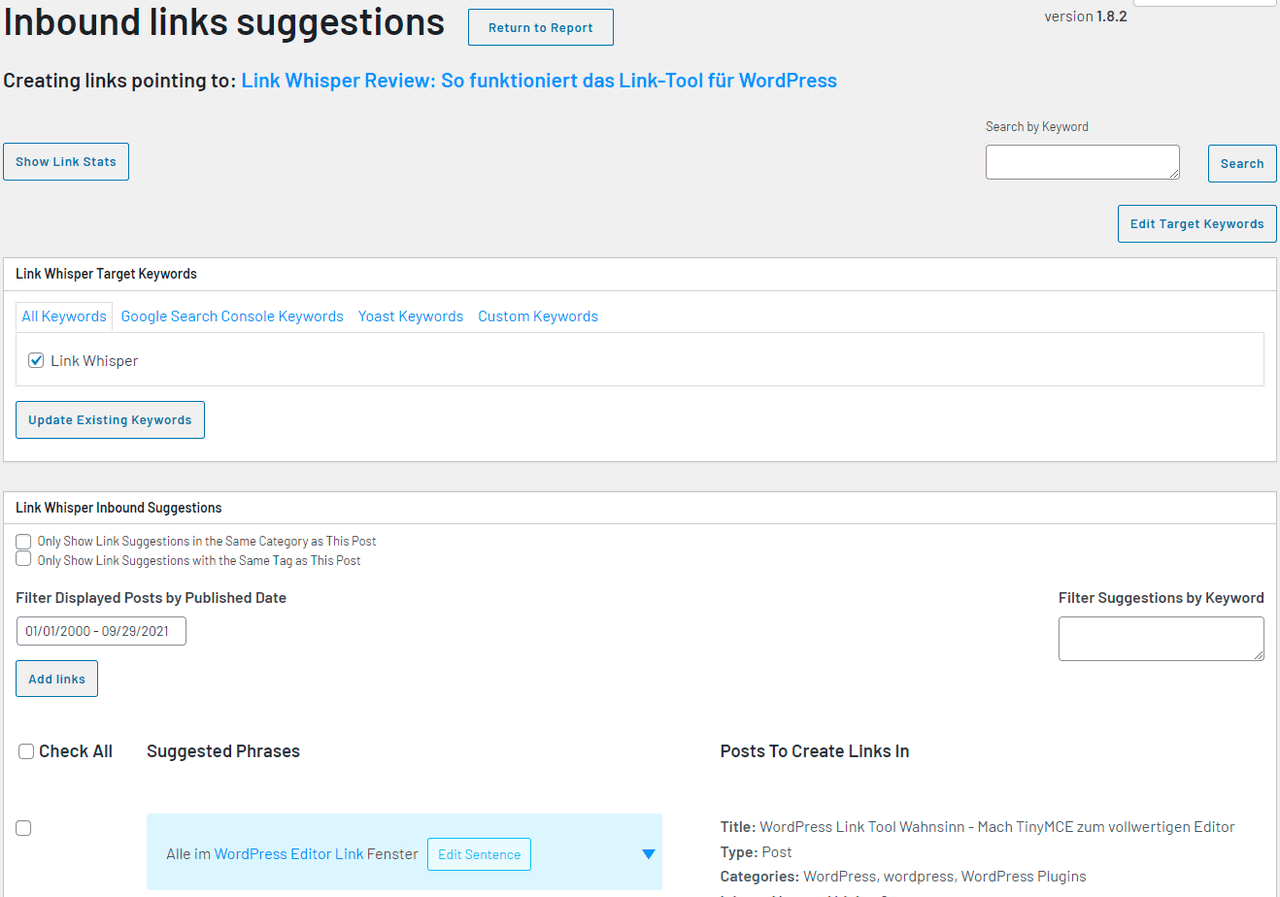
When you create a new article, you want it to get 1 or 2 internal recommendations. Link Whisper can help you with that, too.
To do this, you can either click on the blue “Add Inbound Links” button at the bottom of the editor or use the menu of the same name in the left navigation.
A new window will open, where internal links to the current post will be suggested to you. Again, you have full control over the links and the link texts.
Linking with Yoast SEO
Yoast SEO is the most popular and in my opinion also the best SEO plugin for WordPress.
In the Advanced Settings you can find the option “Only Create Outbound Links to Yoast Cornerstone Content”. If you activate this, only Cornerstone articles marked in Yoast will be suggested to you for internal linking.
This can be a great feature, but only if you’re really on top of your content marketing and your planning is always up to date.
If in doubt, I would leave this option disabled and weigh eachlink suggestion carefully.
URL Changer
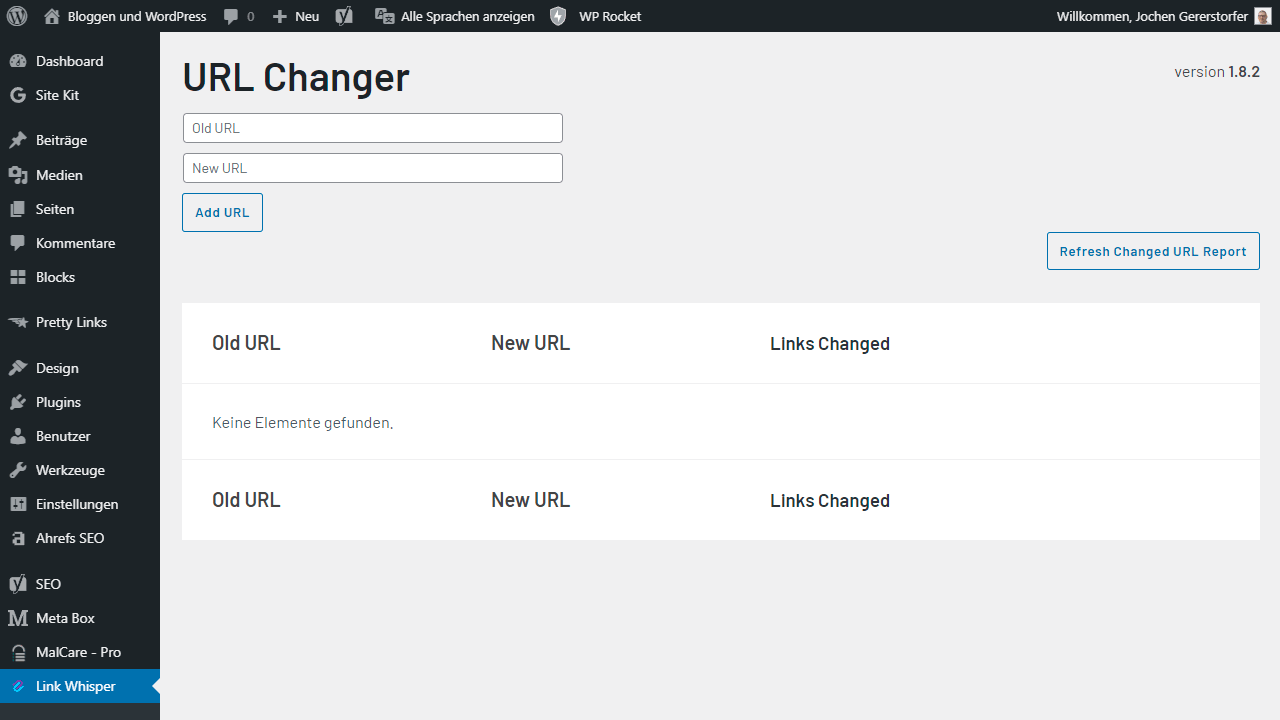
The URL Changer is a simple but sometimes very helpful tool. If you change your domain, or only one article, you can easily keep your website up to date with the “link changer”.
You just have to enter the old URL and the new URL and press the button “Add URL”. LinkWhisper will do the rest.
Matching with the GSC
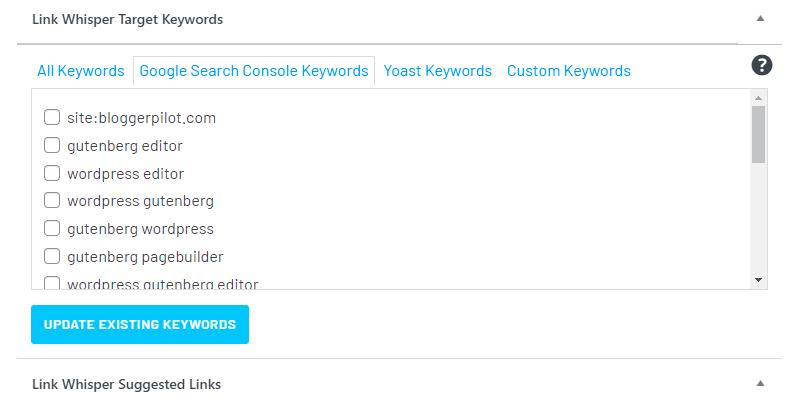
This is a super powerful feature. Connect your Google Search Console to the plugin to retrieve all keywords used by the visitor from GSC.
But I’m not quite sure yet if the list won’t get too cluttered with all the keywords. I still have to figure that out for myself personally.
15$ Coupon: bloggerpilot
Shopify
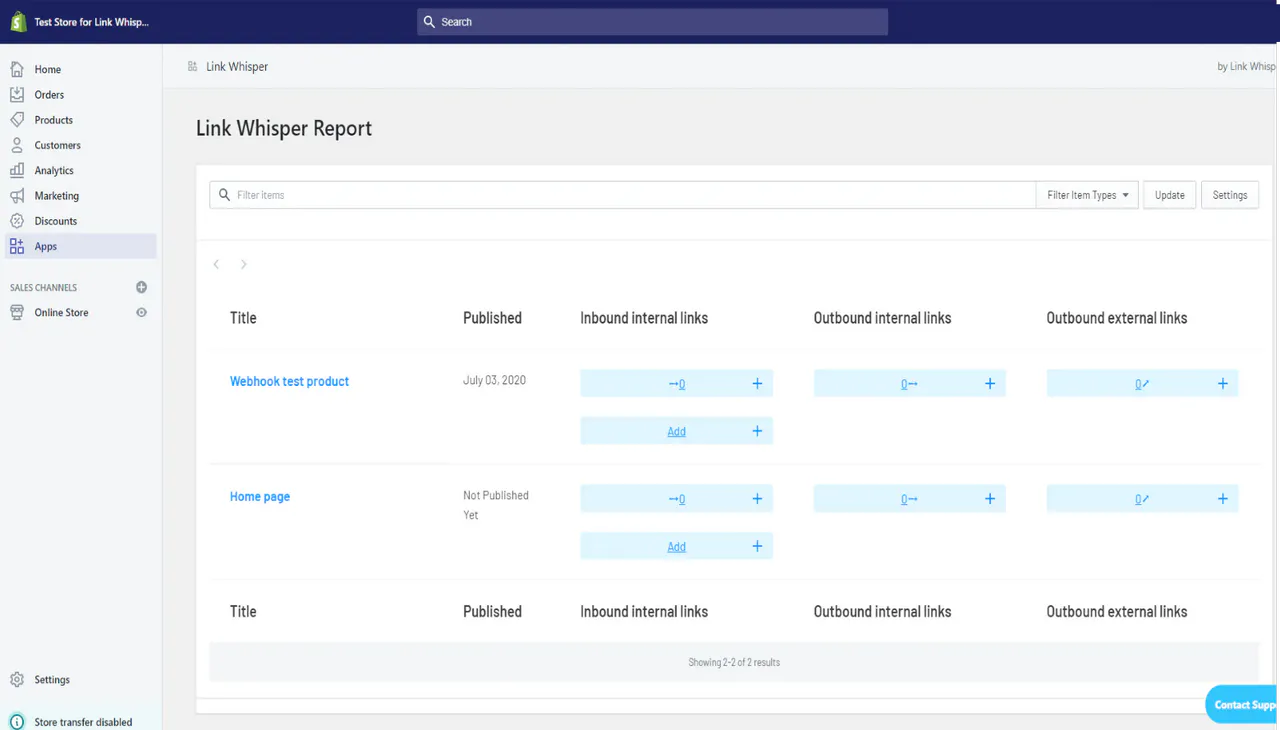
LinkWhisper is now also available for Shopify. However, I haven’t been able to test it myself.
Conclusion: Link Whisper – a round thing!
Large blogs often struggle with time-consuming internal linking. Link Whisper helps automate this quickly and easily. In the dashboard, you can immediately see unused link opportunities—for better SEO and longer reader retention.
At the same time, Link Whisper relies on a very fair pricing model, especially when measured against the time saved by the tool. Even if the plugin is not quite cheap. Overall, I think the plugin is a real added value and recommend to have a look at it at least once!


Hey, Jochen!
Link Whisper is a must-have WordPress plugin that makes internal linking an automated task that was never possible earlier.
I believe internal linking is the most underrated SEO technique but Link Whisper made it possible to leverage its power.
Keep doing the amazing work, thanks!
>> Ravi Dixit
Hey Ravi,
you are right. Link Whisper is a game changer.
Jochen