Newsletter Segmentation ✉ Kadence Forms and Encharge 2025
The quality of your email marketing depends on the data you collect. I don’t just mean the information sent by your new subscriber. I’m talking about metadata that you can use for segmentation in your newsletter system.
Newsletter segmentation is a key tool in online marketing. By targeting subscribers, content can be personalized and made relevant. This increases open rates and conversion. Segmentation makes for clearer and more engaging content and minimizes repetition.
In this tutorial, you’ll learn how to fill out important information in hidden form fields and forward it to your newsletter service.
The data involved is as follows:
- WordPress Category
- Page title
- Page address
But now let’s start with the howto.
What you need for this tutorial
- Kadence Blocks Plugin
- Encharge (Or another ESP that uses site tracking )
You can paste the form block directly where you need it. However, I use the Kadence Elements for this so that I can easily reuse the object. For this, you require the Kadence Theme.
The form
Create the form and the JavaScript code in a Kadence element. First, you have to activate this function in Appearance > Kadence > Hooked Elements. Then you can find the new menu item Elements under Appearance > Kadence.
Step 1: Create element
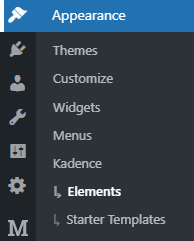
In the Elements menu click on “Add New” and select “Content Section” as element type.
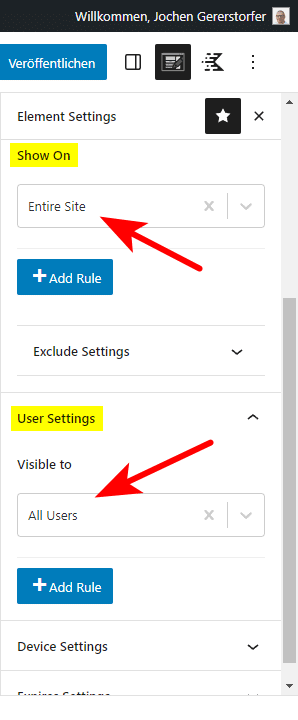
In the element settings you must not forget to select the appropriate value for the options “Show on” and “Visible to”; otherwise the element will never be displayed. Above, I left “Placement” empty because I use the shortcode for it.
Step 2: Create form
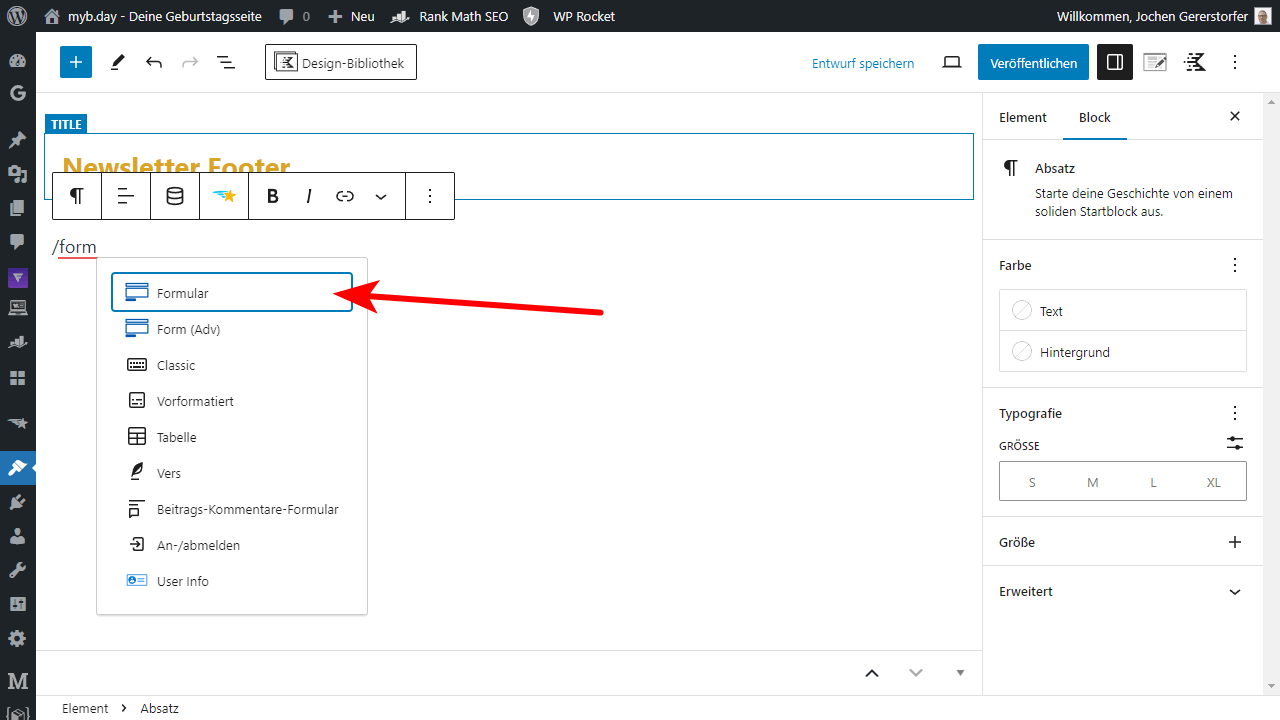
For the form, I use the Kadence Blocks form block. You can use the new Advanced Form, or the simpler Form Block. For an opt-in form, the old block is enough for me.
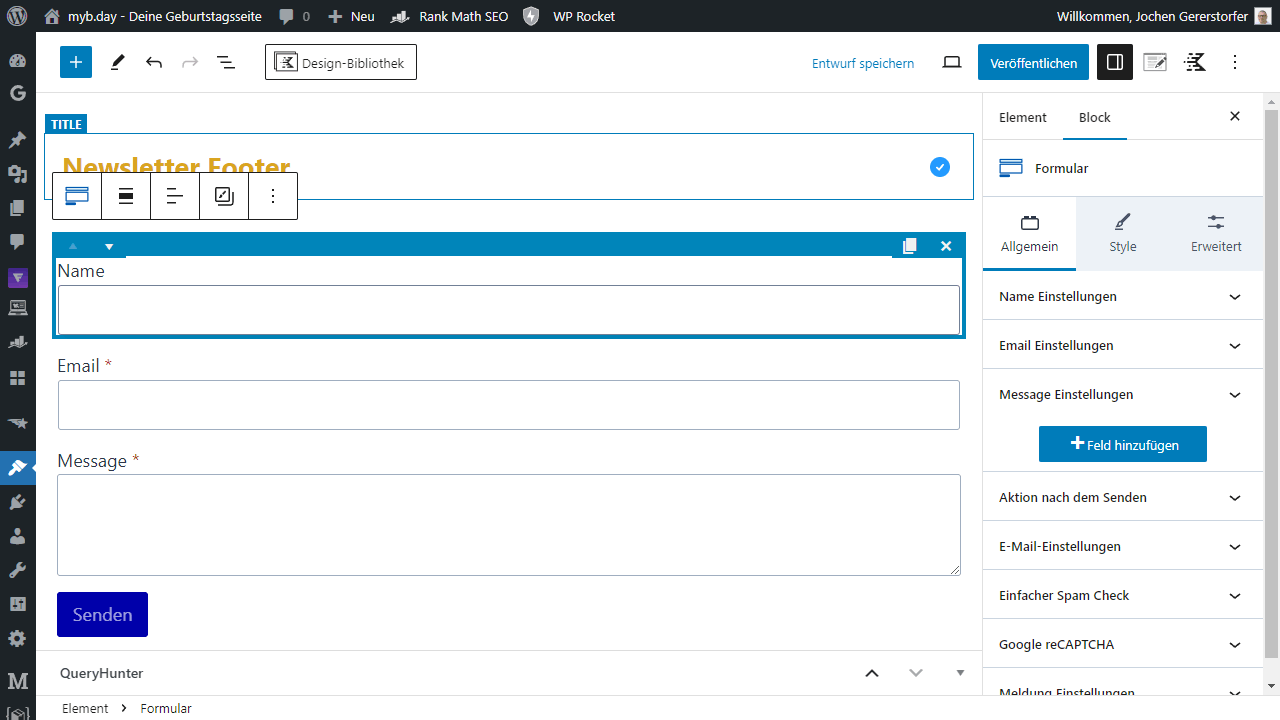
The block comes with three fields. Name and Email I need for my newsletter form. But I delete the Message field.
Now you can customize the form to your design and make the necessary settings for sending emails.
Step 3: Add hidden fields
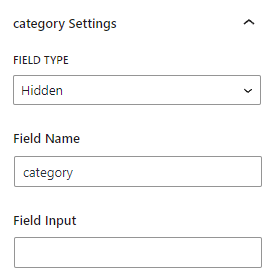
In order for Encharge ‘s form tracking service to get the three pieces of information mentioned above, I created three fields of type “Hidden”. This allows you to store the data in the value attribute of the input tag.
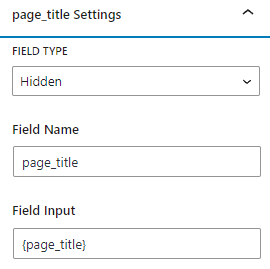
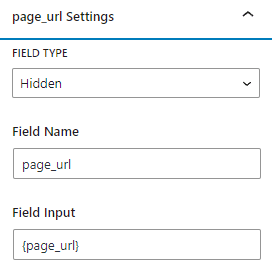
In “Field input” you can use the internal variables {page_title} and {page_url}. These are provided by the form block. But not for the category. Actually, you can save the two variables because we set the values in the next step with JavaScript anyway.
Field 1: Category
Create a field of type “Hidden” with the field name “category”.
Field 2: Page title
Create a field of type “Hidden” with field name “page_title”.
Field 3: Page address
Create a field of type “Hidden” with field name “page_url”.
Step 4: Insert JavaScript code
Now create a Custom HTML block or Code Editor block directly below the form block and insert the following snippet:
<script>
// Direktes Abrufen der ersten WordPress-Kategorie
const category = [...document.querySelector("article").classList].find(cls => cls.includes("category"));

// Funktion zum Setzen von Formularfeldern mit bestimmten Werten
function setFormFieldValue(selector, value) {
    const field = document.querySelector(selector);
    if (field && value) field.value = value;
}

// Setze die Werte in die Formularfelder
setFormFieldValue("input[name='kb_field_2']", category);
setFormFieldValue("input[name='kb_field_3']", document.title);
setFormFieldValue("input[name='kb_field_4']", window.location.href);
</script>
Snippet explanation
First, I get the first category from the article tag and store it in the “category” constant.
The second block is the function to set the form fields.
In the third block, the setFormFieldValue function is used to write the individual data into value attributes of the fields named “kb_field_2”, “kb_field_3” and “kb_field_4”. The JavaScript properties document.title and window.location.href already have the latter two pieces of information without any intervention.
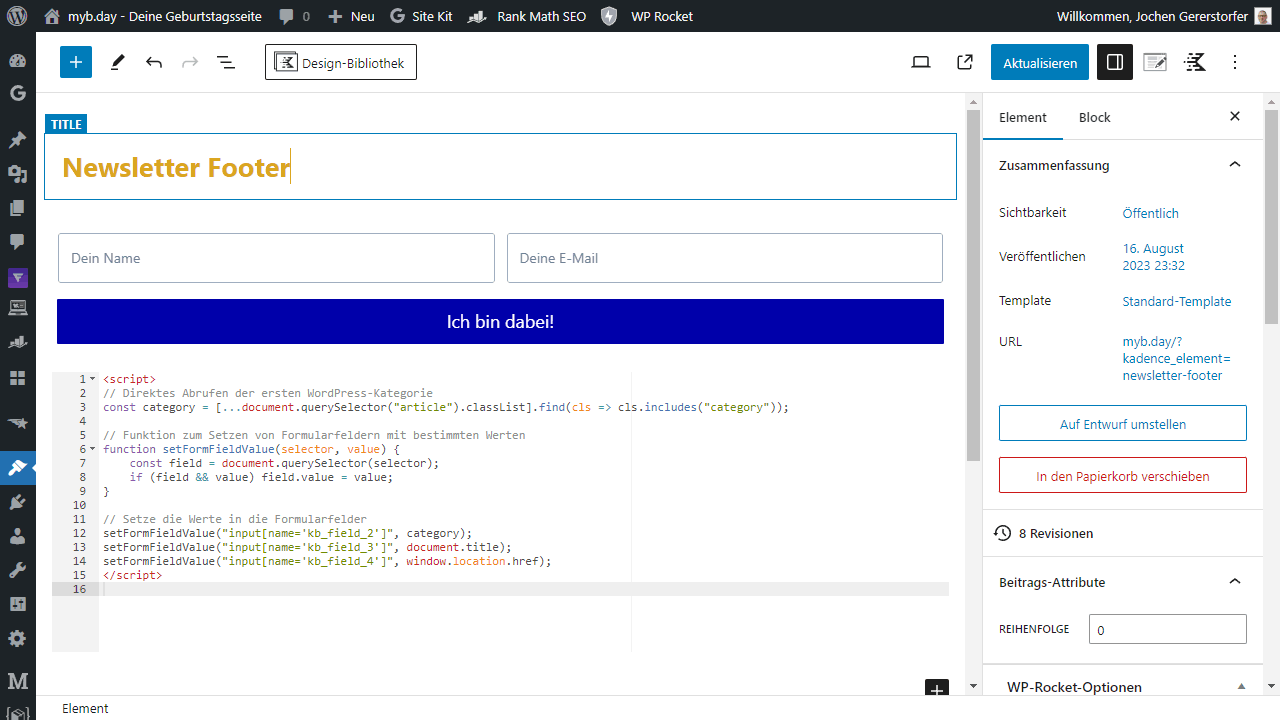
The finished element with form and JavaScript snippet looks like this:
Don’t forget to publish!
Step 5: Publish the form
How and where you use the form now is up to you. You can put it in the header, in the content, in the sidebar or in the footer. Or you can put it in all of the above places.
So back in the Appearance > Kadence > Elements menu, copy the shortcode of the column with the same name. Looks something like this:
In the editor, customizer, site editor, widget area or wherever you want to have the form, you now paste your previously copied shortcode.
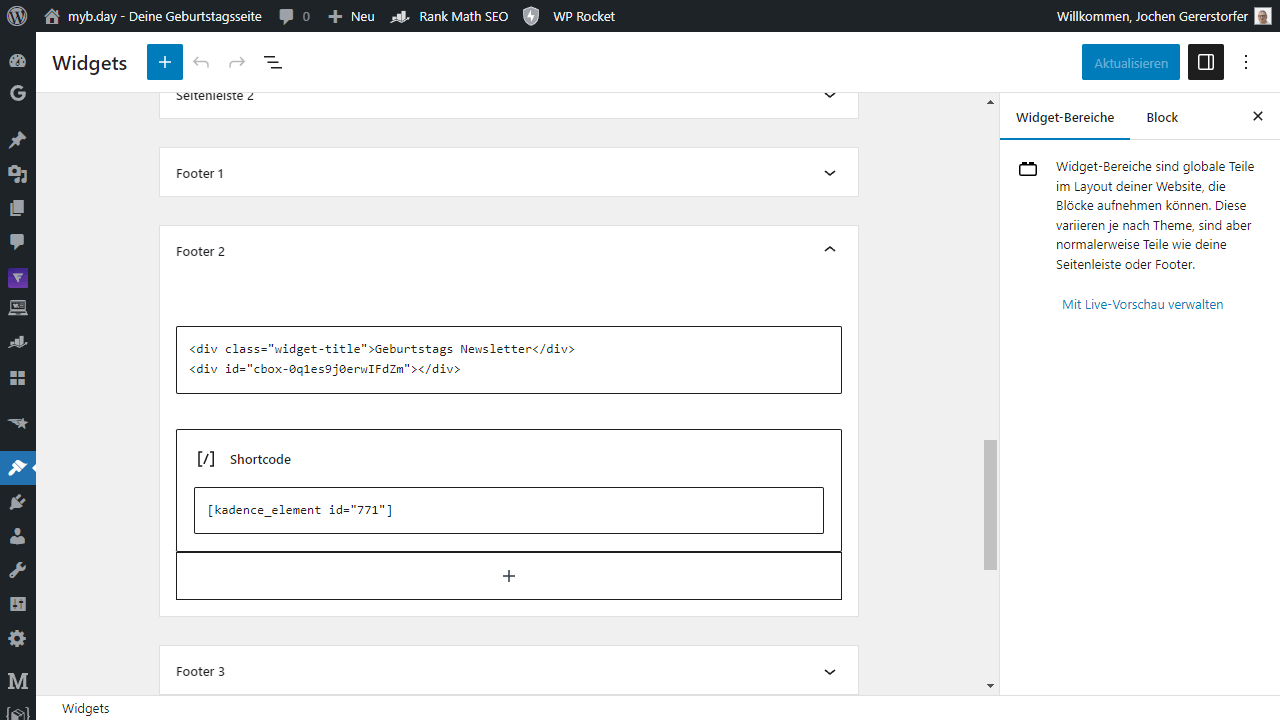
For me, this is just a footer widget.
After saving you might need to clear your cache and then your new form should appear on your website. With CTRL SHIFT R you can force your browser not to fetch your page from the cache.
Step 6: Check data
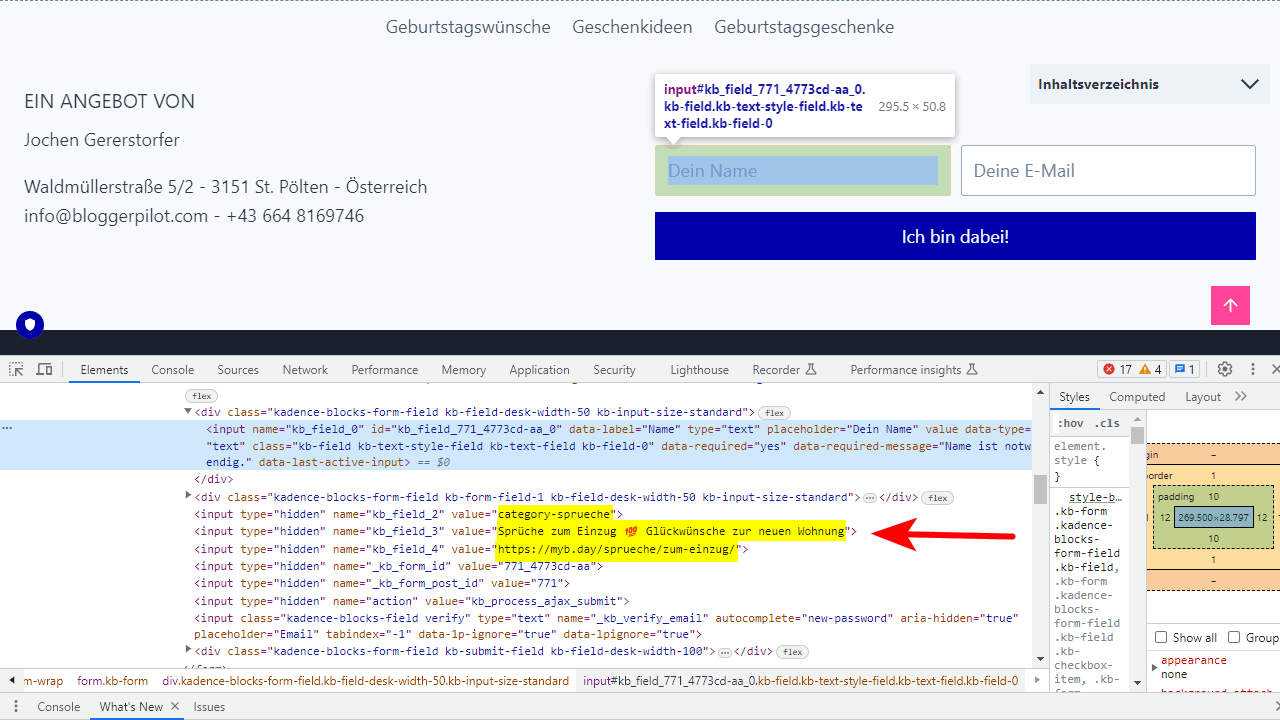
If you did everything right in steps 3 and 4, the data should now appear in the source code.
The easiest way to do this is to right-click on your new form and then click “Inspect”. The developer tools will open with the code of the form visible.
If you now see the three hidden input tags with a filled value, you have won. However, the field kb_field_2 is only filled on posts. On all other WordPress pages, there are no categories.
Step 7: Set up ESP
ESP = Email Service Provider
In Encharge, it’s time to set up form tracking. Before that, you need to submit the form at least once so that site tracking can recognize the form.
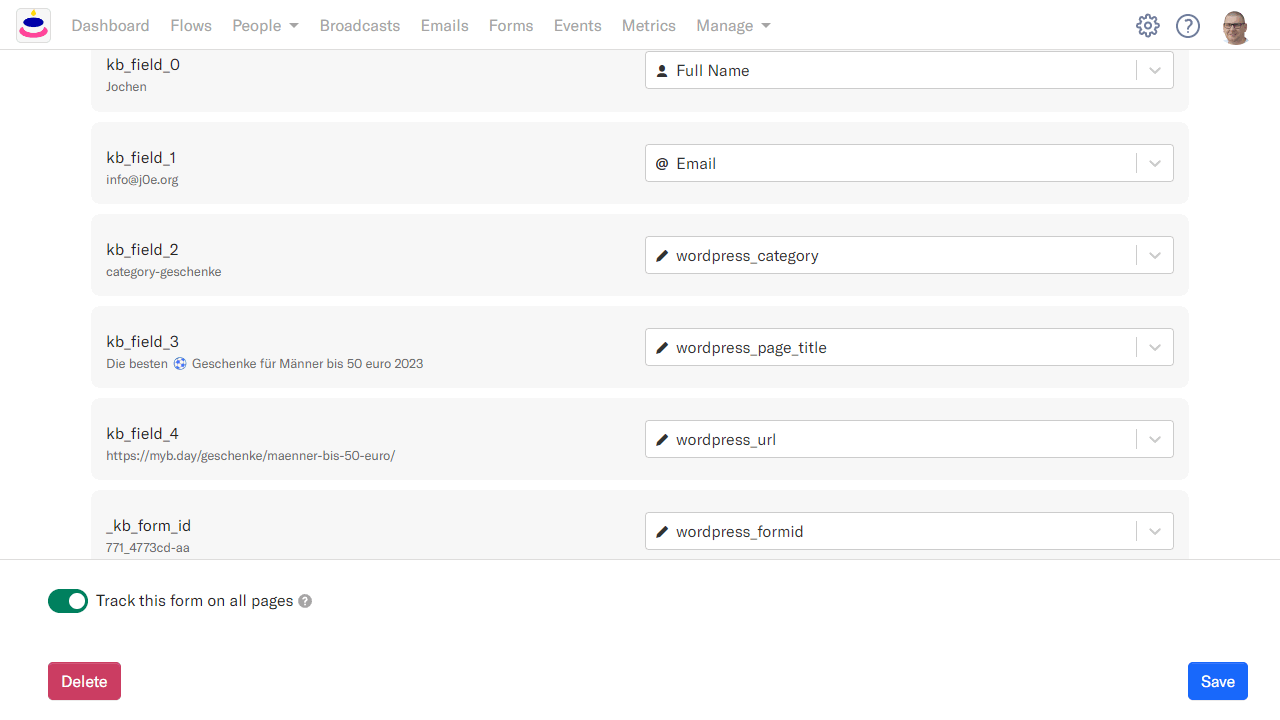
Previously, I created the following custom fields for myself:
- wordpress_category
- wordpress_page_title
- wordpress_url
- wordpress_formid
Under Settings > Form Tracking you can then create the new form and assign the fields. See screenshot.
For each new subscriber, you now have the category of your article and thus know which topic they were interested in on your site. With the page title and URL you even have the exact article.
This allows you to target your email campaigns.
Step 8: Segmentation
Segmentation is just as easy to set up. Go to the “People” menu and click on the blue plus button.
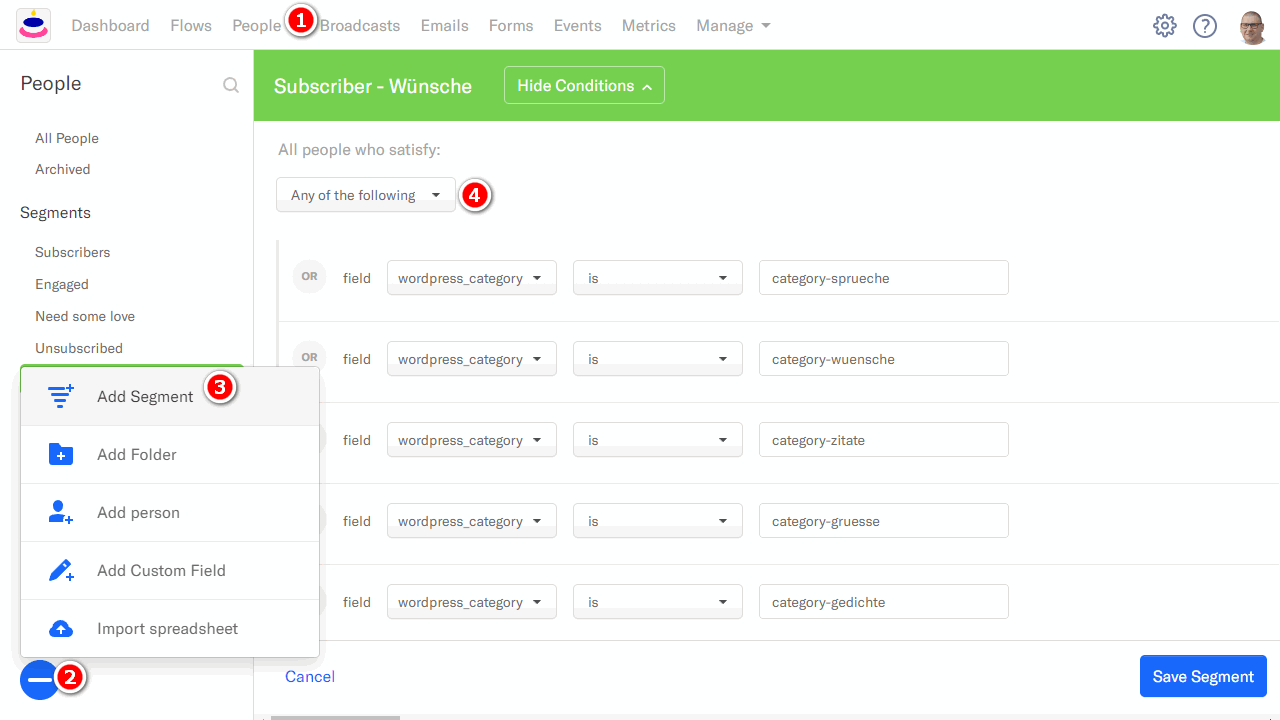
You can create a segment for each category on your website, or combine multiple categories into one segment.
When shipping and automating, you then select the appropriate segments and don’t have to worry about anything else.
Explanation
Newsletter segmentation is the process of dividing an email subscriber list into smaller groups, or segments, based on certain criteria such as buying behavior, interests, or demographics.
This division allows companies to send targeted and relevant content to specific groups of subscribers. This increases the relevance of emails, boosts open rates, and fosters a stronger bond between the company and its subscribers.
Target groups

Target groups in email marketing are specific groups of people defined based on common characteristics, interests or behaviors. They allow companies to target their marketing messages to those subscribers for whom the content is most relevant.
By knowing their target groups precisely, companies can personalize and optimize their email campaigns. Precise targeting often leads to higher open and click-through rates. Segmentation by target group is therefore a key tool for increasing the effectiveness of email marketing campaigns.
Email marketing is an effective method of sending targeted messages to a group of recipients. Recipients can be divided into specific segments based on various characteristics, such as gender, age or buying behavior. This classification makes it possible to send individually tailored content that is particularly relevant to the target group in question.
This ensures that messages are better received by recipients and achieve the desired effect. Recognizing and considering such characteristics are therefore a decisive factor for success in e-mail marketing.
Conclusion: Newsletter form with Kadence Forms and Encharge
Emails are among the most effective tools in digital marketing. The need for customized content tailored to user interests is constantly growing. With this in mind, it is becoming increasingly important to collect and use relevant metadata from potential customers to perform successful segmentation and personalization.
Designing and implementing newsletter forms with the Kadence Blocks plugin and using Encharge for site tracking is not only intuitive, but also extremely flexible. It allows customization to individual needs and improves the segmentation and relevance of the emails sent.
But remember, the work doesn’t end after the form is created. Carefully chosen segments and well-designed email campaigns are just as crucial to reap the fruits of the previously collected user data.
With that, we conclude this in-depth tutorial. I hope you learned a lot and feel ready to take your email marketing to the next level. Good luck with it and don’t hesitate to get in touch if you have any questions or uncertainties!
