WP Rocket Guide 2024 - Best WordPress Cache Plugin
The WordPress cache plugin WP Rocket manages to speed up your site significantly with just a few clicks. Not only through caching, but with many other small optimizations.
Recommended by WordPress professionals as the most powerful cache plugin
wp-rocket.me
There are many reasons to use WordPress. Blogs, portals or small stores, all no problem for WP. However, extensive themes and numerous WordPress plugins make a WordPress site slow.
That’s where the premium WP cache plugin WP Rocket comes in!
No other caching plugin works as efficiently and uses all optimization options from a single source as WP Rocket. Free alternatives unfortunately don’t come close to the feature set.
WP Rocket is the caching standard
Jochen Gererstorfer
Meanwhile, the WP Cache plugin is also no longer a newcomer. Already since July 14, 2013, the French developer WP MEDIA distributes the plugin WPRocket.
The following video shows how WP Rocket works.
How much does WP Rocket cost?
Although there are many free alternatives, most serious bloggers use WP Rocket. Stinginess is not always cool. Especially when it comes to a ranking factor, which is page speed.
| SINGLE | PLUS | INFINITE |
| 1 page | 3 pages | Unlimited |
| $ 49 | $ 99 | $ 249 |
| 1 year support and updates | 1 year support and updates | 1 year support and updates |
| Buy Single | Buy Plus | Buy Infinite |
Within 30 days you can renew the license at a 30% discount.
You can use the plugin as long as you want after purchase. Only updates and support are included for one year only.
14 days money back guarantee!
I even bought for 4 years in advance during a promotion. This gives me peace of mind for now.
Installation
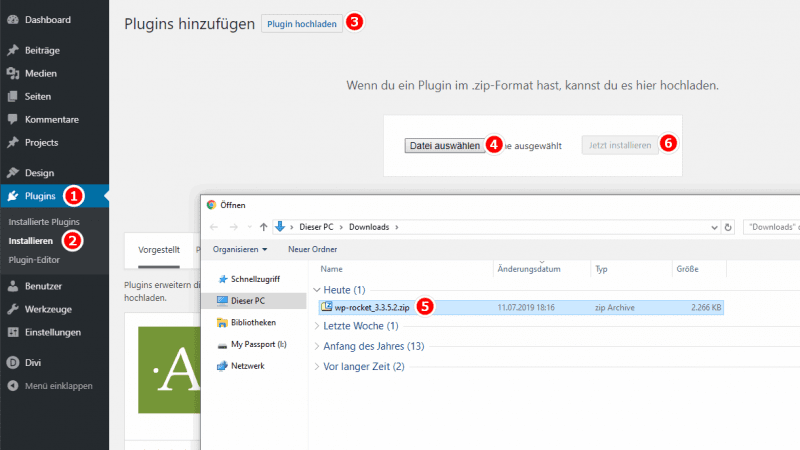
The premium plugin is not listed in the WordPress repository. So you have to download it in wp-rocket.me account.
In WordPress-Admin Plugins –> Install you click on Upload Plugin and select file. Now select the wp-rocket_3.x.x.zip file and click on Install now. Now you just have to click on the blue button Activate Plugin.
By downloading via the account, your plugin file has already been given all the information, so you don’t need to enter a serial number or an API key. Very handy!
The Web Cache plugin is now preconfigured with the most common settings. If you don’t have the time or inclination, you don’t really need to look at the other settings and optimizations.
More: How to install a WordPress plugin?
The Interface
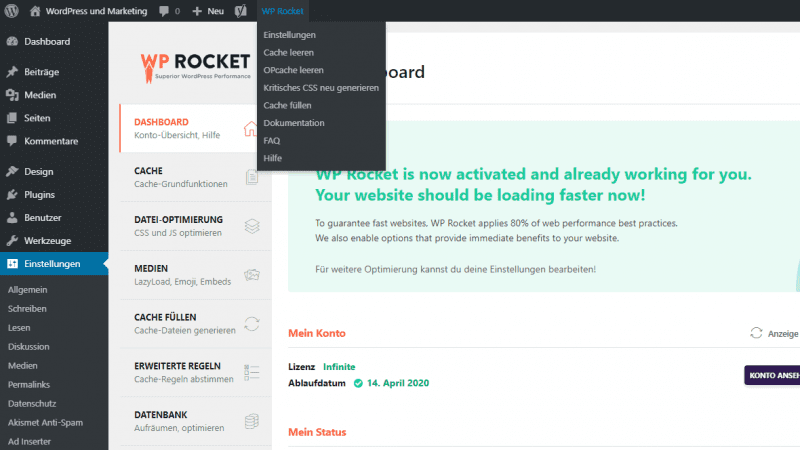
In the WordPress admin, WP Rocket is accessible at any time via a dropdown menu. In addition, still via the usual settings menu.
After setup and when running smoothly, you will be presented with a green congratulations message.
On the left sidebar, you will find the menu where the settings are grouped. This makes it easy to find each option quickly and the first configuration doesn’t look cluttered.
On the right, there are three important buttons. You can clear the file and object cache if you want to make major changes. After that, you should start the cache preload, so that the first visitors can benefit from the cached page right away.
Configuration and settings
Perfect WP Rocket settings
Features at a glance
- Fast setup
- Page Caching
- Web cache filling
- Sitemap preload
- GZIP compression
- Browser caching
- Database optimization
- Google Fonts Optimization
- Remove query strings from static files
- LazyLoad
- Minimization / Linking
- Delayed JS loading
- CloudFlare compatibility
- CDN
- DNS prefetching
- Mobile device support
- Multisite compatible
- E-commerce ready
- Multilingualism
- Logged in users
- Import/Export
- Extension friendly
Menu item 2: Cache
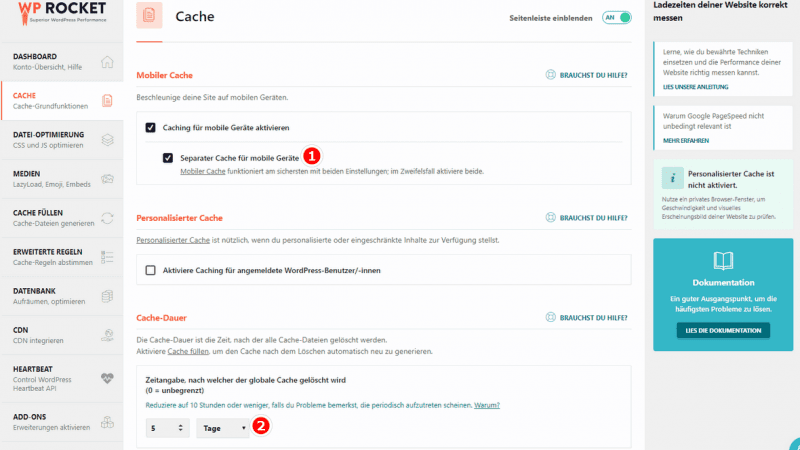
In the Cache menu, you can’t disable the cache completely. You can only do that if you disable the whole plugin.
This is about:
- Mobile Cache
- Personalized cache
- Cache duration
For the mobile cache, I still have Separate cache for mobile devices enabled. The personalized cache remains deactivated. I always increase the cache duration from 10 hours to 5 days.
Menu item 3: File optimization
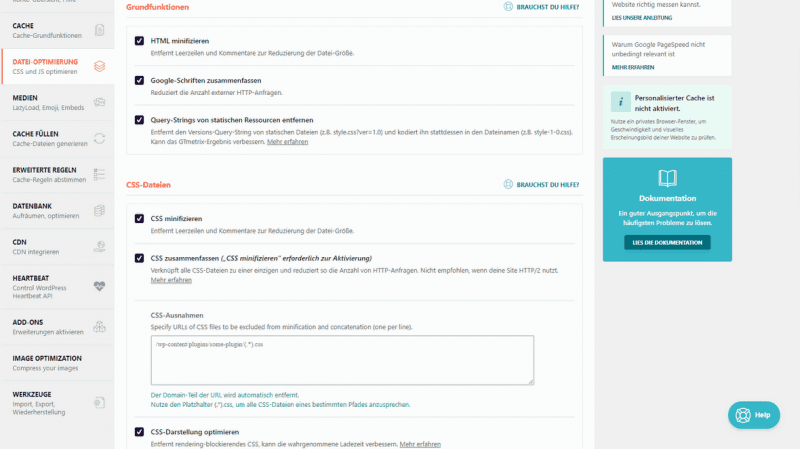
- Minify HTML
- Minify CSS
- Minify Javascript
The settings in the File Optimization menu can provide a significant boost in load time. At the same time, these settings can also be dangerous for the correct display and function of your page. That’s why the preconfiguration here is very conservative. So almost everything is disabled.
Since I want the optimum speed, I have everything enabled here on my pages. Basically, it’s all about merging and compressing the static files.
Not all themes support these aggressive settings. So you should watch your theme closely after enabling it. Here I use the Astra theme with all minifications active.
If there are problems, however, the exceptions usually help. Enter the affected CSS or JavaScript files and the problem is fixed.
Menu item 4: Media
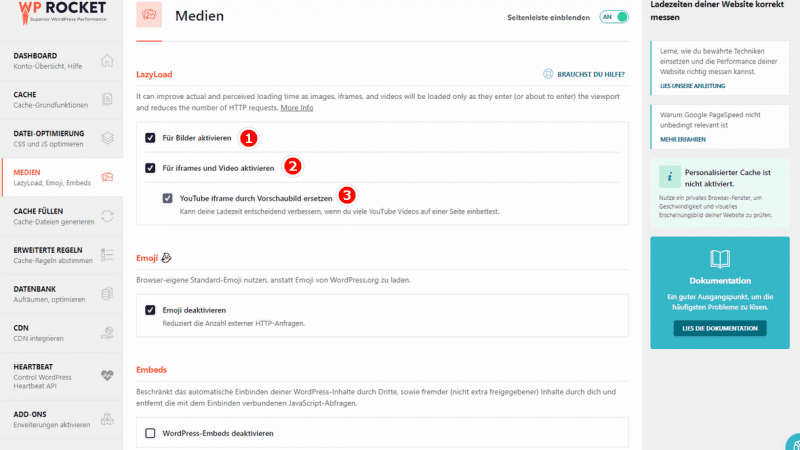
- LazyLoad
- Emoji
- Embeds
LazyLoad ensures that images, iFrames and videos are loaded only when they appear on the screen. Especially for content with a lot of media, this really saves time when calling up the page. Of course, I activate this.
The rest I leave as preconfigured. Emojis deactivated and embeds activated – I like them.
Menu item 5: Fill Cache
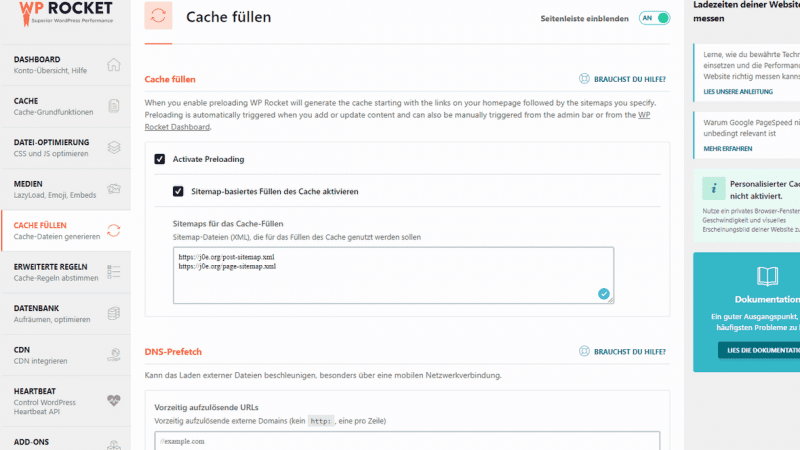
- Fill Cache – Preload
- DNS prefetch
Active Preloading keeps the plugin cache all linked pages from the home page on every content update. In addition, I have activated sitemap-based filling because not all posts are linked via the homepage. But for this, you have to store your sitemap.xml.
DNS-Prefetch is currently empty for me.
Menu item 6: Advanced rules
- (URLs) Never cache
- (Cookies) Never cache
- (User Agents) Never cache
- Always delete (URLs)
- Cache for query strings
For the advanced rules, I had to have the opportunity to use them first, namely with a somewhat older theme. Basically, I leave everything here at the default, so empty.
Menu item 7: Database
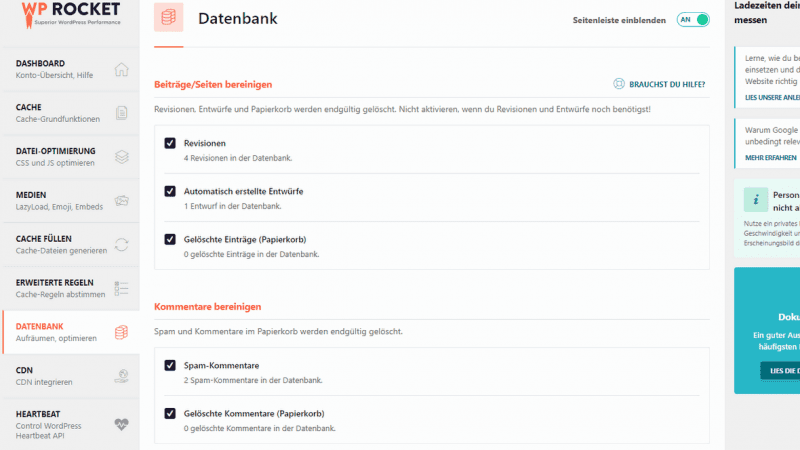
- Clean posts/pages
- Clean Comments
- Clean up transients
- Clean database
- Automatic cleanup
WordPress stores a ton of ballast in the database, like blog post revisions or spam comments. If you only have 5 posts and one page, it doesn’t matter much. If you have hundreds or even thousands of posts, it makes the database extremely bloated.
For me, all cleanups are enabled and scheduled weekly. But you should only do this if you have an automatic daily backup!
Menu item 8: CDN
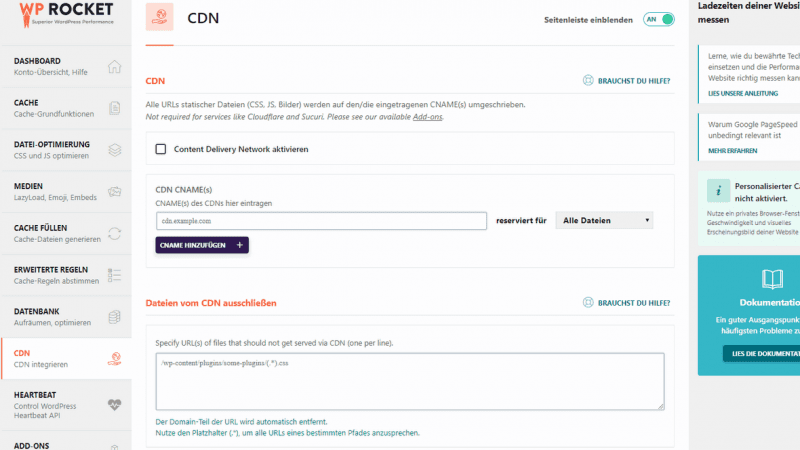
- Activate CDN
- Exclude files from CDN
When it comes to CDN – short for Content Delivery Network – opinions differ. But one thing is certain: If your website is not international, a CDN makes no sense.
My pages are all in German, so a fast hoster in Germany is perfectly sufficient for me.
But if you do need a CDN, Cloudflare might be an option for you. WP Rocket even offers an addon for Cloudflare.
Menu item 9: Heartbeat
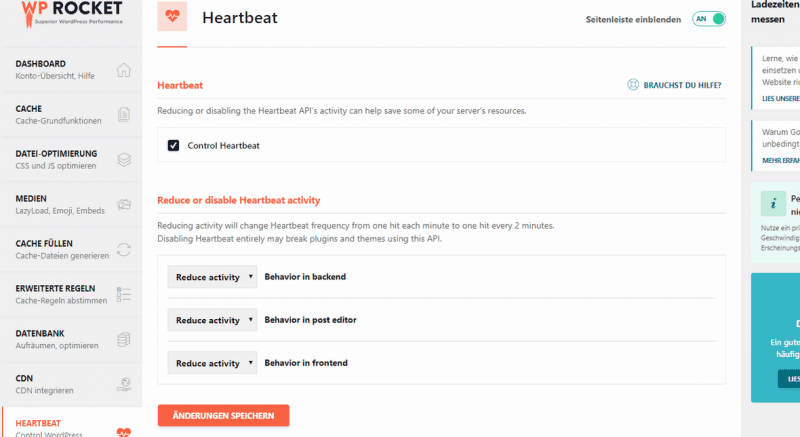
- Heartbeat
- Reduce or disable Heartbeat activity
The WordPress Heartbeat API takes care of the communication between the admin backend and the server. Or between browser and your WordPress installation. The constant Ajax requests in the background can put a lot of load on the web server.
With Control Heartbeat and the Reduce activity setting, I have minimized these requests somewhat. Disable is not recommended though.
Menu item 10: Addons
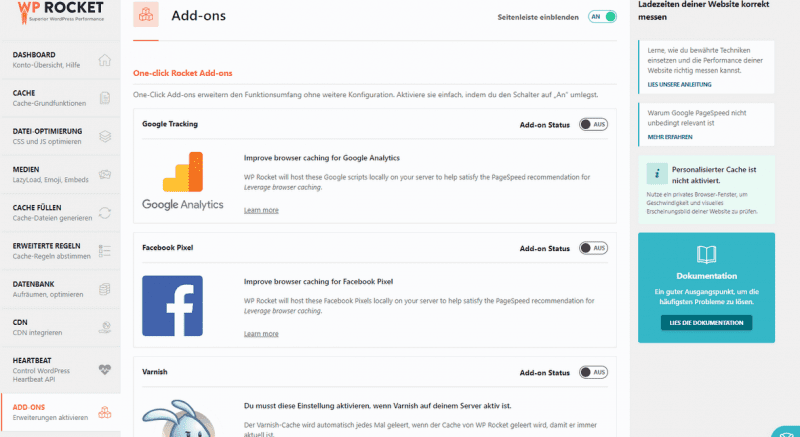
- Google Tracking(Leverage browser caching)
- Facebook Pixel
- Varnish
- Cloudflare
- Sucuri
The addons extend the plugin with very specific options.
If you use a CDN, the addons are certainly very useful. But also hosting the Google Analytics file locally is interesting, so that certain tools don’t grumble about leverage browser caching.
Menu item 11: Image Optimization
The Image Optimization menu is actually just advertising for the in-house plugin Imagify. The plugin automatically optimizes all images you upload to WP.
The image optimizer is well done, but I still preferred to use ShortPixel.
Menu item 12: Tools
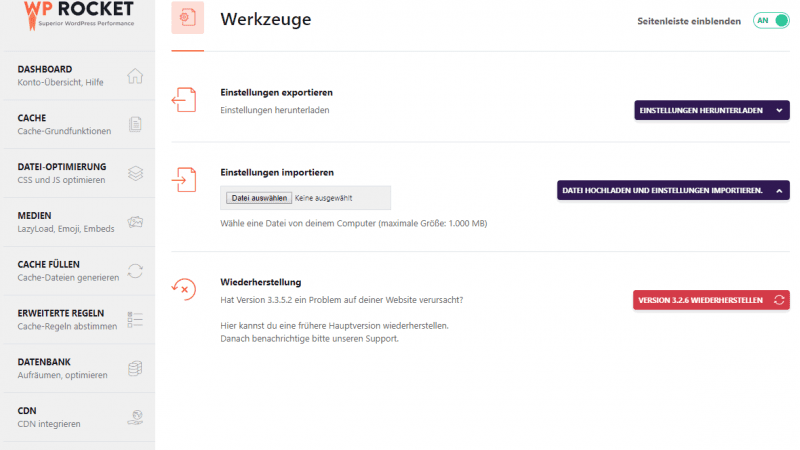
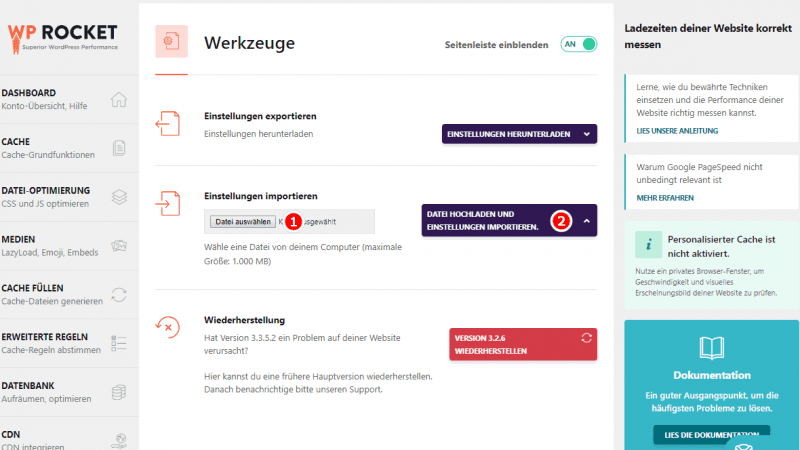
The Tools menu is relatively unspectacular. Here you can export and import your settings.
The Restore function is interesting, though. If you ever have a problem with a WP Rocket update, you can jump back to the last version.
Caching types
What many people don’t know, caching happens both at the web server and at the surfer in the browser.
Server Cache
WP Rocket’s server cache creates a static HTML page from the dynamically built WordPress site.
By default, the location within your WordPress installation is in the folder: /wp-content/cache/wp-rocket/
Without static caching, WordPress has to make countless database queries every time you call a page to plug in the finished page. This costs time and processing power. The waiting time makes visitors bounce, and we pay the web space provider for the increased processing power.
These expensive database and PHP queries are avoided by saving the static HTML page.
Sequence:
- First call by a visitor or by the fill cache function.
- The page is built dynamically and delivered slowly.
- Now the page is stored statically -> Cache
- The next visitors get the static page delivered lightning fast.
Browser Cache
The browser cache happens one hundred percent on your computer, in the browser. The WP Rocket Caching plugin adds guidelines for the browser to store static content of your page (CSS, images and JavaScript) in the local browser cache.
So your readers only need to download all design elements on their first visit. From then on, unmodified CSS files, JS files and images are loaded from disk blazing fast.
RocketCDN
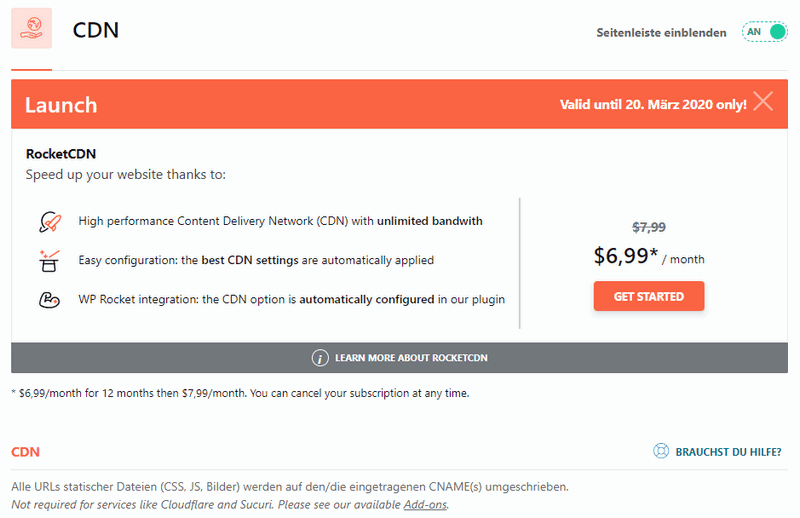
Version 3.5 introduced the in-house CDN service in the caching plugin.
The Content Delivery Network (CDN) distributes your static files to many servers that specialize in delivering them as fast as possible. These include:
- Images
- Javascript
- CSS
The service costs $6.99 / month per domain.
- Unlimited bandwidth
- All RocketCDN files are automatically distributed using SSL
- SSL traffic included
- All Global PoPs included
The advantage, with one click you have the CDN set up for your WordPress website.
WP Rocket is the #1 rated cache plugin
Whether you want to set up WP Fastest Cache or W3 Total Cache. The features are poorly accessible in the plugin and not well explained. In short, configuring this plugin is not easy and the result always remains better with WP Rocket.
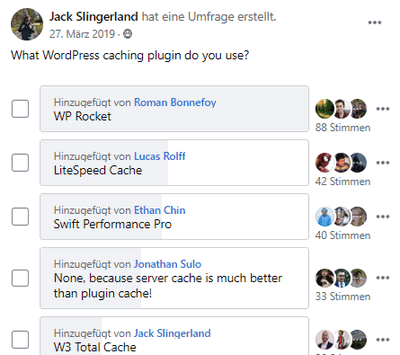
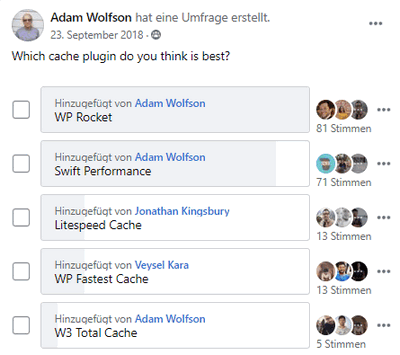
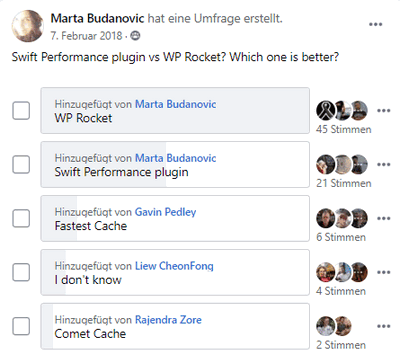
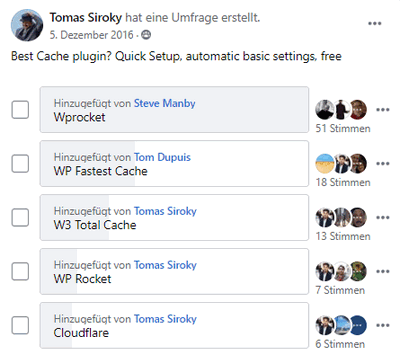
No matter where you look, WP Rocket is named as the best WordPress caching plugin. Also the winner in a wide variety of surveys.
But see for yourself:
Polls in selected Facebook groups reflect very well the popularity of a plugin.
I have linked the images directly to the polls. Since they are closed groups, you need to sign up before you can see them.
WP Rocket Coupon Code
Sorry, there is no promotion running at the moment and no WP Rocket coupon available. Sign up for the newsletter and I’ll let you know about any savings.
Best WordPress Hosting
Hosting recommendations are usually garbage.
Often extremely cheap hosting packages for $ 3 are recommended, others advertise a $ 100 VPS, because they earn the most as an affiliate thereby. In the end, we all just want the fastest possible web space for as little money as possible.
And optimized for WordPress!
What else is important? The server should be a fast backbone for your website and the support should answer as fast as possible, and preferably in your language.
You can get all this at Cloudways from $ 10,00 / month.
Conclusion
When it comes to the WordPress caching plugin WP Rocket, the rating is easy. Full five points, of course.
I’ve used all the WordPress caching plugins available on the market. Free plugins like WP Super Cache or WP Fastest Cache is very difficult to set up and do without all the optimizations in the .htaccess. For WP Rocket speaks on the one hand the ease of use and secondly the snappy result.
Take advantage of the 14 day money back guarantee and give it a try. You will never want to use another cache plugin again.
If you have any questions, or just want to discuss about the plugin, please use the comment function. I am happy about any feedback!
Updates
The guys and girls at WP Rocket always keep the Premium Cache plugin up to date. Since 2013 there have been countless updates and bug fixes. I’m especially happy to see new features and current technology being incorporated as well.
