Imagify Review: How to Optimize Images in WordPress
Imagify is a tool for optimizing images for the Internet. A so-called Image Optimizer. Can be used as SaaS in the browser or as a WordPress plugin.
Websites are becoming more and more extensive. Pictures, videos and animations often turn the surfing experience into a waiting experience. For this reason, Google has made website speed a ranking factor. Fast websites have long been preferred in search results not only by readers.
I have compared the best WordPress plugins for image optimization.
Mostly images are the largest objects of a WordPress blog. This is where it is important to start in order to keep your own page as lean as possible. To do this, you should crop or shrink the images to the maximum width of your text area before uploading. The pictures can’t be displayed any bigger anyway. In addition, the optimal image type should always be used.
- .jpg = Images and photos with many colors
- .png = graphics with few colors or when transparency is needed
- .gif = for animated images or graphics with few colors
- .webp = is often the best choice for images and graphics
If you always take JPG with 70% compression when in doubt, you are on the safe side.
I myself have been using the plugin since 2015 on my iPhone News Blog,where Imagify takes over all optimization tasks. So I don’t need to educate the copywriters there in image optimization.
WordPress optimization also includes a good caching plugin. For this I use WP Rocket from the same manufacturer on my websites.
Optimize WordPress images
Imagify.io consists of two parts.
- The service performs the actual work on the server. There, the images in the background are reduced in size and optimized.
- In the foreground is the website or a plugin, where the user assigns the tasks.
The online app
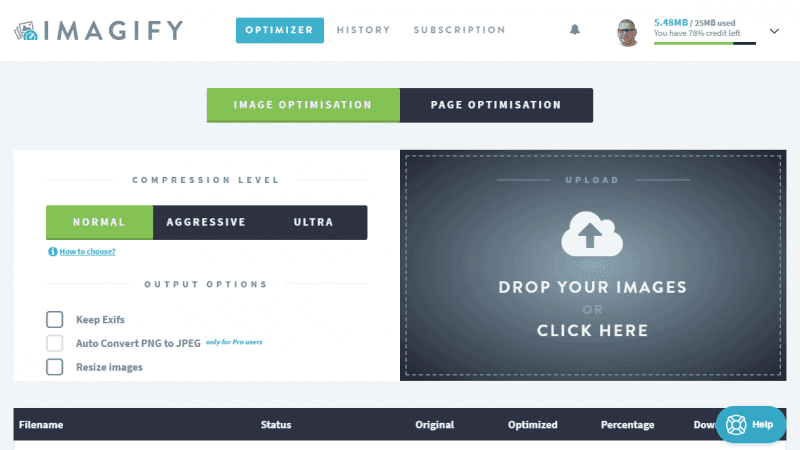
For optimizations away from WordPress, the Imagify app is available. Here you can upload images and then download the optimized version again.
First, you need to choose whether your “Compression Level” should be “Normal”, “Aggressive” or “Ultra”.
Normal is the so-called lossless optimization. So no image quality is lost, only status information is deleted to reduce the image size.
With Aggressive, Imagify tries to use the optimal degree of compression that achieves the smallest possible image size without the image noticeably losing quality.
You should really only choose Ultra if you know what you’re doing and if you pay the utmost attention to speed.
You can also resize the image. Directly in pixels or in percent.
After that, just drag your image to the right upload part and Imagify will do its job.
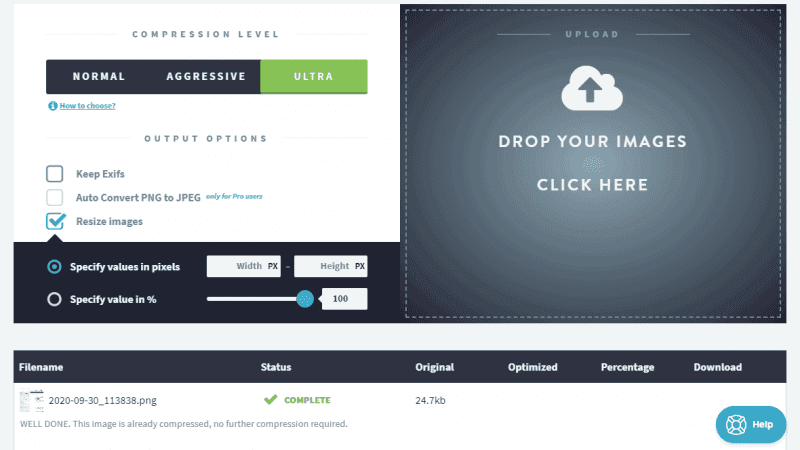
The lower part of the app will then show how many bytes your image could be optimized. The picture is now ready for download.
The WordPress plugin
Most of us will mainly want to use the WordPress plugin.
First, you need to install the plugin in the WordPress admin. Learn more: How do I install a WordPress plugin?
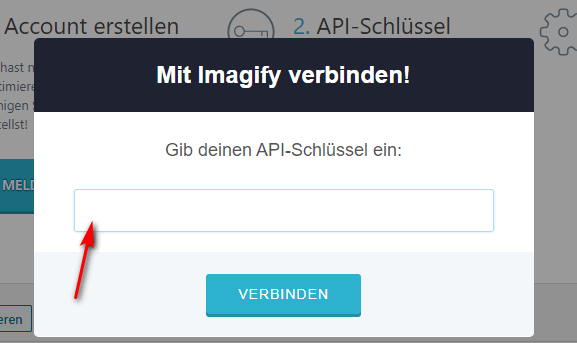
After that, you have to copy your access token from the Imagify page and paste it into the plugin settings. You will be automatically prompted to do so after activating the plugin.
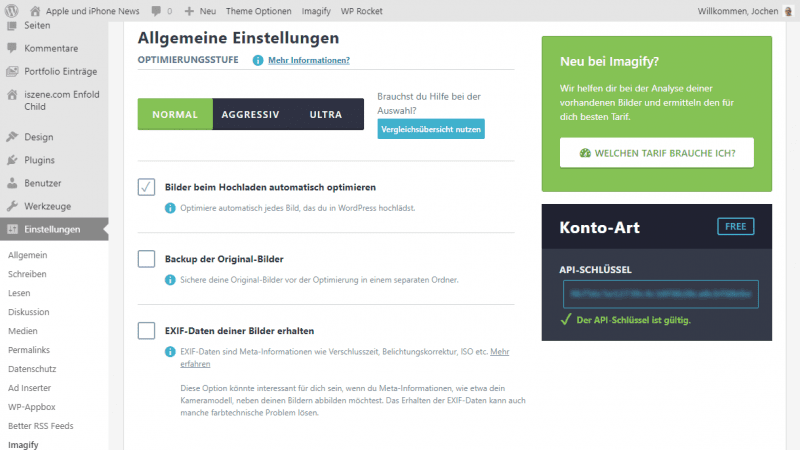
Before you actively use the plugin, you should take a closer look at the settings.
Aggressive could be used if you do not optimize or adjust the social media images on your computer beforehand.
But if you take the coarser steps already on the PC, I would recommend Normal, so your optimizations are preserved and only the finishing touches are made.
With “Automatically optimize images when uploading”, all uploaded images are automatically optimized according to your specifications. The option “Backup of the original images” allows you to keep the original images as a backup. If you have enough space on your web space, that’s a good option.
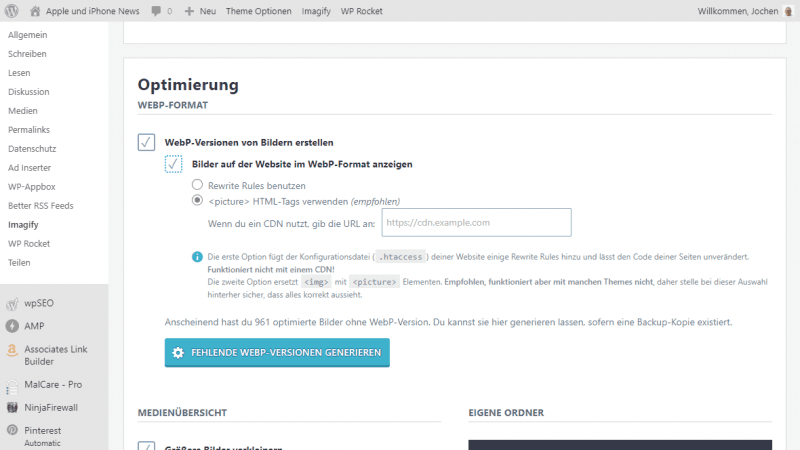
The webp image format compresses images more effectively than the older jpg and png formats. Unfortunately, not all devices can display this format.
Imagify can generate a webp version for you and play it out for compatible devices. If you have enough credits, I recommend enabling this option.
But Imagify can do even more!
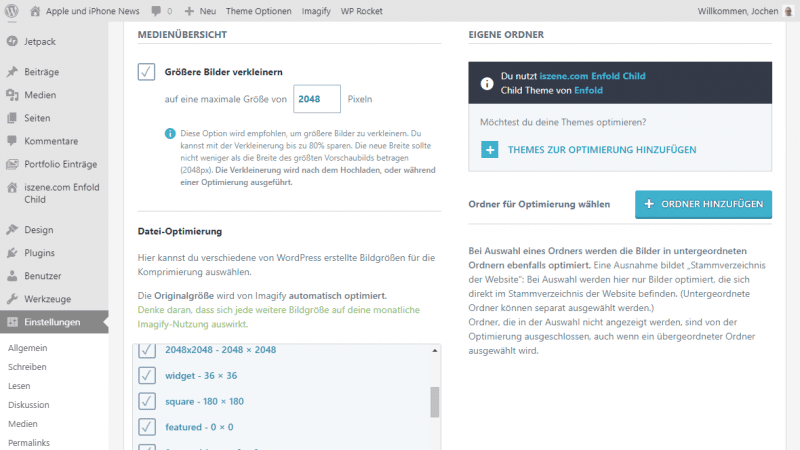
Very interesting is the option “Shrink larger images”. Here you could specify the width of your text area, after which the images are automatically scaled.
If you have several editors on the blog who often forget to adjust the image size, you have solved this problem.
Finally, you can choose which of the image sizes created by WP should be optimized with Imagify.
If you have images outside of WordPress, or upload images using FTP, you can also optimize those images with Add Folder.
Then click on “Save changes”!
You have a new column in the media overview. The content shows you what the status of Imagify’s optimization is. If an image was already optimally compressed before, you can also see it here.
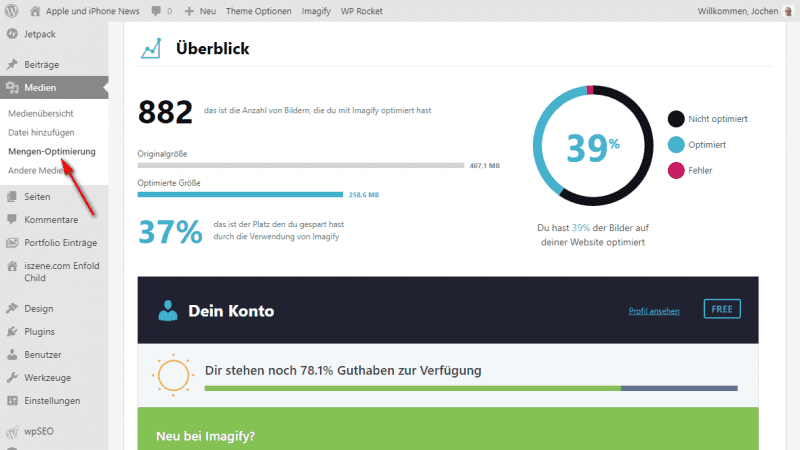
If you want to optimize all your existing images afterwards, you can do so with the menu entry “Quantity optimization”. With one click, the plugin processes all images. Of course, this can take some time and also exceed your credit. So be careful!
Overall, a very successful plugin.
How good is Imagify?

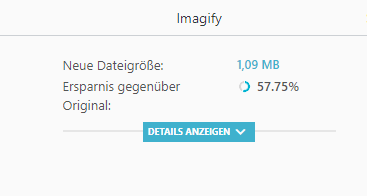
I have compressed as a test, the same JPG image, once normal and once aggressive. At Normal, only 3.88% could be saved. With Aggressive, the JPG quality has been turned down to 59%, which corresponds to a saving of 44.12%.
I converted the same image into a PNG image on my computer and had it compressed by Imagify. With the aggressive compression method, many bytes could also be saved here. To be precise, even 67.19%.
That’s huge. But how is this possible? Quite simply, even with PNG different quality levels can be used. Imagify simply stores the 24-bit PNG with only 256 indexed colors, which achieves this high compression level.
This type of compression works very well for graphics or screenshots. With photos, the color overflows become very bad, which usually makes the photos very ugly.
How much does Imagify cost?
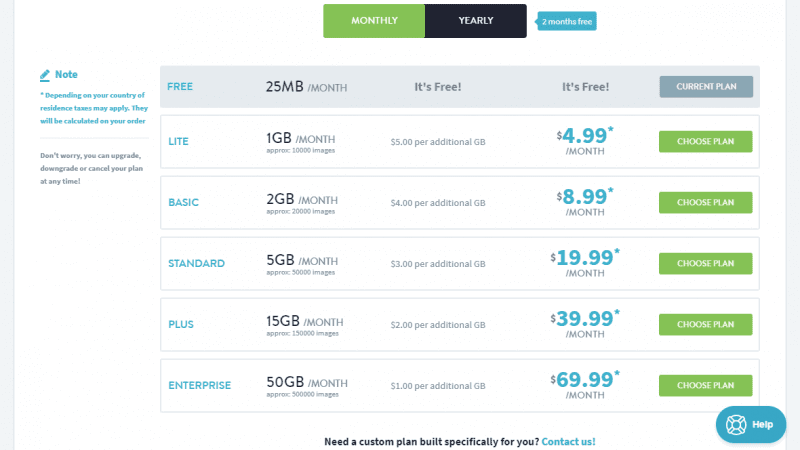
Basically, the image optimization service and the WordPress plugin Imagify are free.
You are limited only by the number and the megabytes of images consumed that you use with each optimization. The free account includes 25 MB per month. Have you e.g. 10 images with 250 KB each optimized, you have used up your quota for one month.
For private bloggers, this can be enough, as most images for the web have significantly less than 250 KB file size. And a private blogger usually writes only one new blog post per week.
With the Micro Plan, for $4.99 per month, you get a quota of 1 GB. That will be enough for most blogs. It always depends on how many image sizes are generated by your theme and whether you want to optimize them all. The other plans are then more intended for professional bloggers and agencies.
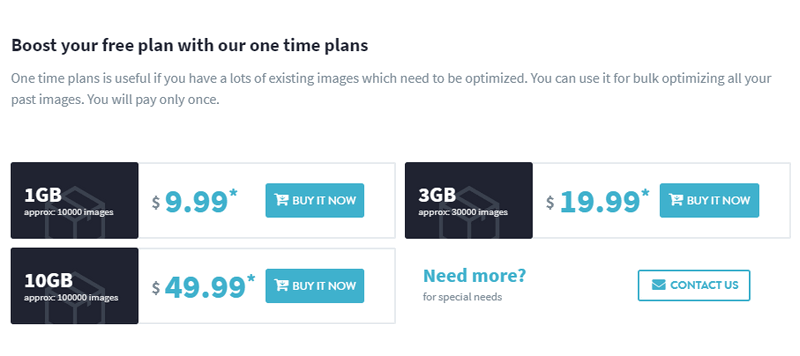
If you rarely don’t get by with the 25 MB of the free plan, you can also buy additional GB once with a pack.
Conclusion
The free account could be enough for many bloggers. Included are 25 MB per month. So you can optimize a total of 25 megabytes of images. With the app or plugin.
The monthly plans with 1 GB to 50 GB are priced interestingly.
Read my also post about free images.
Read more about Imagify and WordPress and WordPress performance in general.





I’ve been looking for ways to improve my website’s loading speed, and Imagify seems like a great option. The step-by-step guide you provided makes it easy to understand how to get started. I’ll definitely give it a try!
Great review! I love how you broke down the features of Imagify and the step-by-step optimization process. It really helps to visualize how to implement it on my WordPress site. Can’t wait to try it out!
thanks