Convert Pro - WordPress Popup Plugin
Convert Pro is a comprehensive WordPress plugin for popups, forms, opt-ins and lead generation. Especially the drag-and-drop form editor stands out. With it, you have complete freedom when creating forms. A large number of ready-made templates makes it easy to get started.
I’ve been using the plugin for several years here on bloggerpilot.com and other projects.
A WordPress plugin to convert theme all!
With this Convert Pro guide, you’ll be able to create any forms, popups and fly-ins. Also, you will learn how to connect external email providers with WordPress email opt-in and lead generation plugin.
Form, Call-to-action or Design. All these names can be found in the plugin. What is always meant is a Convert Pro form, which can be created in many different variations. For example, as an inline form, popup or as a widget.
What is Convert Pro?
Before we get into the nitty gritty, I want to clarify what we’re talking about here in the first place.
Convert Pro is a WordPress plugin for creating forms and popups for generating leads, that is, building an email list for a newsletter. But you can also use the opt-in forms for other purposes, like telling people about a new product.
You can even create contact forms with it.
What is Convert Pro not?
- An online SaaS service
- An email sending service
- You can’t send mails with it!
How is Convert Pro available?
Convert Pro can be renewed annually if you want updates, or purchased as a lifetime license.
There is also an option to purchase the plugin as a Growth Bundle, which includes the Astra theme and four other premium plugins:
- WP Portfolio Plugin
- Ultimate Addons for Beaver Builder
- Ultimate Addons for Elementor
- Schema Pro

On top of that, there is access to SkillJet Academy – a course platform for WordPress and marketing. However, all courses are in English.
COST – annual
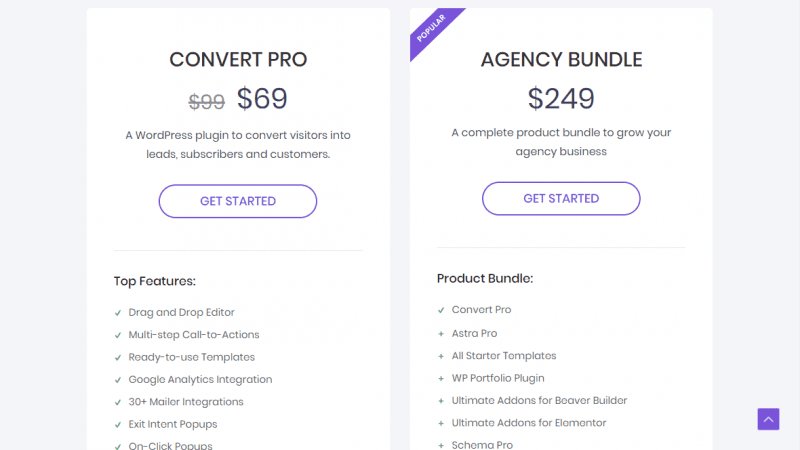
You buy Convert Pro once and can use it as long as you want on unlimited websites.
However, after one year you will no longer receive support and updates.
| Convert Pro | Growth Bundle | |
|---|---|---|
| Websites | unlimited | unlimited |
| Updates | 1 year | 1 year |
| Support | 1 year | 1 year |
| Scope | Convert Pro | Convert Pro + Astra Pro + WP Portfolio Plugin + Ultimate Addons for Beaver Builder + Ultimate Addons for Elementor + Schema Pro + SkillJet Academy |
| Price | $ 87,00 | $187,00 |
Lifetime
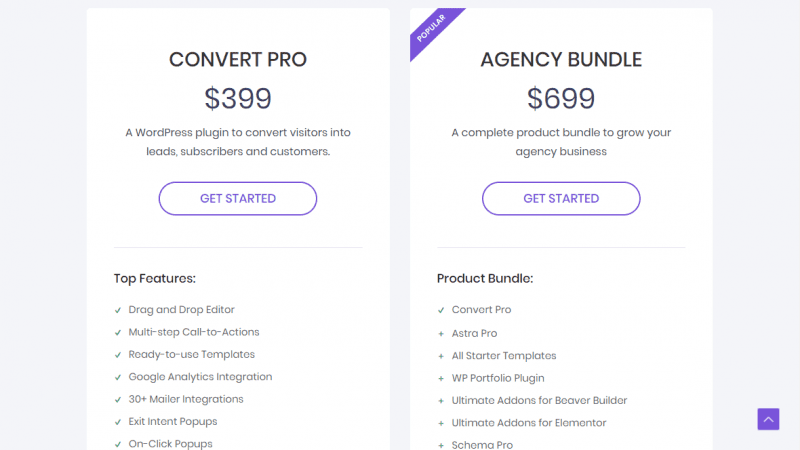
However, if you want to use the popup plugin for a longer time, it is worth buying a Lifetime license.
| Convert Pro Lifetime | Growth Bundle Lifetime | |
|---|---|---|
| Websites | unlimited | unlimited |
| Updates | unlimited | unlimited |
| Support | unlimited | unlimited |
| Scope | Convert Pro | Convert Pro + Astra Pro + WP Portfolio Plugin + Ultimate Addons for Beaver Builder + Ultimate Addons for Elementor + Schema Pro + SkillJet Academy |
| Price | $ 399,00 | $ 699,00 |
You pay $699 once – that’s about 620 Euro, depending on the current dollar exchange rate – and get unlimited access to the products.
Convert Pro Dashboard
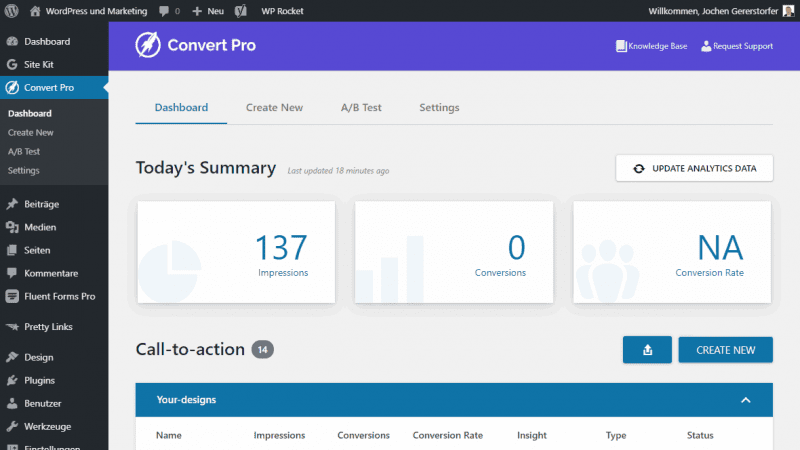
Convert Pro is a powerful tool with many professional features like A/B testing and Google Analytics tracking. Many features need to be enabled in the settings first. For demonstration purposes, they are all already enabled here.
The dashboard is your administration center for the plugin. From here you can access all functions.
Of particular interest is the Today’s Summary section, which highlights the three most important pieces of information in a big way.
- Impressions shows the daily impressions from all lead forms.
- Conversions shows all achieved goals. For example, the click on a button or a submitted form.
- Conversion Rate is the quotient of the two previous values.
This overview shows at a glance what is currently happening on your site. Of course, only with regard to your opt-in forms. Just above is the UPDATE ANALYTICS DATA button. Both will only work if you have activated and configured the Analytics addon. More about that later.
Under Call-to-Action you will find all your already created forms, often called Designs in the plugin.
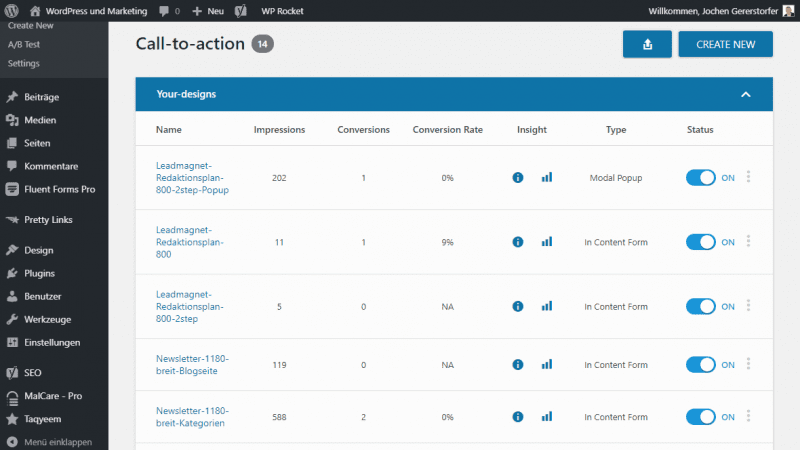
Next to the form name you can find the insertions, conversions and the conversion rate.
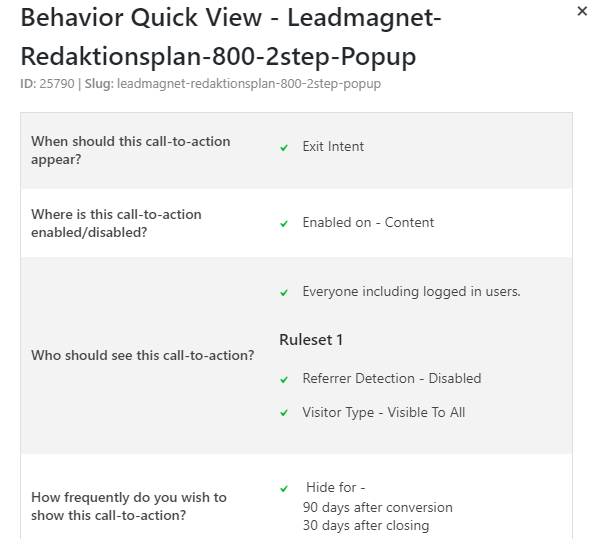
The Insights column contains two icons.
Clicking on the first icon opens the Modal Behavior Quick View with all the settings for the design. So the technical data like triggers and rules.
The Analytics icon shows the statistics again in detail as a graph.
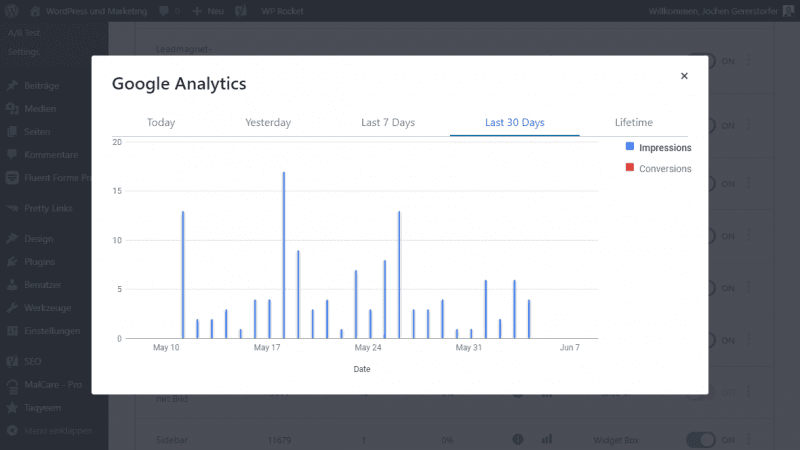
You can choose to display the data for today, yesterday, the last 7 days, the last 30 days or for the entire recording period. Blue are the insertions, red the conversions. This way you can quickly see the statistics for each form.
The next column shows the type of form. It indicates whether it is a popup or an in content form, for example.
Right next to it is the toggle button that lets you enable and disable each form.
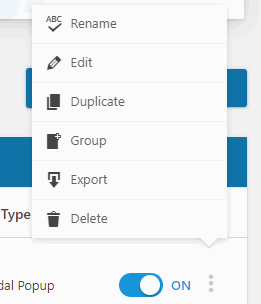
The button with the three vertically stacked dots takes you to a popup menu with the following options:
- Rename
- Edit
- Duplicate
- Group
- Export
- Delete
With Group you can organize and sort your forms if you have created a lot of them.
Very cool is the export function. Clicking on it starts the download of a ZIP archive, which contains all data and images. You can save the ZIP file as a backup, or import it into another installation.
The Convert Pro Form Designer
The form designer has three main menus:
- Design: Contains all the visual aspects of the form
- Configure: For defining rules and targeting
- Connect: Where to send the data
The vertical menu contains all the elements for the main menu.
Design
First we look at the Design menu…
Elements
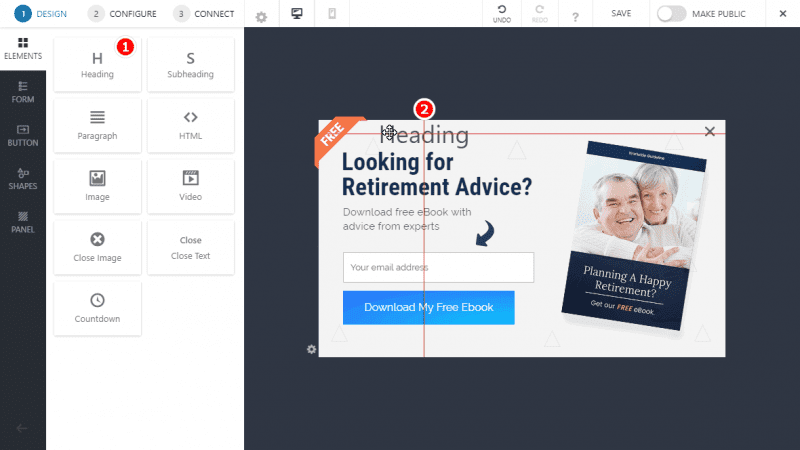
ELEMENTS comes with mostly HTML elements that you can add to your form.
- Heading
- Subheading
- Paragraph
- HTML
- Image
- Video
- Close Image
- Close Text
- Countdown
If you want to add one of the elements, simply drag it to the desired location. The panel with all available settings will open immediately on the left side.
Form
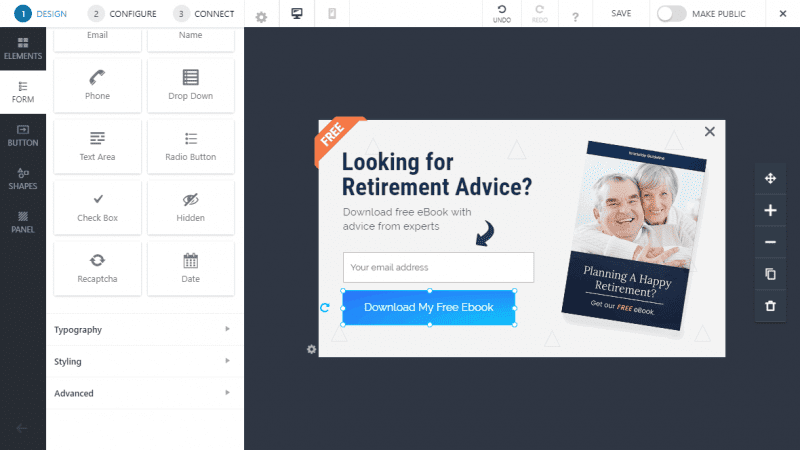
In the FORM section you can not only add new form fields, but also customize the styling, typography and advanced effects like Radius and Box Shadow. However, only for the form fields.
Possible form fields:
- Name
- Phone
- DropDowns
- Text field
- Radio Button
- Check Box
- Hidden
- Recaptcha
- Date
Button
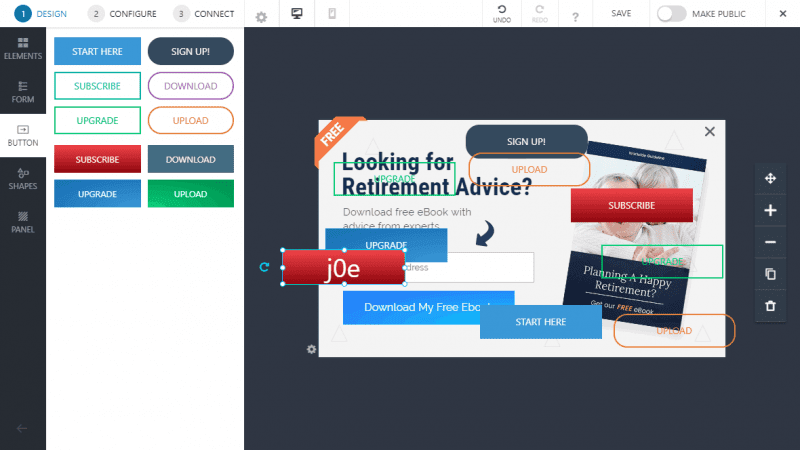
Maybe I overdid it a bit with the buttons on my form. Anyway, you can add submit buttons here and customize as you like.
The 10 predefined designs are only possible templates. You can further modify each button according to your preferences.
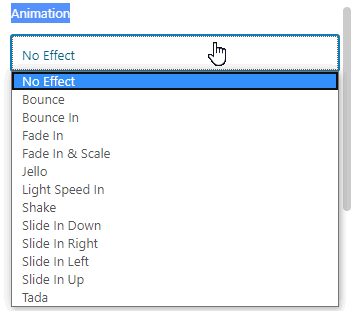
You can even add animations like bounce, face in, shake or tada.
I have never seen such extensive possibilities in any other form builder.
You can also add multiple buttons and give each button a different function. So it doesn’t have to be a form for entering email addresses. A slide-in with a hint about a new product or a link can be very effective.
Shapes
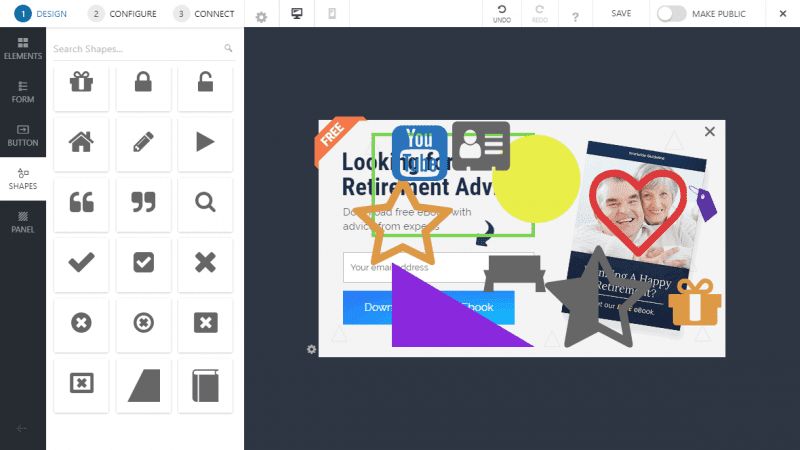
With the shapes you can create all sorts of things. Besides simple shapes there are also hundreds of icons and logos.
Insert, change, combine and create completely new constructs. All shapes are vector graphics and can therefore be customized as you like.
These shapes are also used to create the pre-made templates.
You can then assign an action and an animation to each individual shape. But be careful not to overdo it with this.
Panel
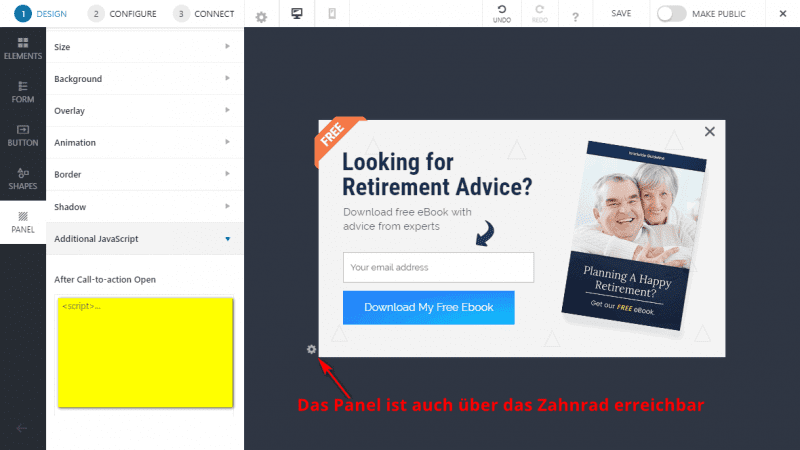
The Panel menu takes care of the form itself. Here you can set the maximum size, the background or even an animation of the whole form as soon as it enters the field of view.
Sometimes the Additional JavaScript field is also very useful. For example, you can make changes to the data that is sent to your ESP (Email Service Provider). Or you can use it to add a tracking script.
Configure
The Configure section is about the delivery of your opt-in form.
Launch
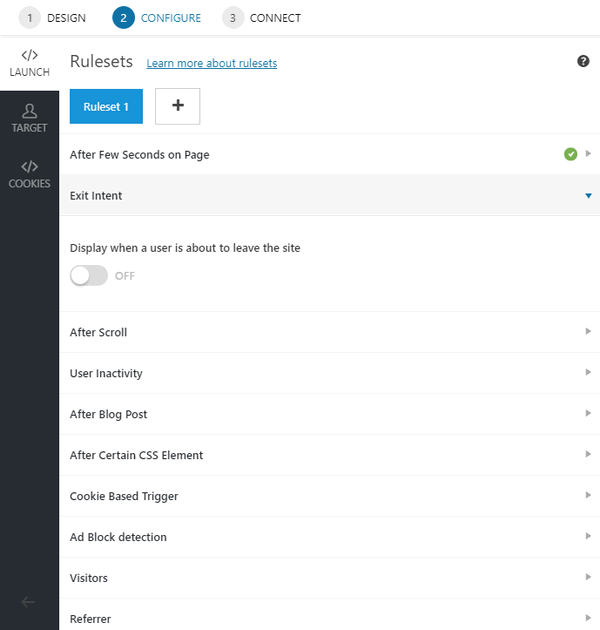
In Launch you can create several rulesets, in which you determine the delivery of your form according to various triggers.
Available triggers:
- After Few Seconds on Page
- Exit Intent
- After Scroll
- User Inactivity
- After Blog Post
- After Certain CSS Element
- Cookie Based Trigger
- Ad Block Detection
- Visitors
- Referrer
- Schedule
- On Click
Target
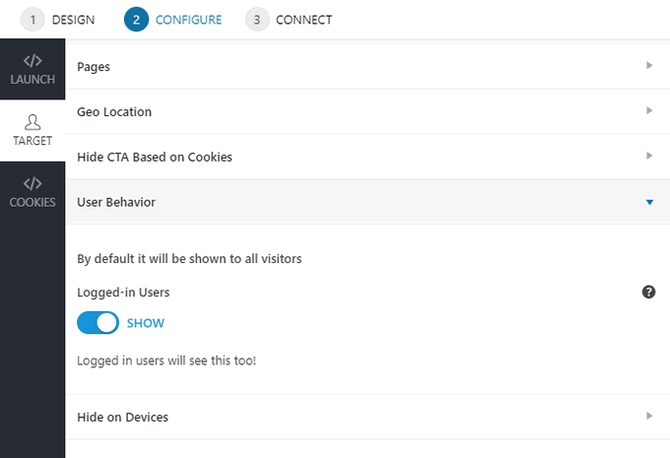
Targeting determines on which pages and for which users the popup is delivered.
Options:
- Pages
- Geo Location
- Display Rules
- Hide CTA Based on Cookies
- User Behavior
- Hide on Devices
Cookies
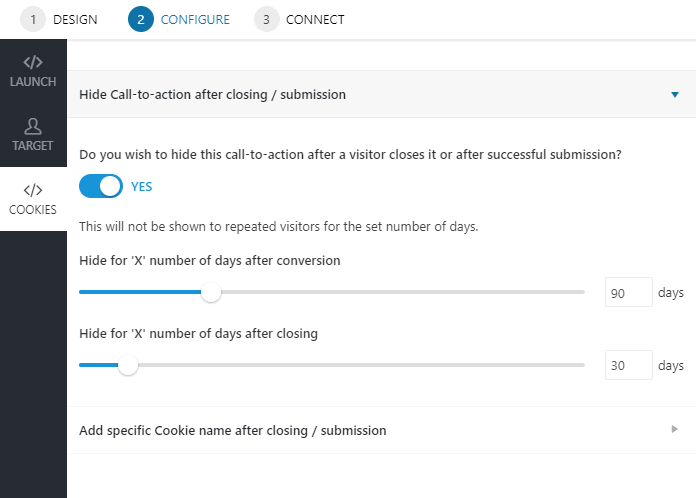
With cookies you can target individual visitors.
For example: The visitor has seen the popup and gets a cookie. Now you can determine in how many days he should receive the popup again.
A powerful tool to not annoy your visitors too much with your opt-ins.
Connect
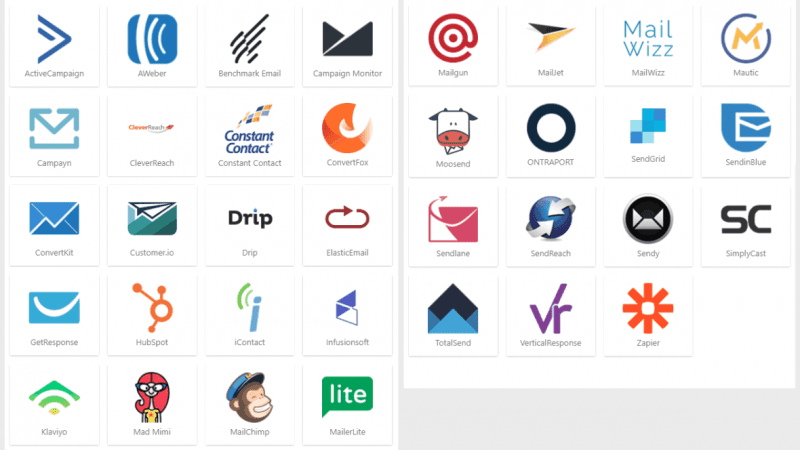
In the Connect menu you can define where your new newsletter subscribers should be stored. This is called integration, which means which ESP (Email Service Provider) you can integrate with Convert Pro.
The received data will be forwarded to the ESP via the integration and stored there. At the ESP you can then start campaigns and send emails to your subscribers.
Available email service providers:
- ActiveCampaign
- AWeber
- Benchmark Email
- Campaign Monitor
- Campayn
- CleverReach
- Constant Contact
- Gist (ConvertFox)
- ConvertKit
- Customer.io
- Drip
- ElasticEmail
- FluentCRM
- GetResponse
- HubSpot
- iContact
- Infusionsoft
- Klaviyo
- Mad Mini
- MailChimp
- MailerLite
- Mailgun
- MailJet
- MeilWizz
- Mautic
- Mossend
- Ontraport
- SendGrid
- Brevo
- Sendlane
- SendReach
- Sendy
- SimplyCast
- TotalSend
- VerticalResponse
- Zapier
Currently there are 36 integrations.
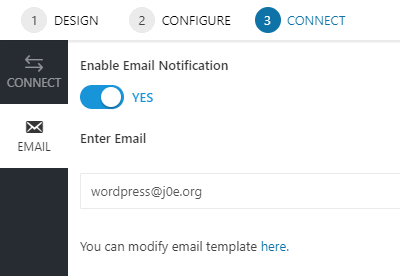
In the Email menu, you can have a notification sent to you for each submitted form.
You can also use this function to create a contact form from a Convert Pro form.
Advanced
The small gear wheel takes you to the advanced settings. With it you can activate the following three functions:
- Multi Step
- Mobile Editor
- Grid
Multi Step
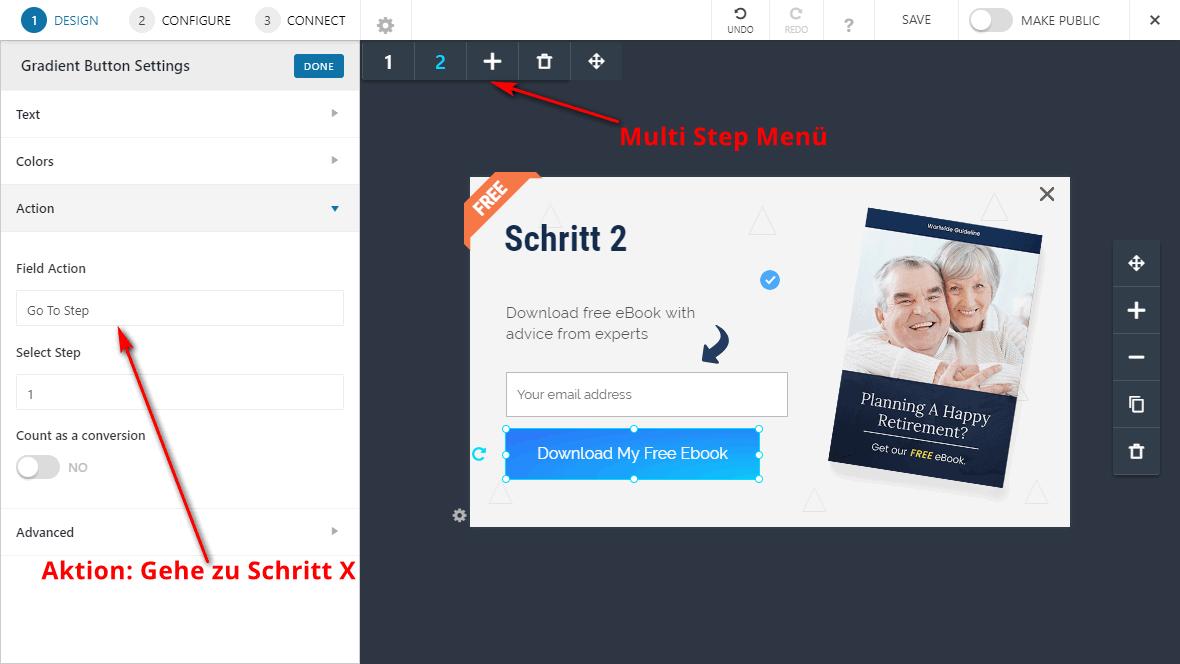
Multi-step forms offer a very elegant way to request multiple pieces of information. So you can ask for the name in the first step and the email address in the second.
Another possible use for multi-step forms is segmenting your subscribers. For example, the question “Do you like dogs or cats”. Depending on the visitor’s answer, they will be moved to another campaign.
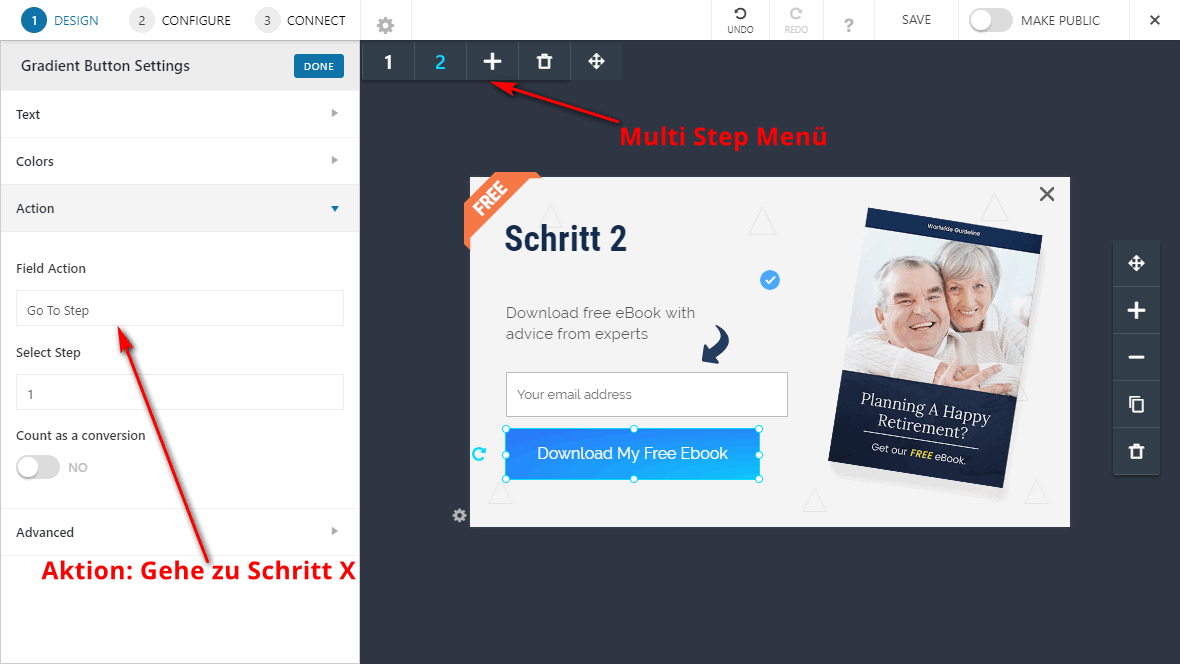
As soon as you activate Multi Step, the form editor gets a new, small floating menu. First you will find the number 1, a plus sign, a dung bucket icon and a button to move the menu. As soon as you click on the +, the editor copies your existing form and creates the second step.
In the Action menu, you can assign the Go To Step action to each button or link to jump to.
This way you can also replace the expensive Typeform service.
Mobile Editor
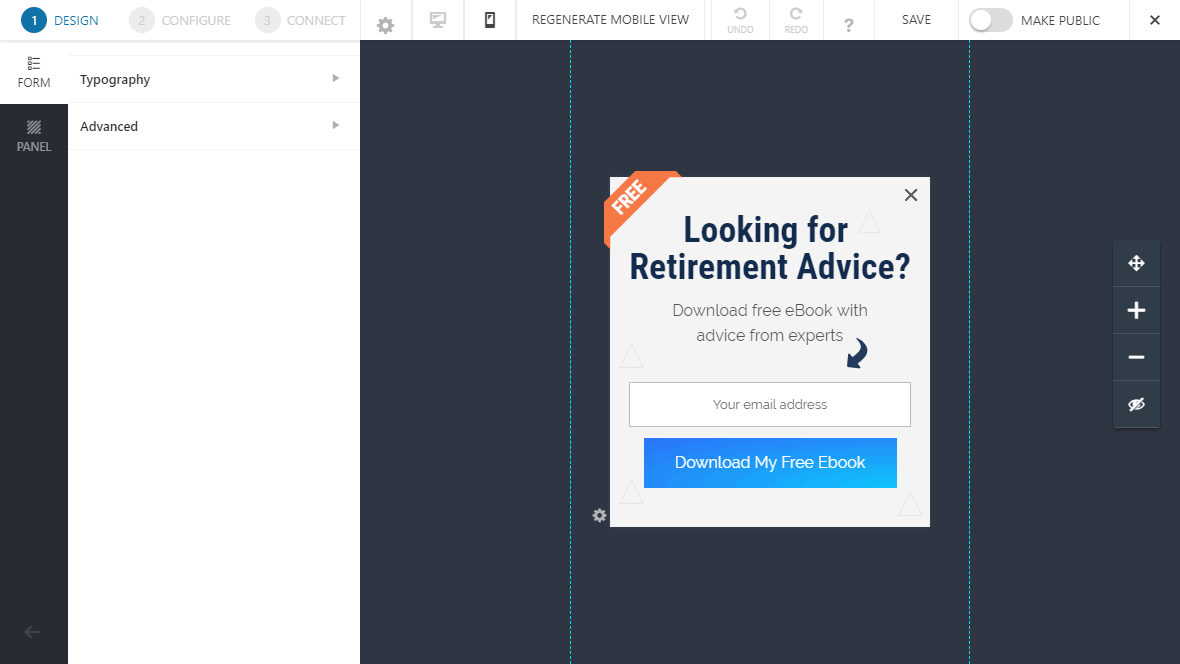
Of course, your forms need to work flawlessly on mobile devices like tablets and smartphones. Convert Pro has taken care of this by means of two functions.
As long as the Mobile Editor is deactivated, no separate mobile version is delivered. However, the form then adjusts its size.
By activating the mobile editor, a customized version is created immediately. You can then modify it even further.
If you mess up the smartphone version, you can use the REGENERATE MOBILE VIEW button to restore the original look.
Save and Make Public
On the top right are the Undo and Redo icons. With these you can go back or forward at any time.
With SAVE you should save your changes regularly. When you are done, click on the MAKE PUBLIC button and the popup or form will appear on your page.
The close button X will take you back to the Convert Pro dashboard.
Create forms
In several places in the plugin, you will find a button labeled CREATE NEW. This is the start of every new Convert Pro form.
In the next step, you have to choose which form type you want to use. Currently, there are eight different types to choose from:
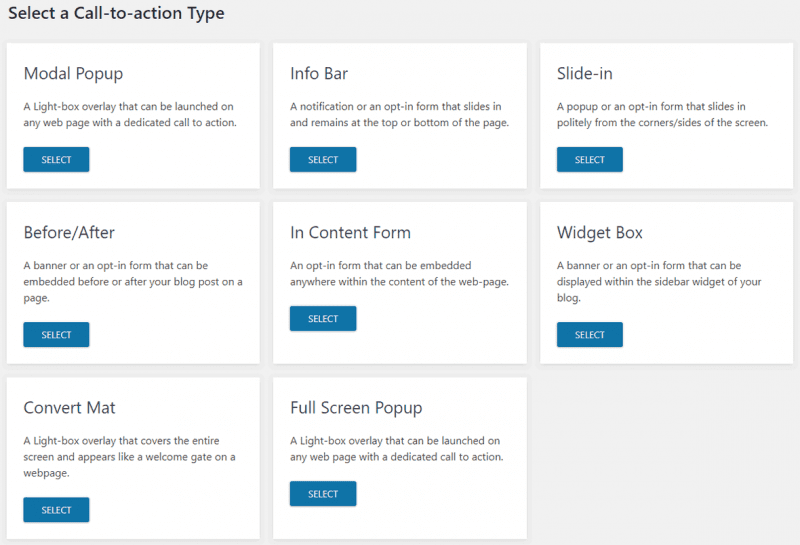
- Modal Popup
- Info Bar
- Slide-in
- Before / After
- In Content Form
- Widget Box
- Convert Mat
- Full Screen Popup
Thus, the creation of a new form always starts with the selection of a form type.
Modal Popup
The modal popup is the well-known lightbox overlay in the form of a small window/frame containing an offer or opt-in form.
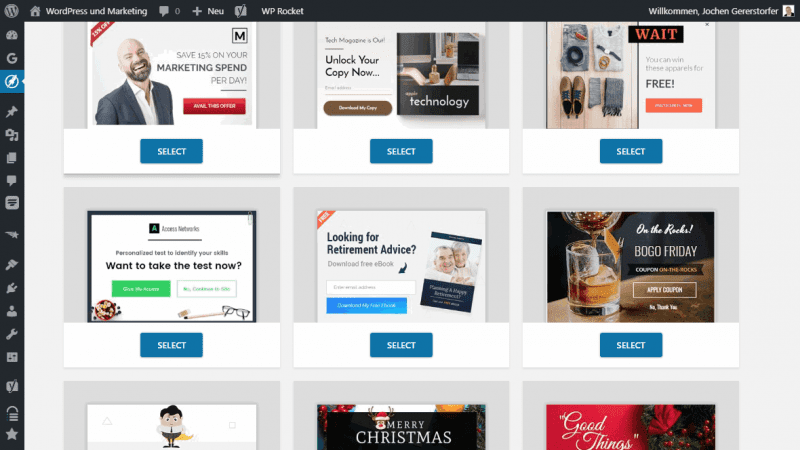
For the popups, most templates are available. Use SELECT to select a template that most closely matches your goal. If you want to start without a template, select Blank Template.
At the bottom there is a REFRESH CLOUD TEMPLATES button. With this button, you can download new templates or update the current ones. What a service!
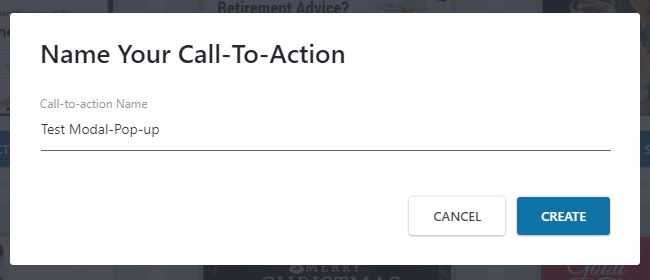
After your selection, a modal called Name Your Call-To-Action will open. Enter a desired name and continue with CREATE.
Now the actual form editor opens. A great part with drag-and-drop, WYSIWYG and whatever else you dreamed of. And this is how the editor looks like:
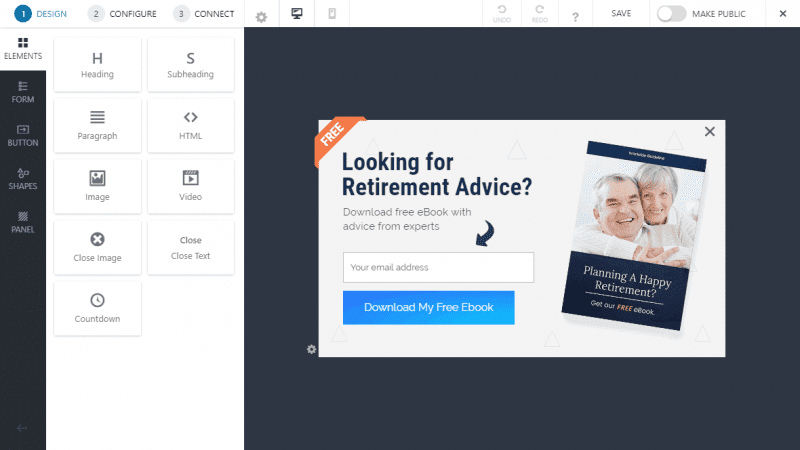
I have already described the form editor in detail above.
Info Bar
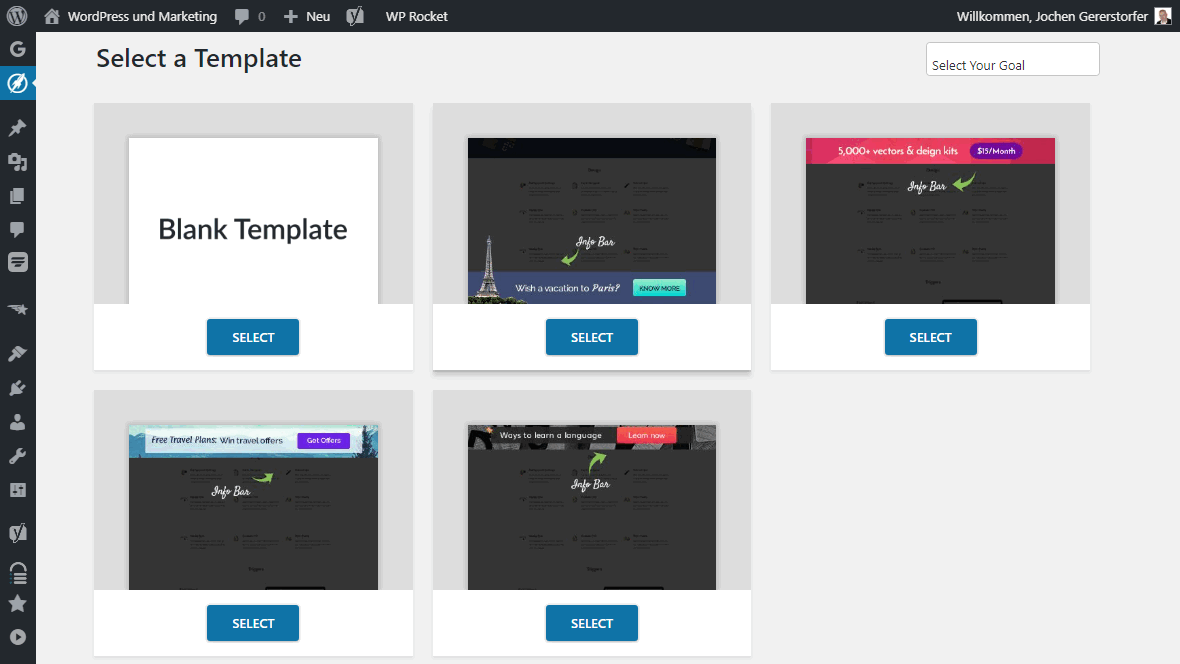
You have probably seen the Info Bar on countless pages. It is the narrow bar at the top of a website. Whether with an email field to enter, but usually only with a hint and a button with the link to a new offer.
Slide-in
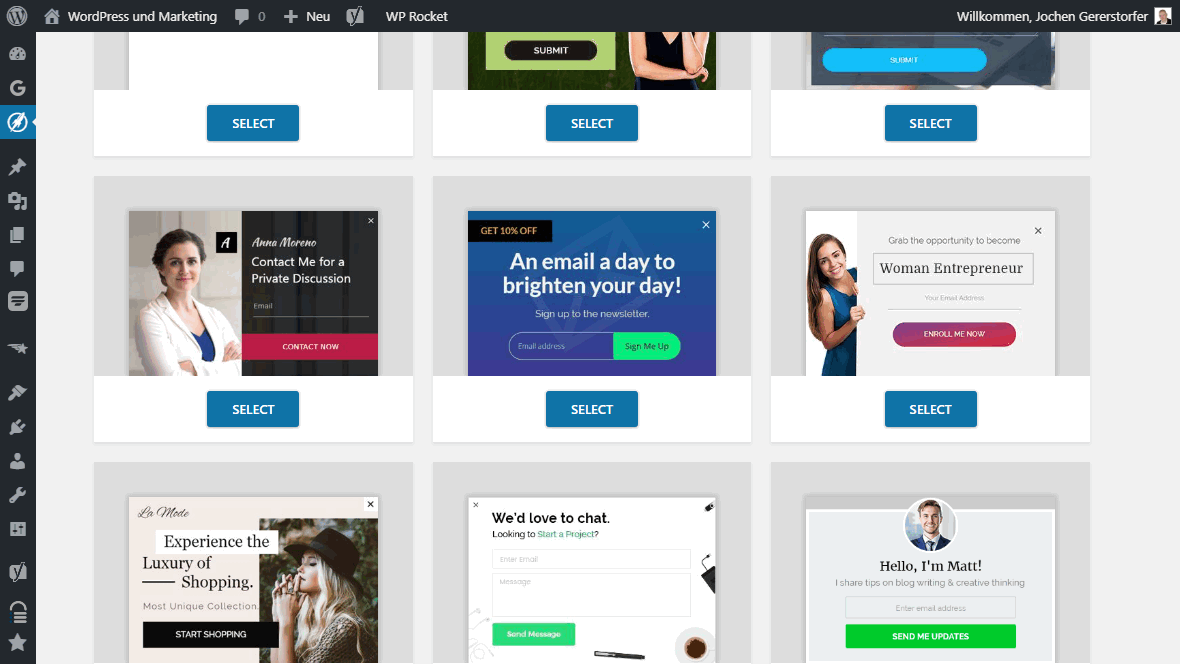
This type of form is one of the most effective of all. I would recommend you start with it.
A slide-in, often called a fly-in or callout, moves from the bottom area into the window of your website. Since most of the content still remains visible, your visitors won’t feel too bothered by it. You can also have the slide-ins centered, both horizontally and vertically.
You can also use a toggle to show and hide them.
Before / After
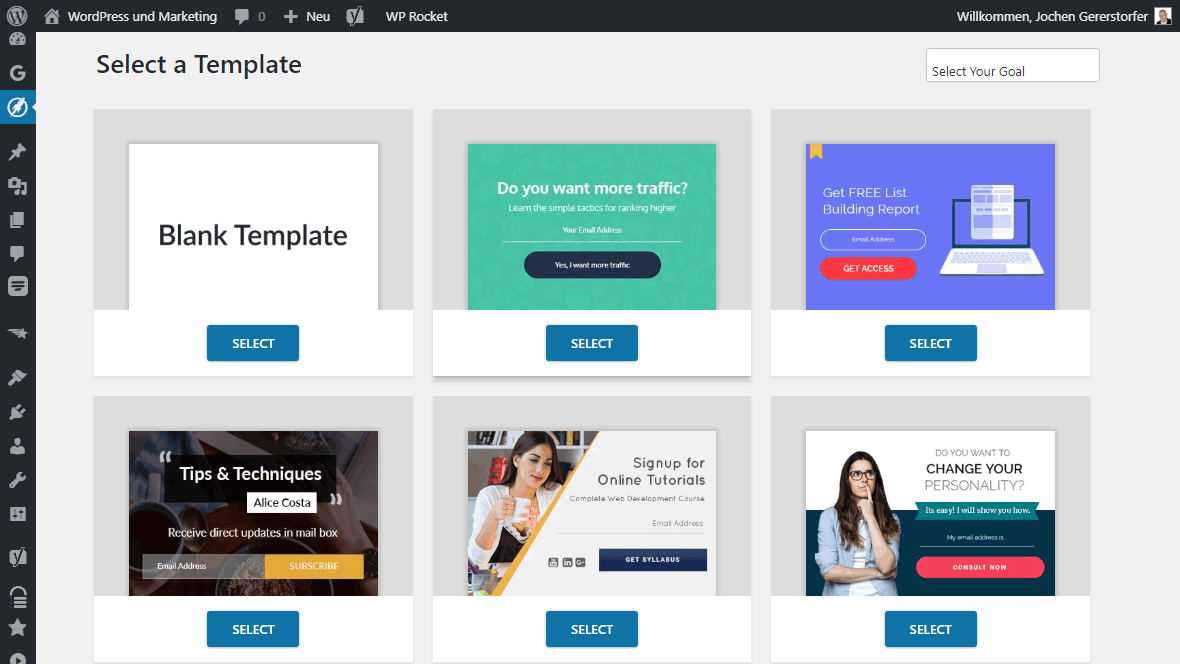
Before and After are simply embedded forms that are automatically inserted either before or after the content.
In Content Form
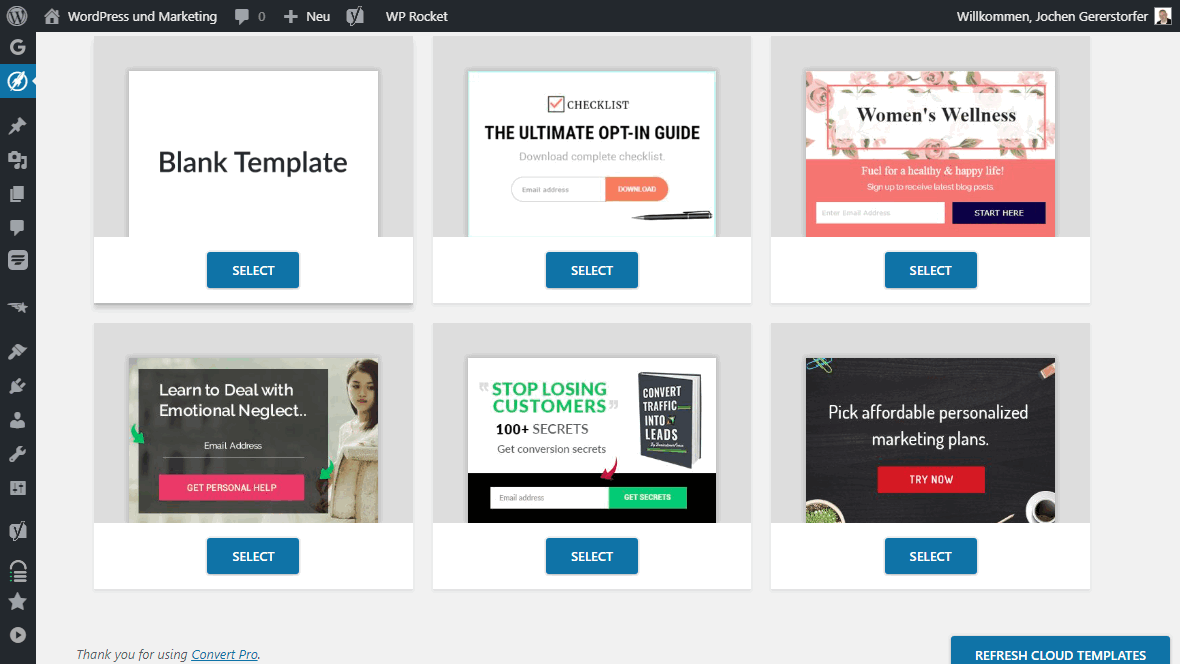
Embedded Opt-in Forms. I like to use fixed embedded forms because they hardly bother the visitor. If he is interested in the content, he signs up, otherwise he just ignores it and scrolls over it.
Widget Box
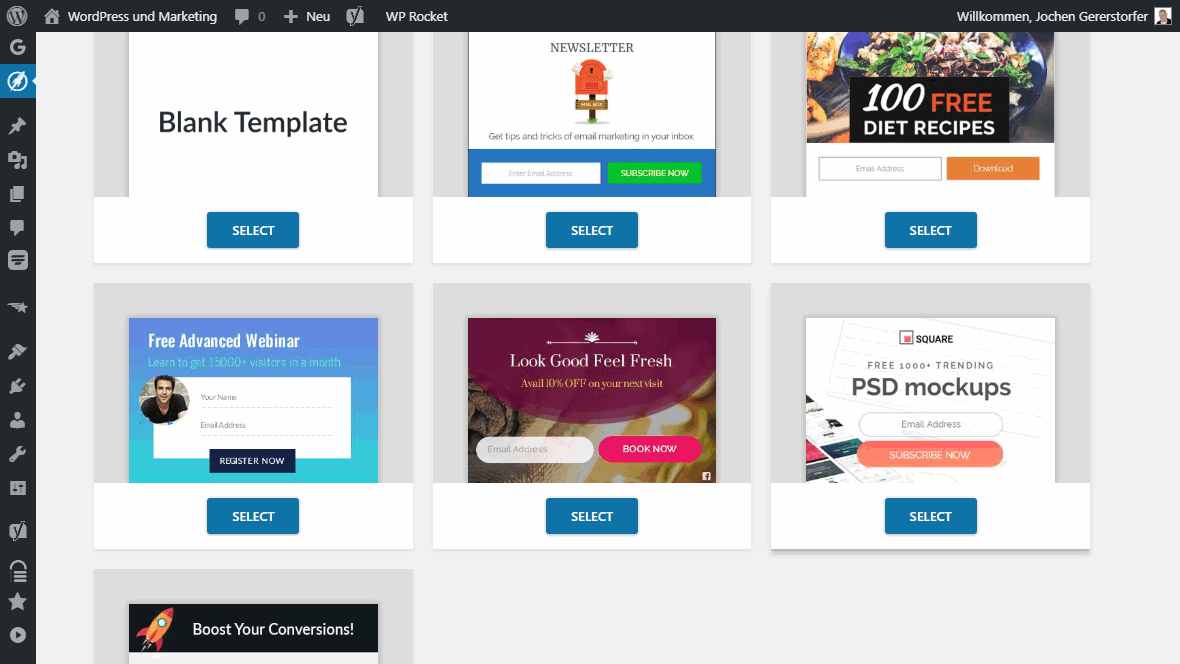
A banner or opt-in form that you can display in the sidebar or other widget areas.
Convert Mat
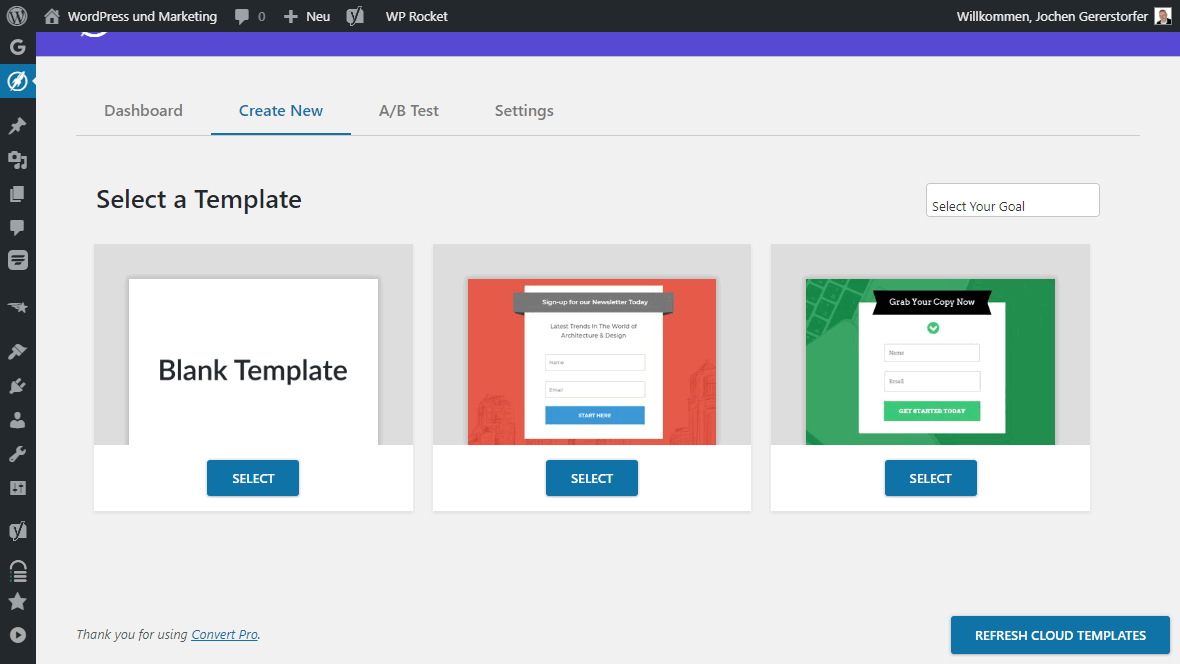
The convert mat covers the entire screen. Other providers also call this display form Welcome Mat, which we would call a doormat. So it’s a full-screen popup, but the popup form itself is no bigger than a traditional popup. It doesn’t get much more intrusive, but at the same time more effective. That’s why I recommend you to use this type of popup as an exit intent popup, i.e. for users who are about to leave your site anyway.
Unfortunately, there are only two templates for the Convert Mat at the moment.
Full Screen Popup
The Full Screen Pop -up is similar to the Convert Mat, except that here the form really goes over the whole screen. Perfect for Coming Soon pages or messages that you really don’t want anyone to miss.
A/B Testing
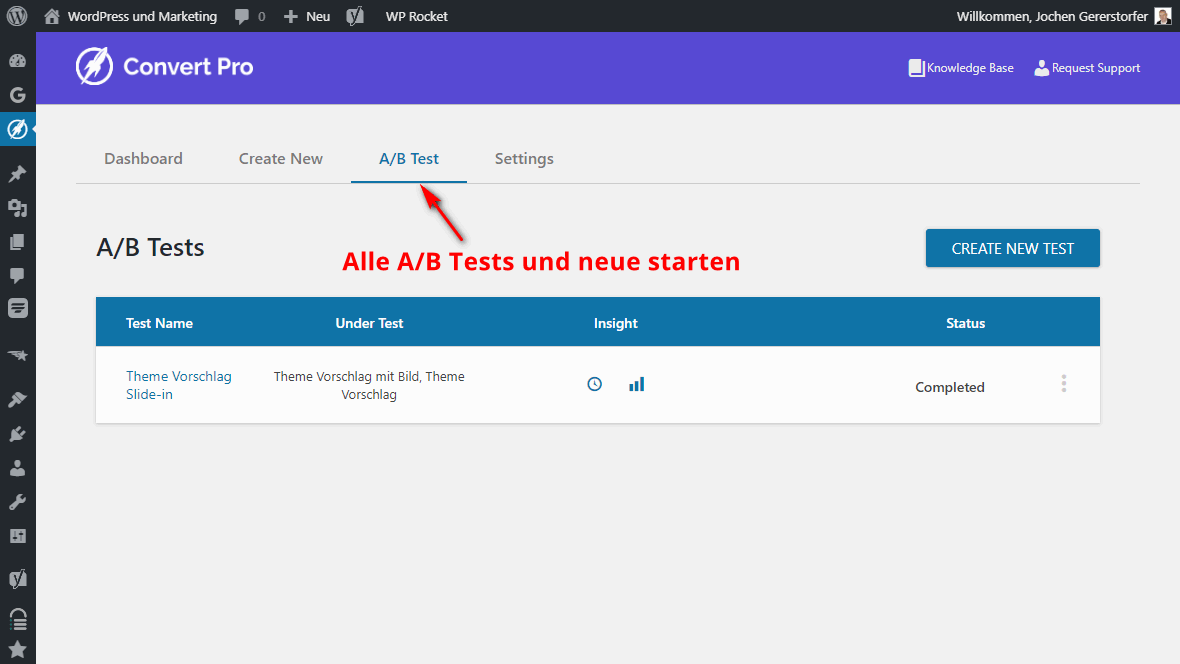
You need to enable the A/B testing addon beforehand in Settings > Addons.
Under the A/B Test menu you will find your new dashboard, where you can test different variants.
Here you will also find a list of all the tests you have already created.
The first column contains the A/B test name. The Under Test column lists the names of the two forms to be tested against each other.
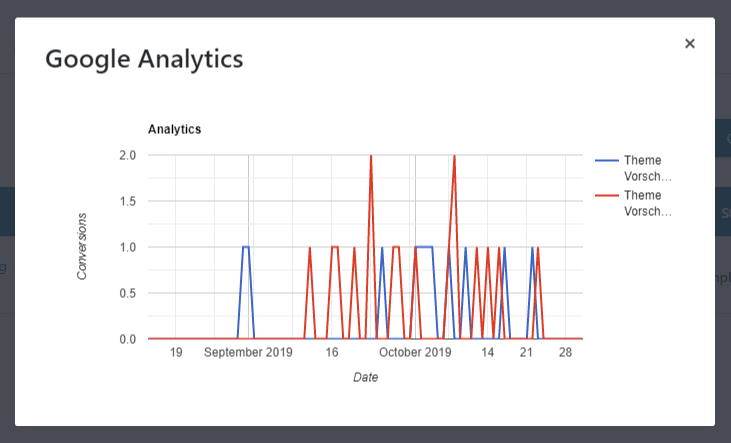
The Insights column again contains a summary of the settings and the statistics. The graph shows a blue and a red line for the different forms. Next to it is still the status. In the screenshot, the test is “Completed”.
Clicking on CREATE NEW TEST opens the dialog for creating a new test.
First you have to give a new name to this test.
In the next dropdown field you select the participating forms. In fact, you can select even more than two, in which case it would be called a multivariate (comes from variate, not variant) test.
The settings for insertion and targeting must be the same for all participating forms, so you need to choose a parent form from which the others will inherit the settings.
Now we need a start and an end. Finally, you can check if the winner should be automatically set as active form.
Settings / Preferences
Such an extensive popup plugin does not come without settings, of course. These can be found under the menu item Settings.
General
In the general settings you can choose the default font for all forms.“Inherit” means that the font is inherited from your website.
User Inactivity Time is the time in seconds when visitors are measured as inactive.
License
You should enter your license to receive automatic updates and support.
Addons
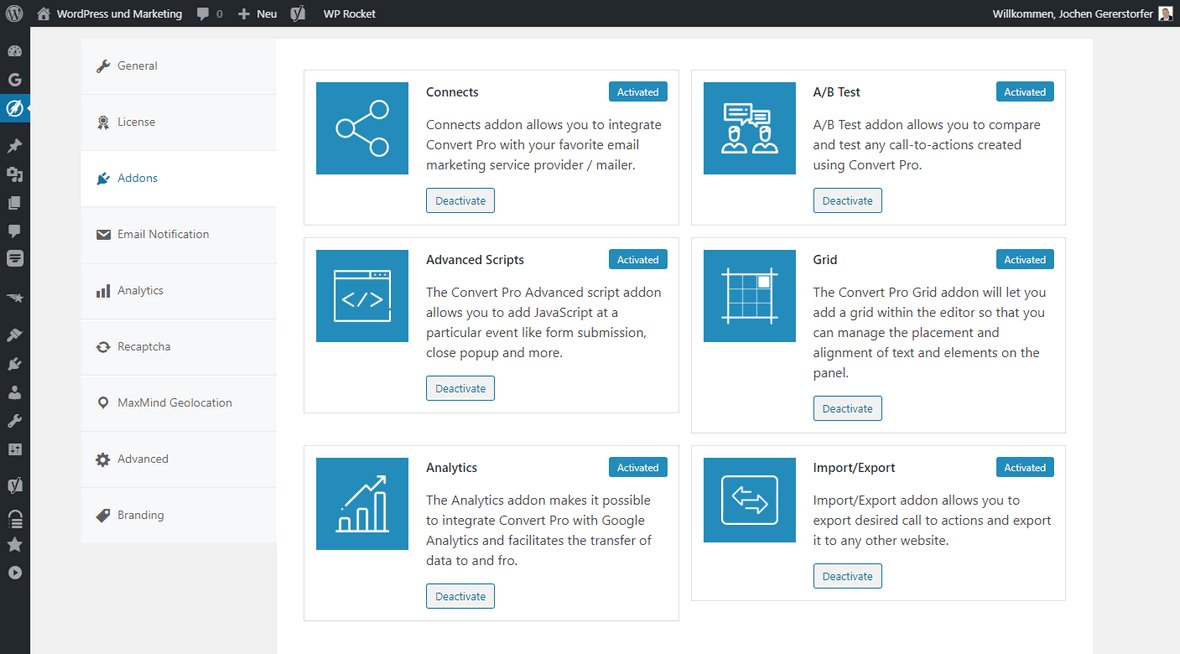
The addons are functions that you can add if needed.
Connects
The Connects addon allows you to integrate Convert Pro with your preferred email marketing service provider/sender.
A/B Test
The A/B Test addon allows you to compare and test all call-to-actions created with Convert Pro.
Advanced Scripts
The Advanced Scripts addon allows you to add JavaScript on a specific event, such as submitting a form or closing a popup.
Grid
The Grid addon lets you add a grid in the editor to manage the placement and alignment of text and elements on the panel.
Analytics
Analytics is the most important addon feature for me. The Analytics add-on allows you to integrate Convert Pro with Google Analytics and facilitates the transfer of data.
Import/Export
The Import/Export addon allows you to export and re-import desired call-to-actions.
Email Notification
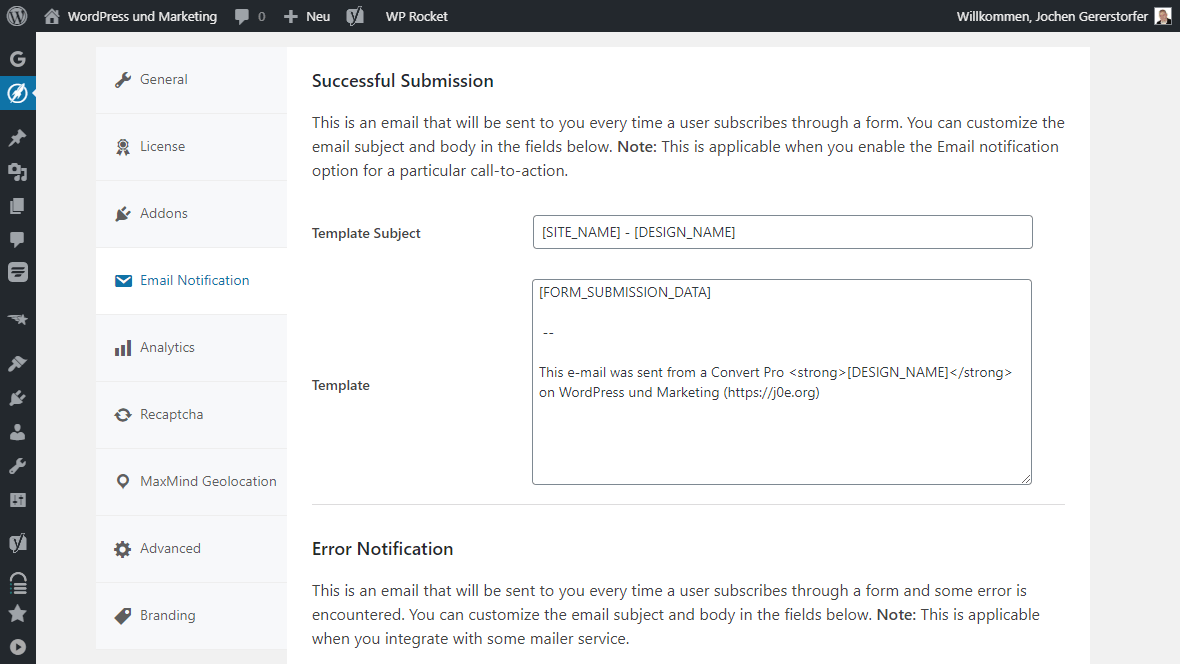
If you want to be notified about successfully submitted opt-ins, you can customize the email message here. The second message template is for failed sends.
Analytics
If you have activated the addon, you can adjust the settings for your connection to Google Analytics here.
In Europe the check mark Anonymize IP for event Tracking is important. Privacy and so on…
Recaptcha
For Recaptcha spam protection you have to generate a key pair at Google and insert it here.
MaxMind Geolocation
Geolocation helps to assign the visitor IP to approximate addresses. With this you can refine the targeting of your visitors.
You need a MaxMind license key for this.
Advanced
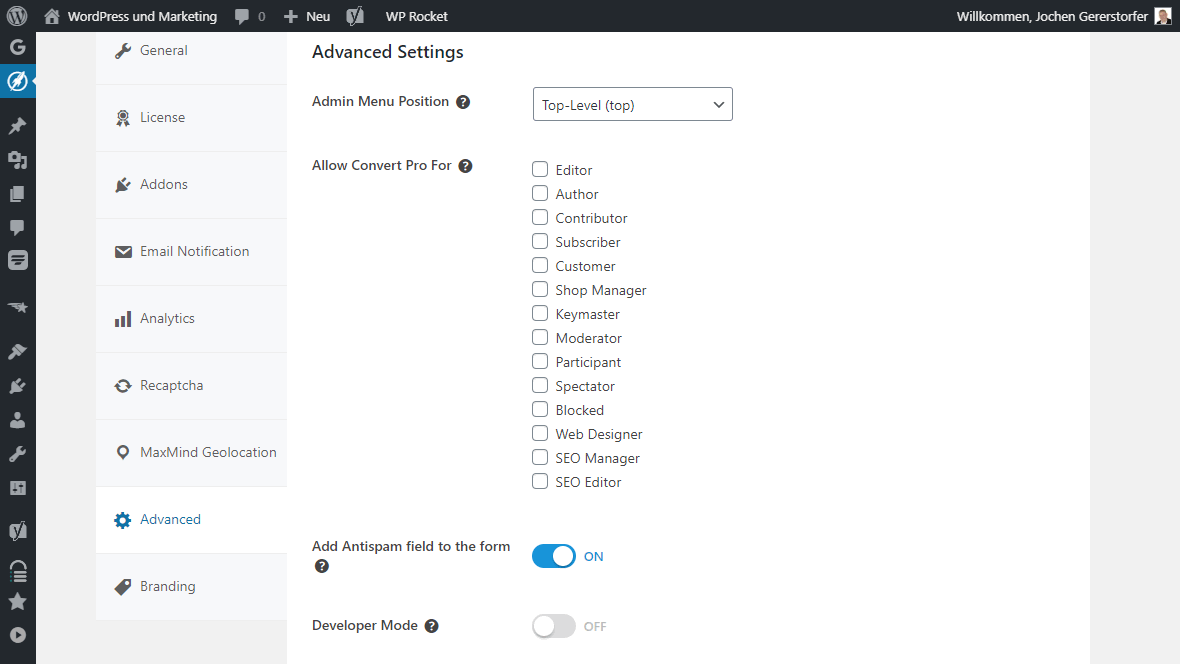
In the Advanced Settings you will find useful overall settings.
For example, you can change the admin menu position. This means, where the link to the Convert Pro Dashboard should be placed in the WordPress admin. I think this setting is just great. Many plugins just slap themselves prominently into the main menu without even thinking that the Settings menu is for them.
Further down is the CLEAR CACHE button. If you ever have a problem with one of your call-to-actions, you can try your luck here.
Branding / White Label
I have never used the branding settings myself, because I don’t want to give the impression to customers that these plugin functions come from me.
All Brainstorm Force products come with white label capability. Even the Astra theme. So you can use it to brand the entire WordPress dashboard to your company.
Documentation and Support
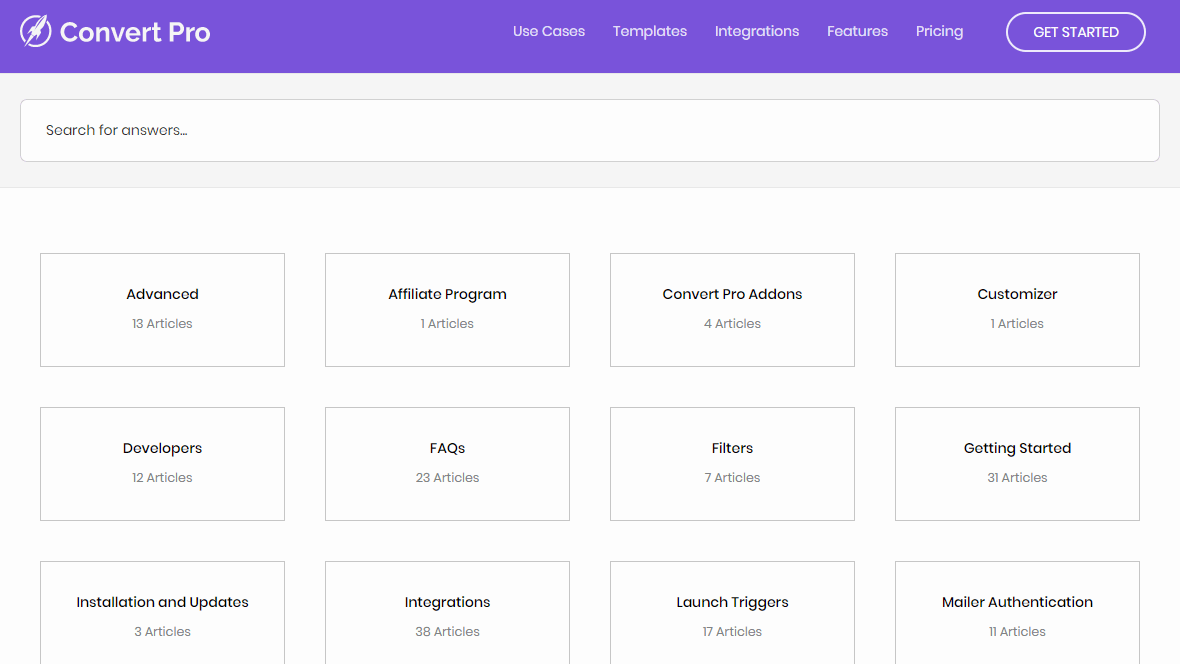
When I have questions, I always immediately run into the Knowledge Base. It is very extensive and directly accessible via the plugin.

If I don’t get any further with the help, I contact the support. Mostly they answer the same day or the next day. Very rarely I had to wait longer for an answer. But I was always helped.
Convert Pro Alternatives
The question of alternatives is never easy, because no product covers the functions of the other one hundred percent.
- ConvertBox: This SaaS popup service is still relatively new, but extremely versatile and fast with new features. The support is excellent.
- OptinMonster: Super service with many features, but not quite cheap.
- Hello Bar: Hello Bar became famous with the top bar.
- Bloom: popup plugin from Elegant Themes.
- Thrive Leads: Powerful WordPress popup plugin
For more alternatives, check out my article on the best WordPress popup plugins.
Convert Pro Coupon Code
Currently only the permanent CP10 coupon code is available.
If you want to be informed about promotions, it’s best to sign up in the form below:
Deals und Coupons
Cyber Monday
Black Friday
Coupons
Aktionen
SaaS Angebote
Meine Black Friday Deals.
Convert Pro FAQ
Conclusion
Convert Pro is a WordPress popup plugin that leaves hardly anything to be desired.
Countless integrations with email service providers like ActiveCampaign and Mailchimp make it easy to get started.
And let’s not forget tracking using Google Analytics, which is my favorite among the featured functions!
In my opinion, Convert Pro is the best lead generation plugin for WordPress.
Updates
- 14.07.2023 – Pro Addon version 1.7.5: Compatibility with PHP version 8.1 and action hook on successful submission of the form.
- 01.02.2021 – Version 1.5.0: FluentCRM integration.
- 08.06.2020 – Pro Addon version 1.3.6: Many fixes with email services.
- 19.09.2019 – Pro Addon version 1.3.0: Moosend integration and bug fixes
- 2019 – Version 1.2.x: SendGrid integration and ConvertKit – Add Tag option
- 2018 – Version 1.x: Worked heavily on connectivity
Support for Zapier, MailWizz, ConvertFox (Gist), ElasticEmail and Sendlane - 2017 – Beta: Already in the beta and RC versions the development was going strong.
Google Analytics modules
Mautic integration for forms and segments
ActiveCampaign and Drip
Mailgun and Mailpoet integration
VerticalResponse integration
A/B Test
Klaviyo and Customer.io integration
Convert Pro Review
Leistungsumfang
Benutzerfreundlichkeit
Preis
Convert Pro ist ein umfangreiches WordPress-Plugin für Pop-ups, Formulare, Opt-ins und Lead Generation. Besonders der Drag-and-Drop Formular-Editor sticht hervor. Damit hast du völlige Freiheit, bei der Erstellungen der Formulare. Eine große Anzahl an fertigen Template erleichtert den Einstieg.
