Set up and optimize Swift performance
Set up and optimize Swift Performance – here’s how! If you have purchased and installed Swift Performance, you will be faced with the task of configuring the WordPress caching plugin as effectively as possible. Fortunately, the developers make it easy by offering ready-made presets and integrating many other comfort functions. Among other things, there is a help function for just about every menu item that provides further details on the corresponding option.
The best settings and optimizations for the speed plugin Swift Performance. Using caching, image and database optimization, plugin organizer and JS/CSS minification, the plugin provides a performance boost. But what are the optimal settings for my WordPress installation?
Still, there’s a lot that can go wrong here. To make sure that doesn’t happen to you, I took a closer look at the settings of Swift Performance. Based on my own experiences and with the help of my blog, I went on a search for the best configuration to test all available features. In the end, this article was the result.
Here, you will learn everything you need to know to set up Swift Performance in the best possible way and optimize your blog or website accordingly with the plugin. We’ll go through all the settings together and clarify what each option is for and whether it makes sense in each case.
For Swift Performance Lite and Swift Performance Pro.
The four configuration options of Swift Performance
If the Swift Performance plugin is installed on WordPress, you have the choice between four different configuration options. Either you choose the manual configuration, where you can enter all settings manually, or you use an automatic configuration.
Alternatively, settings can be imported from other blogs, as well as it is possible to use certain presets. Presets in this case are presets that are provided by Swift Performance. There you can choose between“Maximum Optimization” or“Simple Caching“. In between, there are other presets that cover typical areas of need.
If you don’t know too much about it, you certainly won’t go wrong with the presets, but you won’t be able to have a big influence on how exactly your WordPress website will be optimized. So if you know rudimentary about what you are installing, you should always make manual settings. Especially since each setting is also explained accordingly via hover. So you don’t have to be a professional to choose the right options.
Six core areas of performance optimization
Once you have decided on the manual settings, six different core areas await you, all of which contain several options. There are General, Media, Optimization, Caching, CDN and Export/Import. Each area has its own settings.
To give you a better understanding of the options, I will now go through the most important ones with you. So you know exactly which settings make sense and should be made. Let’s go!

Important note: To get all options displayed, you have to select Advanced View in the plugin’s settings. If you don’t click on it, only the simplified settings will be displayed. This is practical for beginners, but problematic for professionals, since they often want to make more specific optimizations and therefore need the additional options. Pay attention to this!
General
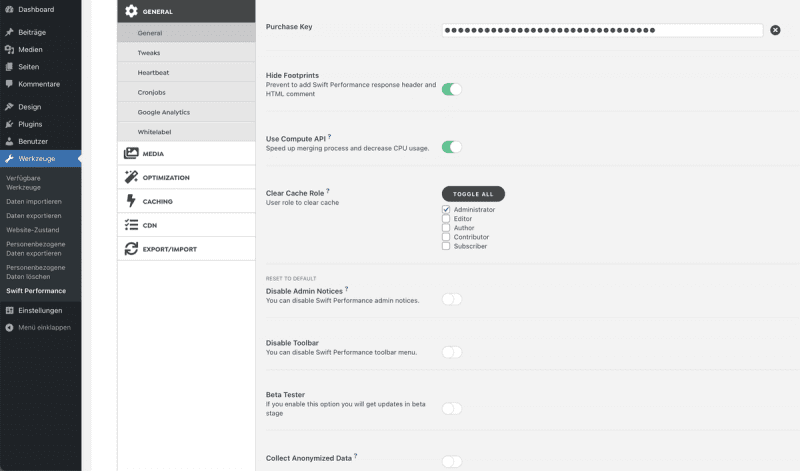
First, we use Hide Footprints to turn off the added comments that Swift Performance wants to set. They are superfluous and basically just advertising. If possible, we turn on the Compute API in the next item to further speed up certain processes.
Clear Cache Role now allows you to specify which users have permission to do a cache reset. Normally this should be reserved for the admins. However, we leave the Admin Notices on, since they are important for the operation. The same applies to the toolbar. We leave the last three items Beta Tester, Collect Data and Debug Log switched off.
Then we press Save Changes in the upper area and go on to the next point.
Tweaks
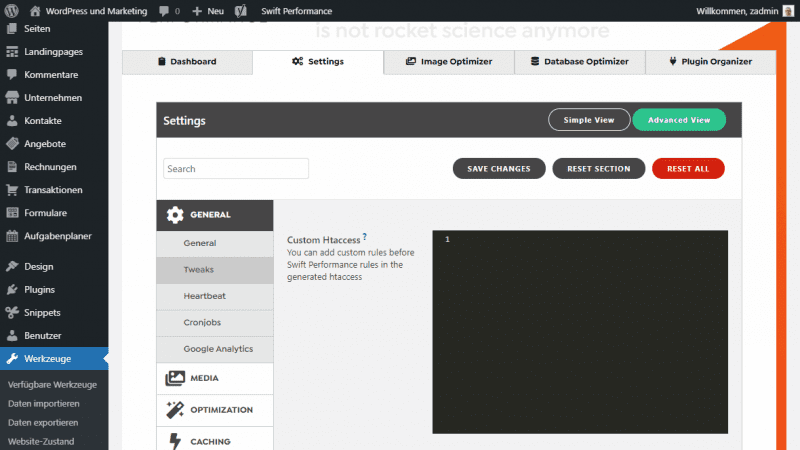
Under Tweaks it is now possible to integrate your own .htaccess code, which will be added before the rules that Swift Performance integrates itself. If you have something, please add it. Otherwise go to the next point.
Heartbeat
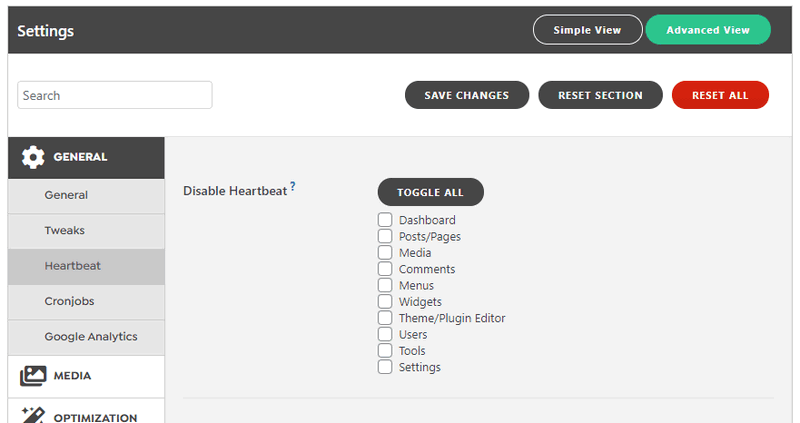
The Heartbeat API of WordPress is a blessing and a curse at the same time. It detects changes and caches posts as you write them. It is credited with a variety of functions, but all of them are of little relevance. It is best to disable the Heartbeat API completely, since it puts a lot of ballast on the CPU during longer operation. But this only works if you can do without auto-saves etc. in the admin area of WordPress. If not, limit it at least a little bit.
With Toggle All you deactivate them completely. Alternatively, you can increase the frequency to several minutes, which also relieves the server and the CPU accordingly.
Then Save Changes again and go to the next point.
Cronjobs
Here I would leave everything on the default settings. There is actually no reason to change the WP cronjobs.
Google Analytics
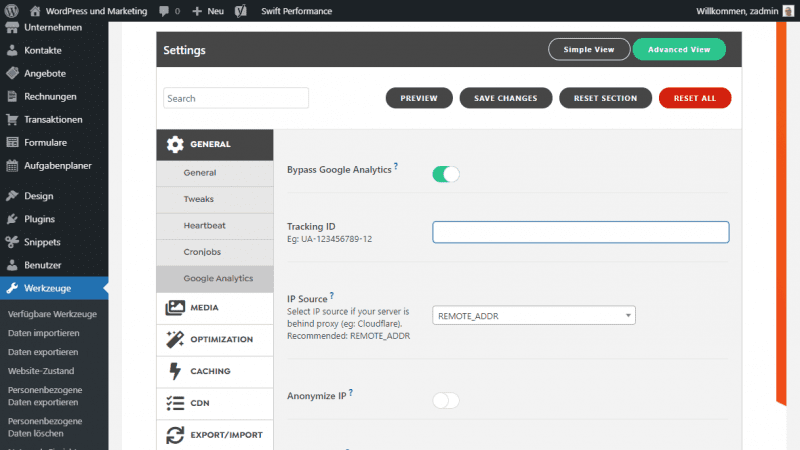
If you’re still using Google Analytics, you should reconsider in regards to the GDPR. For sure you should not use the normal and slow integration, but create an Ajax request via “Bypass Google Analytics”.
Swift Performance blocks the standard script with this option and integrates a direct request via the Google Analytics measurement log. This is much more performant than the usual way – so you should use it if possible.
Whitelabel
This feature is only needed by corporate customers of Swift Performance, who want to set up the extension for customers and hide all details. In my eyes this is always unnecessary, so let’s move on to the next point.
Media
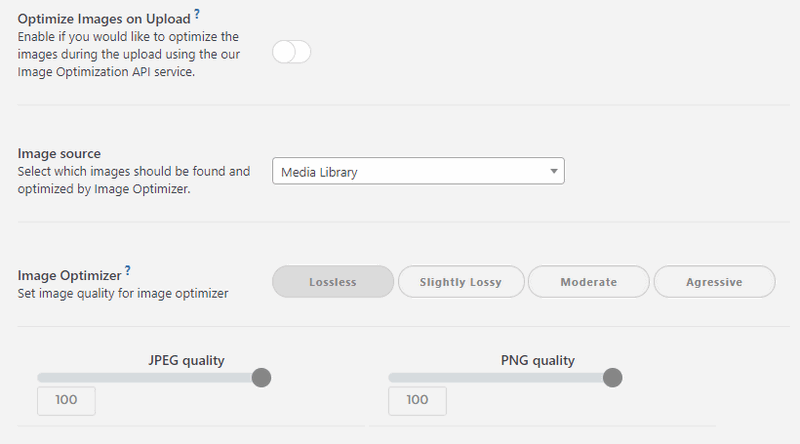
Hidden behind the Media section is Swift Performance’s Image Optimizer or image optimizer. The powerful plugin has also integrated this directly. With the command Optimize Images on Upload it is now activated. If you upload an image, it will be compressed accordingly, which leads to smaller files and thus to better loading times.
The next item Image source can remain as it is. Under Image Optimizer you now choose whether you want to optimize with or without quality loss. Alternatively, you can select a quality according to your wishes. Test this with a few uploads and try to achieve the lowest possible quality in order to achieve even better loading times.
With Resize Large Images you can also automatically resize all uploads to the max-width value. This almost always makes sense, unless you need extremely large images and always want to link or display the original.
I also recommend to generate a WebP. This will show Swift Performance if the file type is supported. By now almost all browsers support WebP images, and since they have much smaller file sizes, it’s worth turning this option on. With Serve WebP you therefore select the Picture element.
The rest of the settings remain at default, because Lazy Load is also preset and configured correctly. At the bottom you will find Gravatar Cache, which only makes sense if you use and display corresponding avatars in your blog. I would also activate Inline Small Images, because this can lead to much better loading times.
Don’t forgetSave Changes.
Embeds
The only subitem in the media section is Embeds. This point is even more important, because the option Youtube Smart Embed and Lazy Load Iframes ensures a much better performance when integrating videos from YouTube.
The former initially loads only the image, i.e. the thumbnail of a video, and the latter ensures that other iFrames are only loaded when they actually appear relevant to the user.
Activating the options unlocks further settings. However, you can leave them at the default settings. Unless you want to do some fine tuning here and tailor everything to your visitors. Otherwise save the configuration and proceed to the next point.
Optimization – Set up Swift Performance
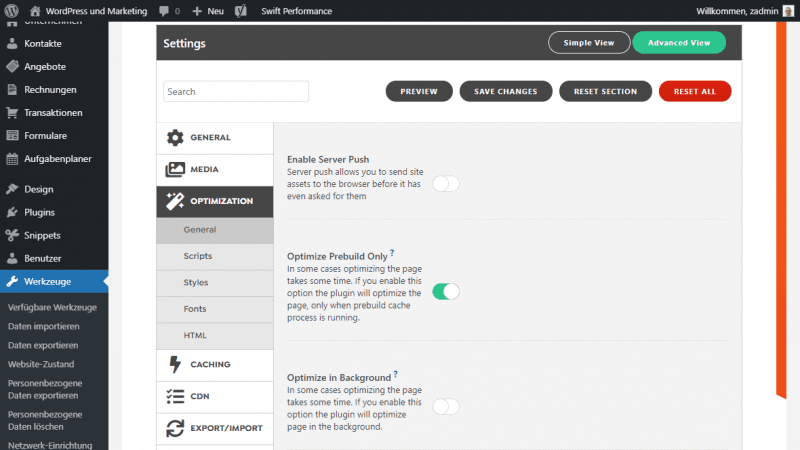
In the menu Optimization you will find a lot of exciting options and several sub-items. Let’s first have a look at the directly available options.
Enable Server Push applies the HTTP/2 feature, where a browser receives appropriate content even before the request. My recommendation is to enable this option.
With Optimize Prebuild Only you also ensure that the generation is much faster and there are no more delays. Optimizations will then only be done on the prebuild. You should also activate Optimize in Background.
If the MySQL database is not your bottleneck in terms of performance, you can also activate the Prebuild Booster function or simply leave it activated.
You should enableDisable Emojis, because it is simply unnecessary and costs loading time.
If you have 508 errors, enable the Limit Simultaneous Threads option. If not, leave it unchecked.
Finally, enable Normalize Static Resources. The rest remains as it is. The defaults are already set here.
As always, don’t forget to save!
Scripts
In the subitem Scripts you should first activate the option Merge Scripts to merge all existing scripts. Finally you should check the Async Execute option.
Personally, I left the rest of the options here at the defaults. Further down I have only enabled Disable jQuery Migrate. Most of the settings are used to make certain exceptions in case of problems. So check that all scripts are still working correctly.
Save and move on.
Styles
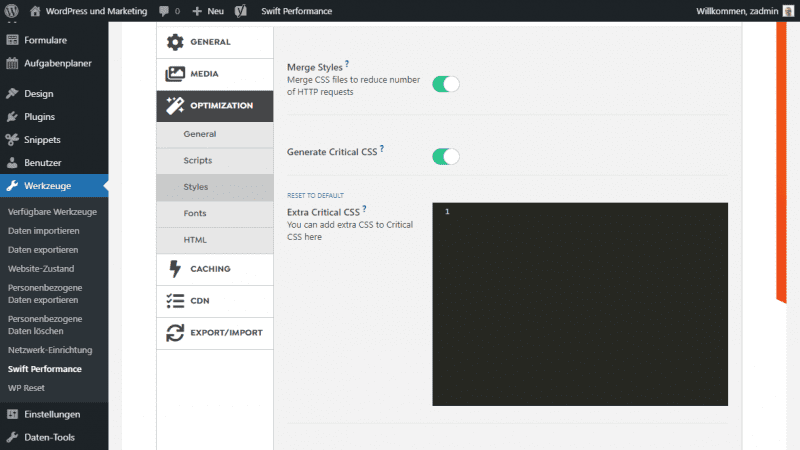
In the menu item Styles you will find a similar function as in Scripts. First activate Merge Styles and Generate Critical CSS.
If possible also activate Compress Critical CSS and Remove Keyframes. Print critical CSS inline should already be active.
Depending on the size of the CSS you can think about activating the option Print full CSS inline. Then no file needs to be reloaded, the code is inline in the footer. If the CSS is too large, this would be fatal. If, on the other hand, it is quite slim, I recommend activating it.
Under Minify CSS you should enable Full. If there are errors, switch back to Basic.
That’s all. The rest is again an adjustment in detail for those who know a little better about the matter.

Fonts
Here I would activate almost everything. Preload Fonts Automatically, as well as Use Local Fonts and Force Swap Font Display. This ensures that fonts can be loaded locally and thanks to the swap command, no more display errors.
Save and go to the last item HTML.
HTML
If possible, be sure to use the Smart Render feature. This uses the relatively new content-visibility command to stop rendering areas that are not currently displayed at all. This option is very powerful as it drastically reduces render time – eliminate render-blocking Resources.
Fix Invalid HTML and Minify HTML are also activated and are self-explanatory. The first command fixes errors in the code, the second minimizes it so that it can be transferred faster.
Caching
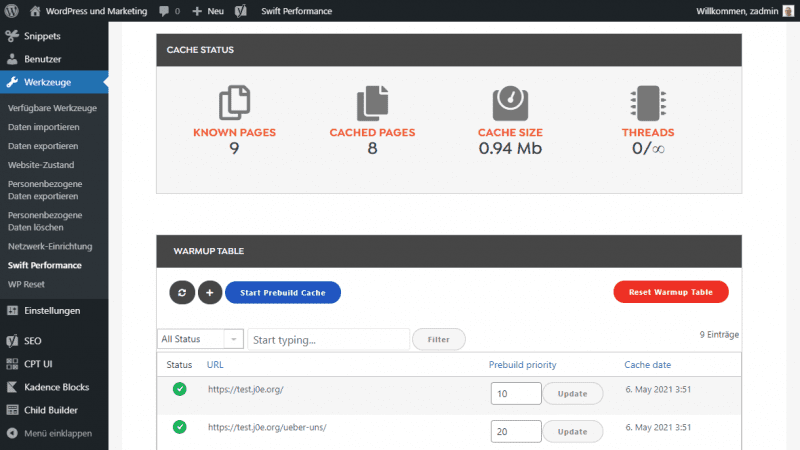
Now we come to a very important point, because Swift Performance’s cache engine has already received a lot of praise in advance. So, the cache is definitely enabled, as it represents the very core of the WordPress Performance plugin. If possible, always choose the caching mode Disk cache with Rewrites, as it works the fastest.
The Early Loader remains activated, and the directory you leave in the default setting. I set the “Cache Expiry Time” to 1 day and the Garbage Collection Interval to 12 hours. The lower the values, the more time consuming. The higher the values, the less up-to-date the content, but the better the performance.
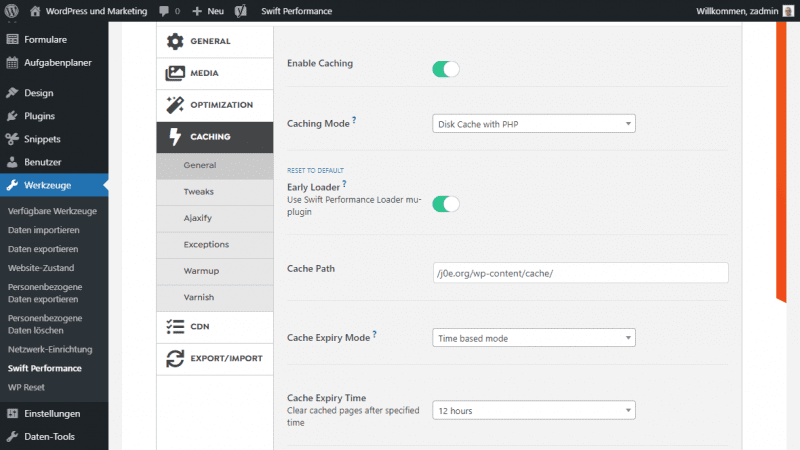
The rest remains as it is. The default settings should already be ideal for most blogs.
Tweaks
Since everyone should be using HTTPS, I would advise enabling the “Avoid Mixed Content” setting by all means. The rest can be left on the default settings.
Ajaxify
Here, among other things, you get to choose whether Gutenberg blocks get an option for Lazy Load. All this is not necessarily compatible with all themes and plugins, so I did not change anything here. You shouldn’t do that either, unless you know very well what each item means.
Exceptions
Under the point Exceptions it is possible to define certain exceptions for the cache. For example, if some pages should remain dynamic or certain functions do not work correctly. The feed is already activated here by default. Otherwise, everyone can decide for himself whether there should be exceptions or not. If so, he may define and configure them here specifically.
Warmup
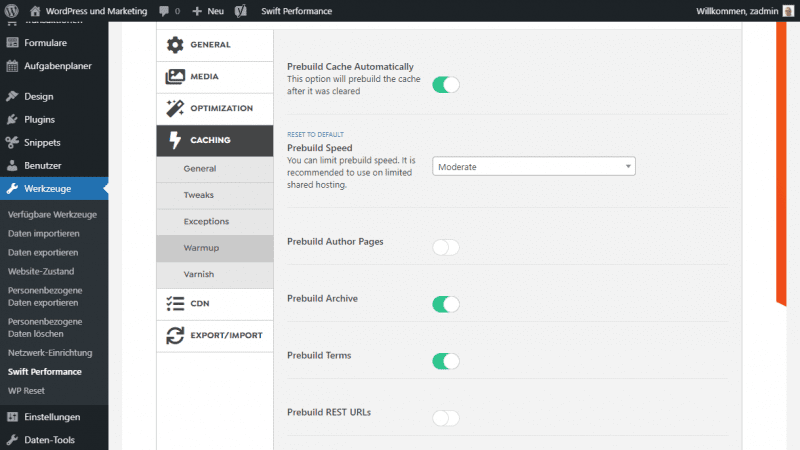
Cache warm up in Swift Performance means that the cache is already preloaded. If you activate Prebuild Cache Automatically, the cache will be rebuilt immediately after it has been emptied.
I would leave the settings as they are. However, the warmup can massively reduce the performance of your WordPress hosting. The more aggressive it is, the more resources it consumes. The whole thing is therefore more an option for strong servers than for small web hosting packages.
CDN
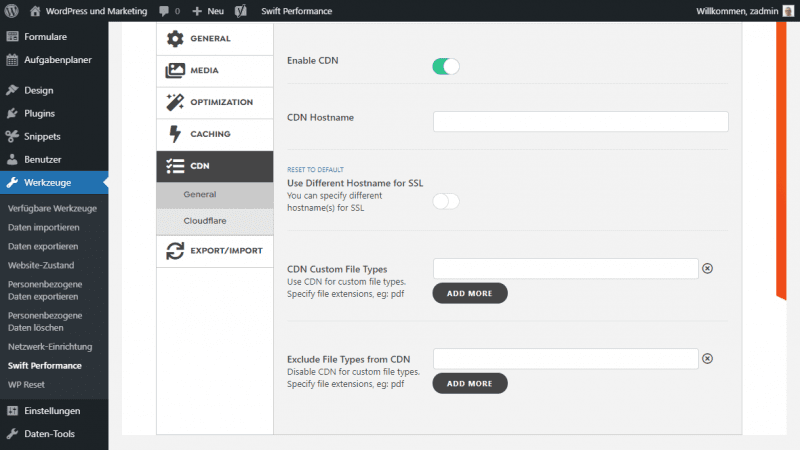
If you use a CDN, you make all the necessary settings here. Cloudflare is supported by default.
I spare myself an explanation here. Who uses a CDN, should have enough expertise to configure it here accordingly. If not, he should think about whether a CDN is right for him at all.
Further functions of the performance plugin
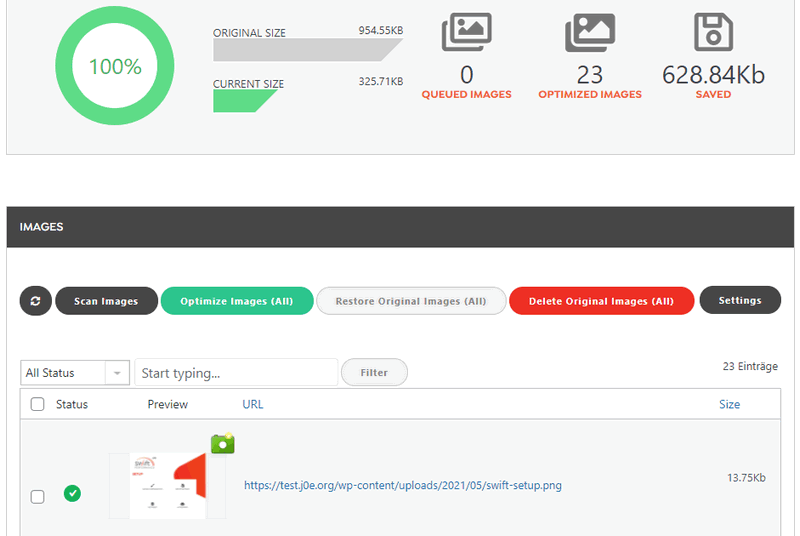
Swift Performance can do much more. In the Image Optimizer tab, for example, you can scan your current images and then convert them completely. This is important if you have already uploaded many images and Swift Performance was not activated from the beginning. This way even old images can be optimized afterwards.
In the Database Optimizer tab you can also go directly to the database and remove orphaned entries, revisions or duplicates. In addition, tables can be completely re-indexed and optimized at the same time. Very useful to keep the MySQL database as performant as possible. But you have to be careful, because the database is the heart of WordPress. Please always create a backup before you change or try anything here.
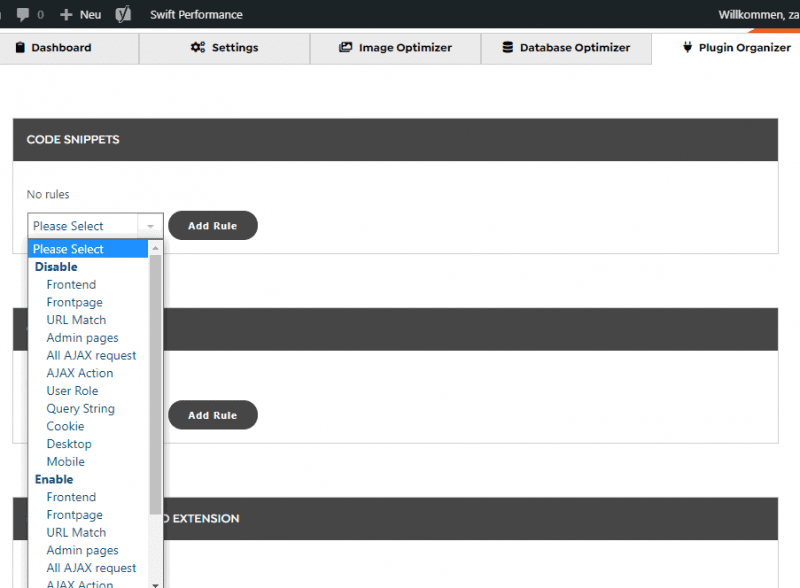
Last but not least there is the Plugin Organizer. This powerful tool is very important for advanced performance optimization. With the Plugin Organizer you can activate or deactivate plugins on certain pages. Extensions that are only needed on mobile are therefore disabled everywhere else on the page, and extensions that are only needed by the admin have just as little loss on the page for users.
Swift Performance settings service
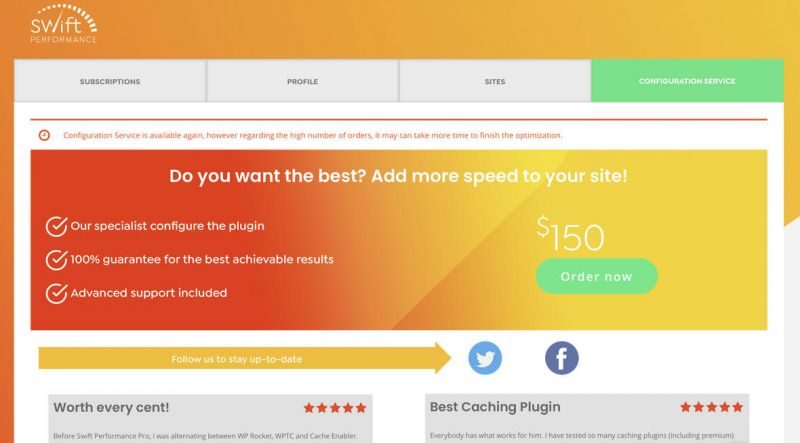
Unsure what exactly works and doesn’t work for you and your hoster? My guide helped you, but you still don’t feel really confident with what you just set up within WordPress? Then the Configuration Service from Swift Performance might be ideal for you.
The configuration service of Swift Performance is a service of the developers, which costs 150 dollars and is displayed on their website after login. If you order it from your dashboard at Swift Performance, the developers will personally take care of setting up the plugin for you on your blog. In return, they guarantee you the best possible settings for your WordPress website.
If you have any questions or similar, they are always available and happy to help you. Whether this is worth the 150 dollars, you have to decide for yourself. You can also book the service cheaper from me…
Surely you are still interested in the best performance plugins and free performance plugins.
Conclusion – Set up Swift Performance
Best WordPress Hosting
Hosting recommendations are usually garbage.
Often extremely cheap hosting packages for $ 3 are recommended, others advertise a $ 100 VPS, because they earn the most as an affiliate thereby. In the end, we all just want the fastest possible web space for as little money as possible.
And optimized for WordPress!
What else is important? The server should be a fast backbone for your website and the support should answer as fast as possible, and preferably in your language.
You can get all this at Cloudways from $ 10,00 / month.
My explanations should already be enough, and moreover Swift Performance configures itself if you want, so this service is only for the very unsure among you. But at least they get a service offered, and I also find that actually good for such plugins.
The Swift Performance setup is relatively easy if you have already dealt with the topic of making WordPress fast. If you come completely without prior knowledge, just leave the automatic configuration, or let a professional do it.
Alternatively, you can always check out WP Rocket and read the WordPress Performance article.





I just set up a subdomain of my website with your explanation, thank you very much, now I will do it with the main page. I used to use Wp Rocket but the website crashed a lot, now it works correctly with all my sites. You are a genius, thank you!