Custom GPT: WordPress.org Plugin API Information and Blogger
Do you often write about WordPress and WordPress plugins, or do you need information about a plugin? Then my GPT “WordPress.org Plugin API Information and Blogger” is just the right tool for you.
The “Custom GPT: WordPress.org Plugin API Information and Blogger” provides users with detailed information about WordPress plugins. With direct access to the WordPress.org Plugin API, this tool provides precise data such as features, prices, advantages and disadvantages as well as descriptions of the plugins. Ideal for blog authors who need in-depth, up-to-date content about WordPress plugins.
Then I’ll explain how you can use my Custom GPT for plugin information.
Attention: Unfortunately, the custom GPTs are still buggy. Some errors occur, which will hopefully be fixed soon.
Step 1: ChatGPT Plus and call
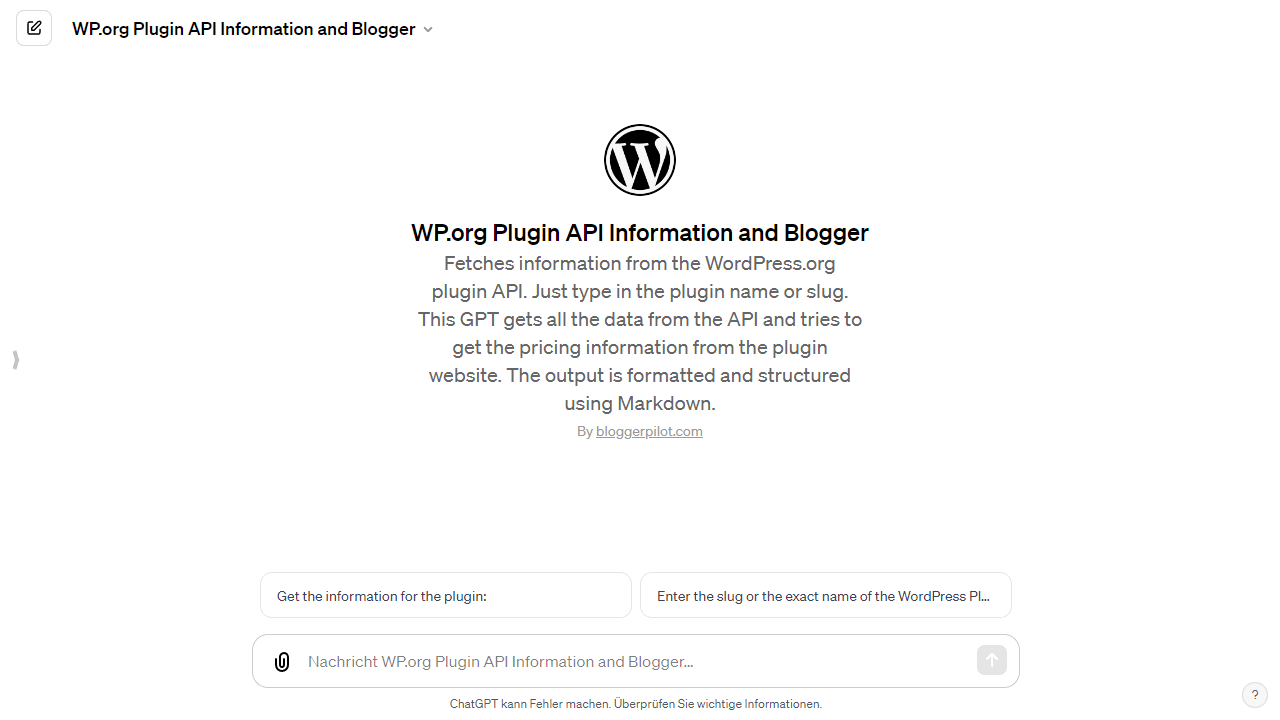
First of all, you need to know that you need a paid ChatGPT Plus account to be able to use Custom GPTs. More about Plus below.
Once you are logged into your account, you can go to the following URL.
➽ To the WordPress.org plugin API information and Blogger
Step 2: Use
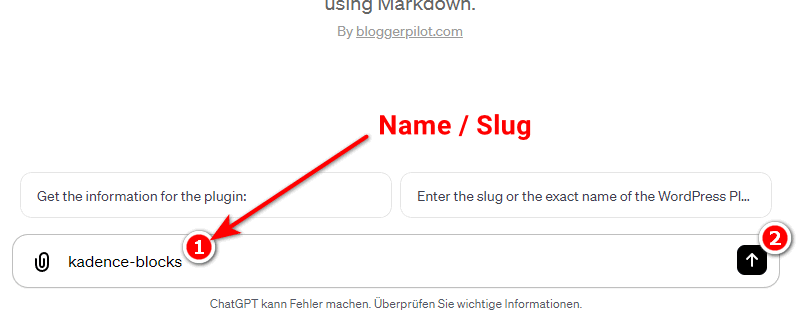
The WP.org Plugin API Blogger is super easy to use.
All you have to do is enter the plugin name or slug in the prompt field below and hit enter.
Since the plugin names in the WordPress.org plugin repository are often very poorly chosen, my GPT can’t always determine the correct plugin.
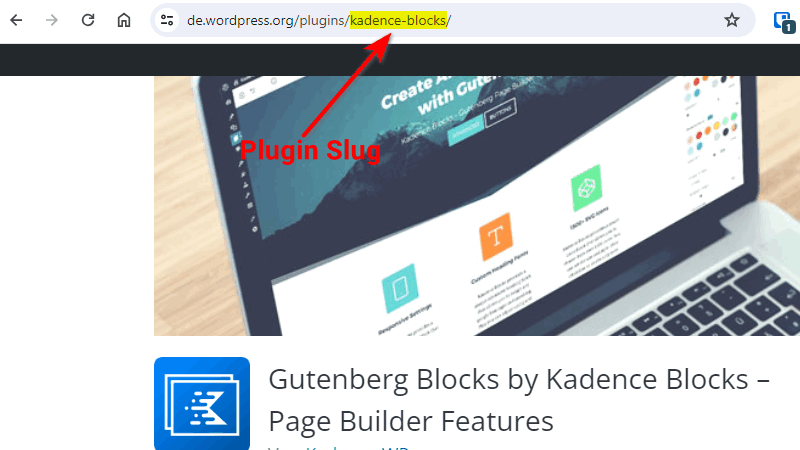
Fortunately, the plugin slug is clear. You can find the slug in the address bar of your browser when you call up the plugin in the plugin directory. See screenshot.
Step 3: GPT output

The output takes place in a scheme I have specified:
- Plugin Name
- Features
- Price
- Advantages
- Disadvantages
- Description
You can copy out the data and change it as you wish.
Alternatively, you can also give ChatGPT an instruction.
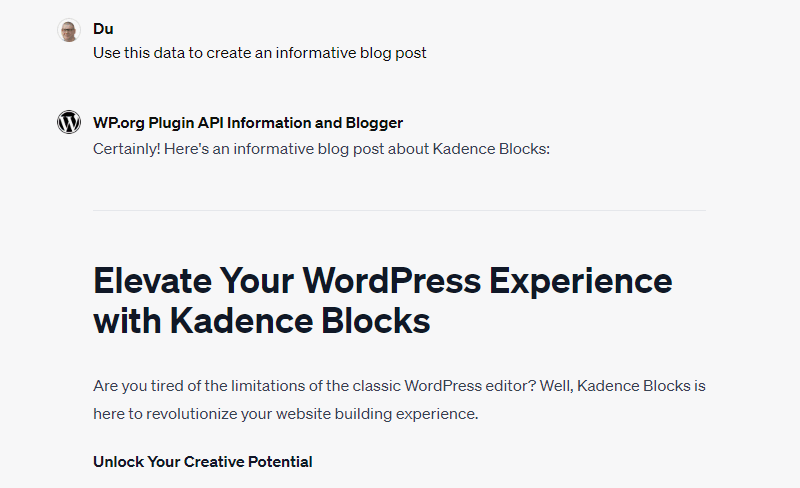
Example: “Write an informative blog post about the plugin with this data”
This way, the AI writes a complete blog post for you and also accesses the current data from the API.
Another idea would be a comparison article. To do this, you ask for the information for a second plugin and have a post written that compares the functions of the two.
Important: Everything that the AI spits out is only of limited use. Check the text for readability and accuracy. Be sure to add your own knowledge and experience.
What is ChatGPT Plus?
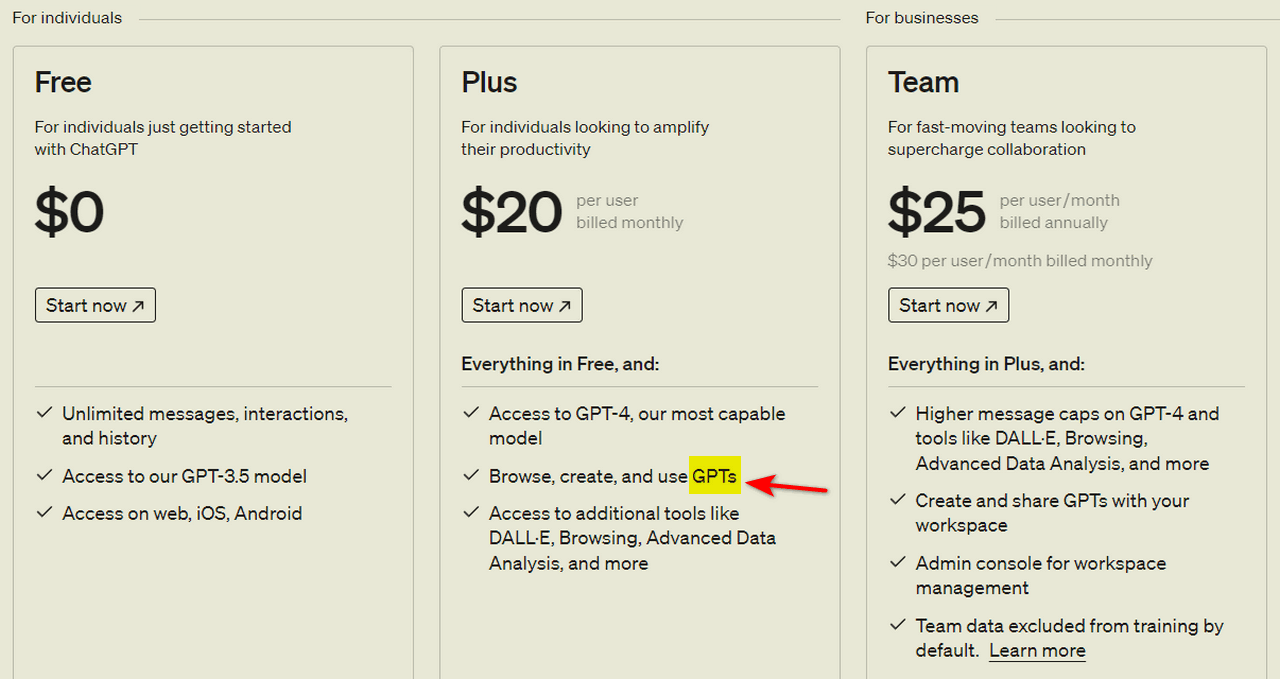
ChatGPT Plus is an enhanced version of the original ChatGPT, an AI-based chatbot developed by OpenAI. This premium version offers users additional benefits such as faster response times, priority access even during peak times and access to the latest features and updates.
ChatGPT Plus is especially designed for users who want to use AI more intensively or professionally, for example for business applications, research or creative projects.
The service is offered via a monthly subscription model, with the cost considered reasonable compared to the benefits offered.
The ChatGPT Plus subscription only covers usage on chat.openai.com and costs $20.00 per month.
➽ Check out my ChatGPT prompt template.
How to create Custom GPTs
Custom GPTs (Generative Pre-trained Transformers) are an innovative development from OpenAI that allows users to create their own versions of ChatGPT for specific purposes. These custom GPTs can be adapted for various applications, be it educational, entertainment or work-related.
Step 1: Get access
To begin creating a Custom GPT, you will first need access to the appropriate tools from OpenAI. Custom GPTs are currently available for ChatGPT Plus and Enterprise users, with plans to make them available to a wider user base soon.
Step 2: Create custom GPT
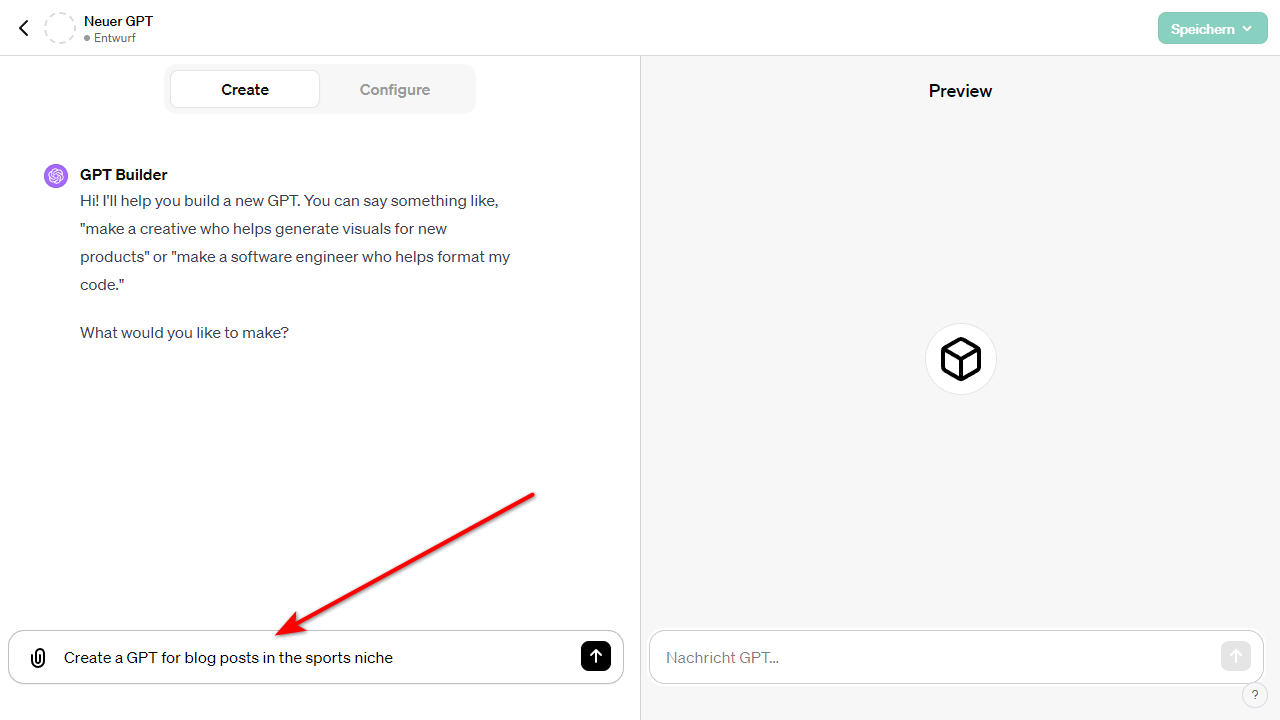
Creating a Custom GPT is simple and requires no programming knowledge. Start a conversation on the platform and give the system instructions and additional knowledge it needs to do its job.
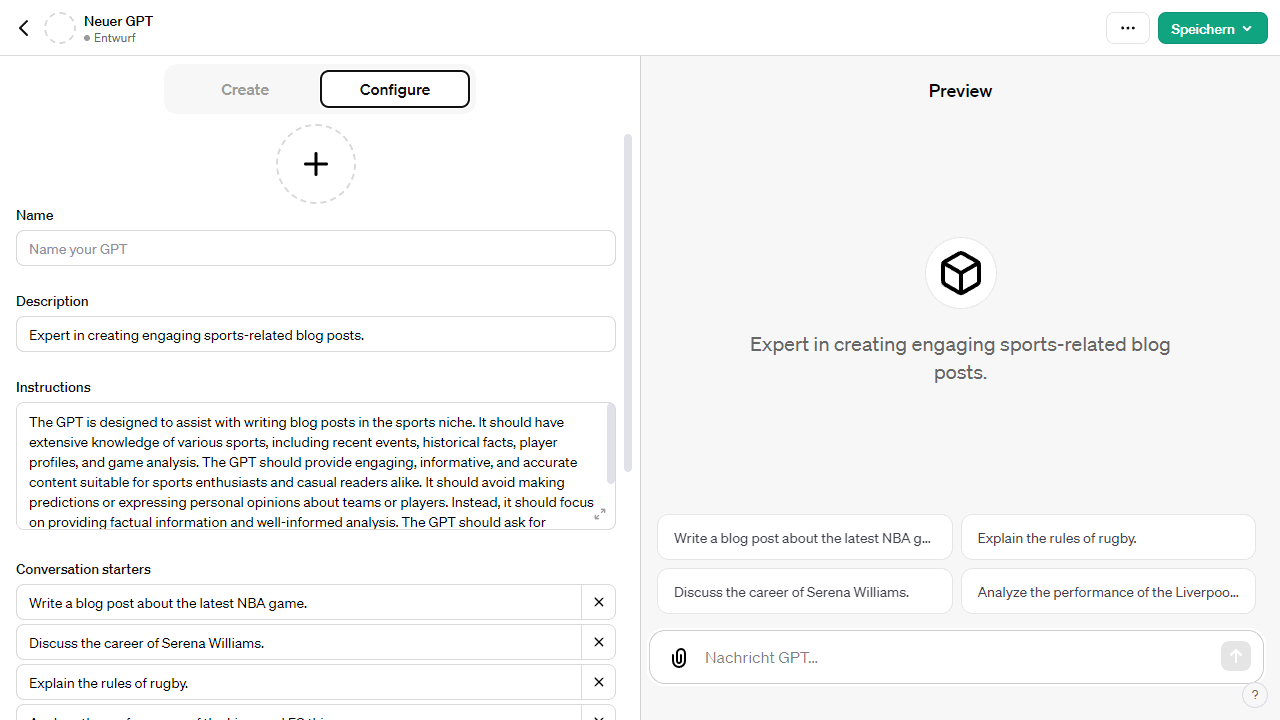
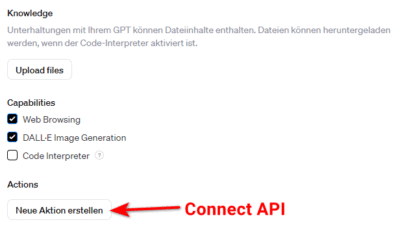
You can also specify which features your GPT should have, such as web searches, image generation or data analysis.
If in doubt, simply activate all three “Capabilities”.
Under “Actions” it gets more demanding. This is where you connect your GPT to an API interface. Just like I did here with the WP.org plugin API. However, actions are not absolutely necessary for GPTs to function.
Step 3: Define areas of application
Think carefully about the purpose for which you want to use your custom GPT. Do you want to create an educational tool that helps children learn math, or a tool for the workplace that helps create marketing materials? The possibilities are almost endless.
Step 4: Share GPT and publish it to the GPT Store
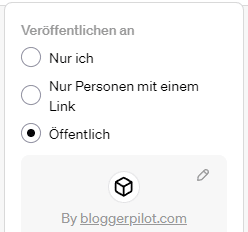
Once your custom GPT is ready, you can share it publicly. OpenAI plans to launch a GPT Store later this month to showcase creations from verified developers.
Here, your custom GPT can become searchable and possibly rise in rankings.
Alternatively, you can save your GPT just for yourself. Or only as shareable via link.
Conclusion
Thanks to the original data from the WordPress.org plugin API, I don’t have to rely on the outdated information from OpenAI. The result is better researched posts and I have to spend less time preparing them because the artificial intelligence has already done a lot of the groundwork for me.
👉 This is what happens next
- Use the tool to research specific plugins and enrich your articles with in-depth information.
- Expand your understanding of content creation and blogging with the article 6 tips for WordPress beginners to improve your blogging skills.
- Deepen your SEO knowledge to better position your website by reading and implementing the article 5 SEO tips.


