How to Create a Timeline with the List Block
This tutorial describes how to create a timeline in WordPress without any additional plugin. Only some CSS and the List Block, or the Kadence Icon List Block is needed for this How-To.
There are many additional WordPress plugins that create beautiful timelines. But with this tutorial, all you need is the Gutenberg editor and some tailored CSS. The timeline you then create nice and comfortable with the list block.
There are many use cases where a vertical timeline would visually fit better than a simple bulleted list. I like to use timelines for professional careers on team or author sites.
Unfortunately, WordPress doesn’t provide a ready-made block for this. Even my much-loved Kadence Blocks can’t do this out of the box. A content timeline block is included in the Ultimate Addons for Gutenberg.
What does this extra CSS code do?
With very little CSS, however, I’ve been able to conjure up a simple timeline with the list block. This saves me an additional plugin and thus increased load times.
In order to display a vertical timeline, I first have to hide the list points and icons of the blocks. Then new points are shown, which I connect vertically with a dotted line.
With just some CSS knowledge you can easily change the colors and the connecting lines.
This is how it looks like.
On the left side the example with the standard Gutenberg List Block and on the right side the variant with the Kadence Icon List Block.
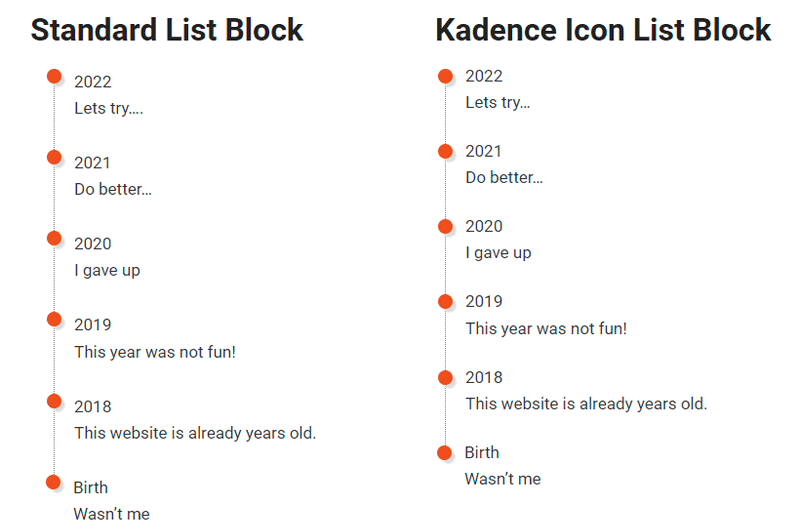
Timeline Block Tutorial
To turn the bulleted list into a timeline, we need to add additional CSS to our WordPress site. I can think of three ways to do this right now:
Three ways to add the CSS
Kadence Post Specific CSS
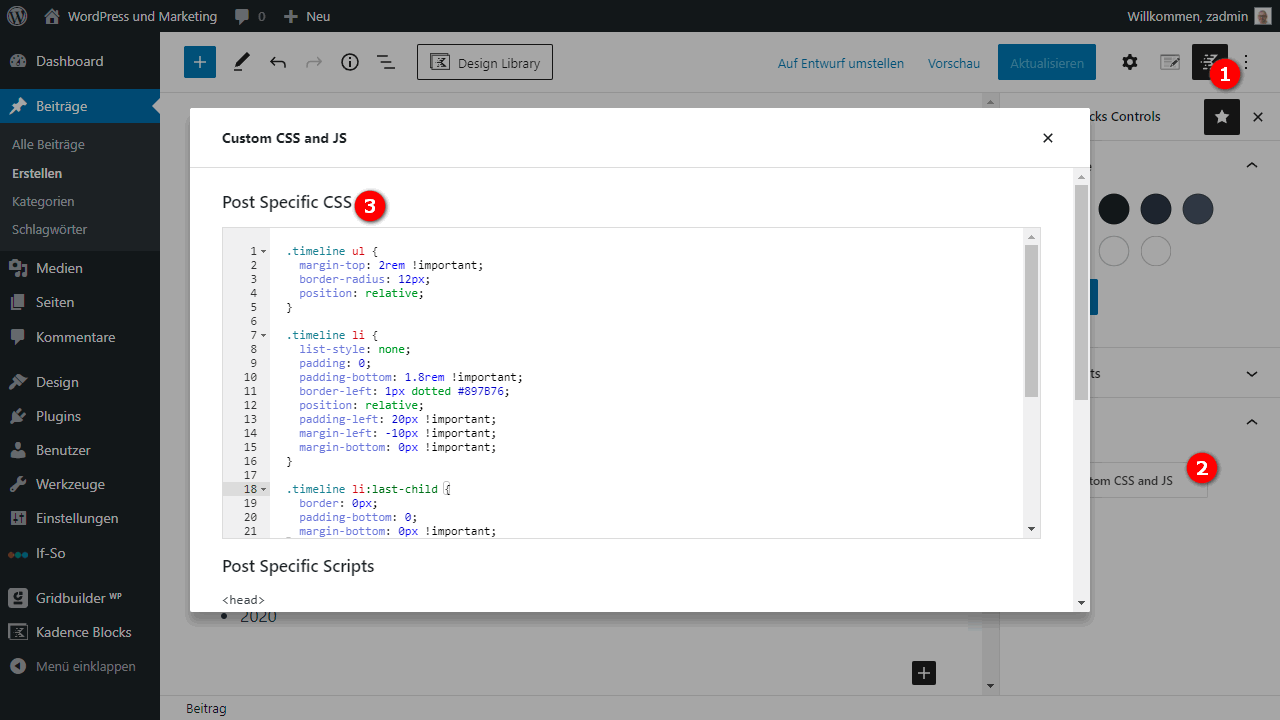
If you have the Kadence Blocks installed, you can add CSS and JavaScript directly in the post or page. This code will then really only load for that page. A wonderful feature, in my opinion.
So in the editor, go to Kadence Block Controls > Custom CSS and JS > Custom CSS and JS and paste the CSS code in the Post Specific CSS field.
Custom CSS in the Customizer
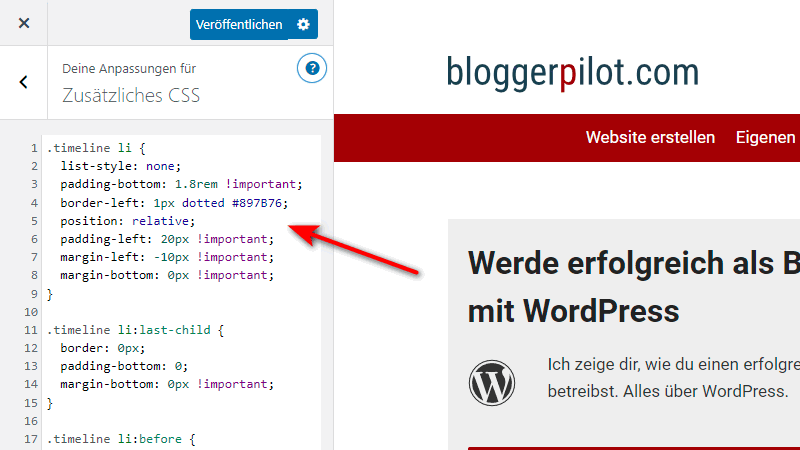
The Custom CSS field is available in every modern theme with Customizer.
Copy my code here.
Inline CSS in the post
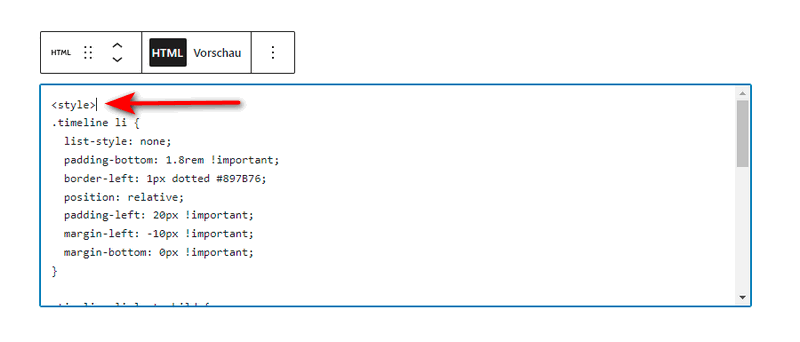
For this possibility you insert the Custom HTML block.
Here you have to note that my CSS code must be inserted inside the tag. See screenshot. If you don’t do that, the code will be displayed as text in your post.
The CSS code for the timeline
.timeline li {
  list-style: none;
  padding-bottom: 1.8rem !important;
  border-left: 1px dotted #897B76;
  position: relative;
  padding-left: 20px !important;
  margin-left: -10px !important;
  margin-bottom: 0px !important;
}

.timeline li:last-child {
  border: 0px;
  padding-bottom: 0;
  margin-bottom: 0px !important;
}

.timeline li:before {
  content: '';
  width: 15px;
  height: 15px;
  background: #E25013;
  box-shadow: 4px 4px 2px #ddd;
  border-radius: 50%;
  position: absolute;
  left: -8px;
  top: 0px;
}

.timeline li span {
  margin-top: -6px;
}
Also, available as Gist.
You have to insert this code into your website in one of the three ways. Only then your list will shine as a vertical timeline.
How to create the timeline
I tested my CSS with the standard WordPress List Block and the Icon List Block of Kadence Blocks.
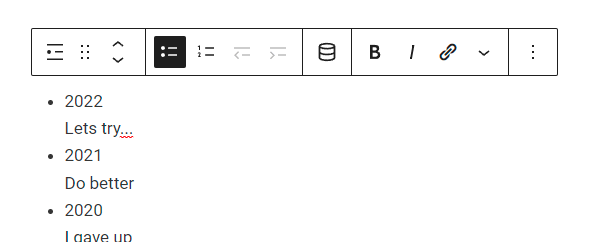
Insert the list block and create the list items.
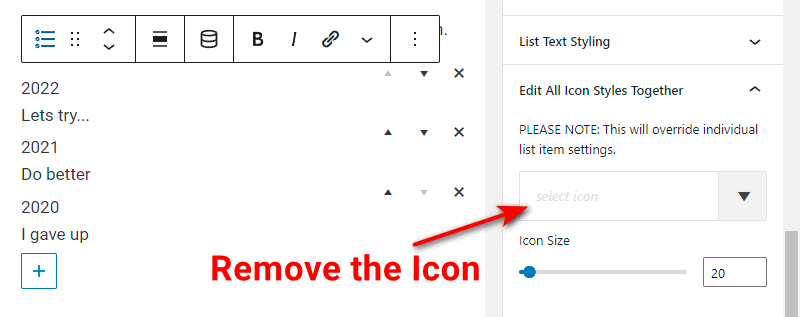
For the Icon List Block, you also need to remove the list icon so that it is not displayed.
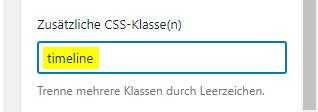
Now comes the most important step. In the right sidebar of the editor you will find the“Advanced” section with the field Additional CSS Classes. Here you need to add the class name “timeline”.
Don’t be surprised!
The style changes are not displayed in the editor. For that you have to either open the preview or save and open the post. Now you can see your timeline in the frontend.
Advantages and disadvantages
Of course, not everything is positive about such a solution. Developers use such tricks every day, but the inexperienced blogger may be overwhelmed.
Advantages
- No additional plugins necessary
- free of charge
- Does not affect the speed
Disadvantages
- User must have some technical skill and knowledge
- No horizontal timeline possible
- Changes only with CSS
Conclusion Timeline with CSS
Sometimes all it really takes is a piece of code to accomplish great things. At least, if at all possible, I try to avoid installing a new plugin. Elementor, Thrive Architect or Shortcodes are spared with this solution.
New plugins always mean an additional security risk and usually longer loading times.
If you have any questions, please use the comment function.

Hi Joachen,
Thank you so much for the simple CSS code. It’s awesome and just what I needed. I appreciate this example.