Elementor Cloud Website Installation and Setup
With Elementor Cloud Website, you get managed WordPress hosting, a pre-installed blog, and Elementor Pro all in one place. This how-to will show you how to set up your first website with the all-in-one Elementor Cloud solution.
How much will Elementor Cloud cost me?
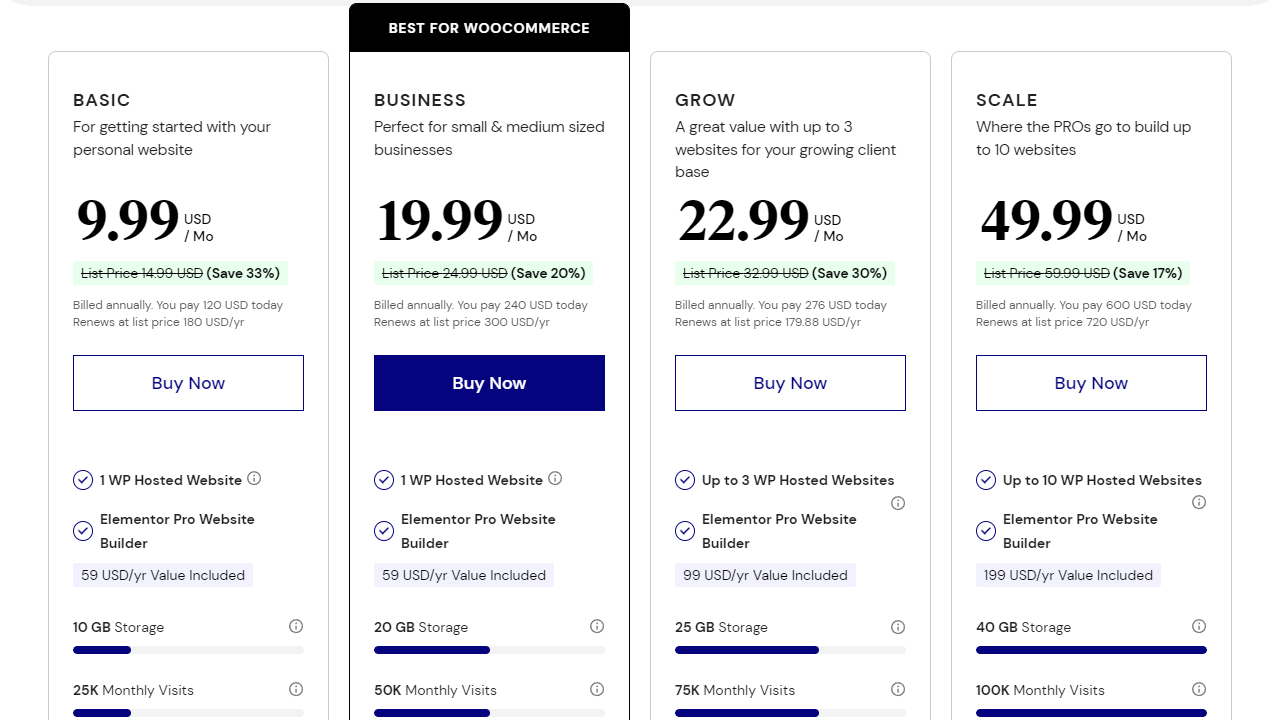
Elementor offers four different packages. Each one comes with Elementor Pro pre-installed and included in the price.
| Basic | Business | Grow | Scale | |
|---|---|---|---|---|
| Websites | 1 | 1 | 3 | 10 |
| Elementor Pro | yes | yes | yes | yes |
| Speicherplatz | 10 GB | 20 GB | 25 GB | 40 GB |
| Besucher/monatlich | 25,000 | 50,000 | 75,000 | 100,000 |
| Backup | 14 days | 30 days | 30 days | 30 days |
| Cloudflare SSL und CDN | yes | yes | yes | yes |
| $ 9.99 | $ 19.99 | $ 22.99 | $ 49.99 |
The prices have increased a bit, but the offer is still worth it. Especially the scale plan for 10 WordPress installations.
Elementor Cloud Website Setup
Installing WordPress is not necessarily difficult. In this case, you don’t even have to worry about it. Because Elementor Cloud takes care of all the tasks for you and asks you for the essentials in 6 simple steps.
Let’s go!
Step 1: Book a subscription
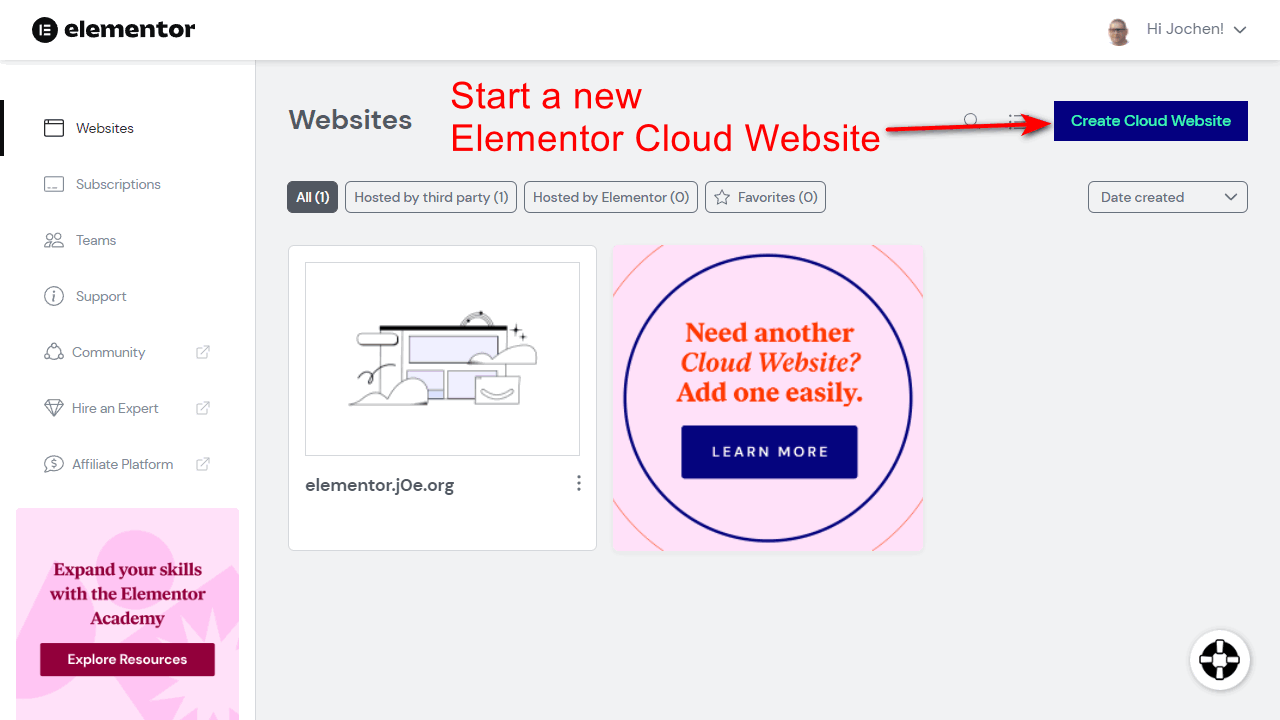
First you need to go to https://my.elementor.com/websites/ in your browser. If you don’t have an account yet, you can create one for free.
On the top right you will find a blue button with the text “Create Cloud Website”. Please click on it.
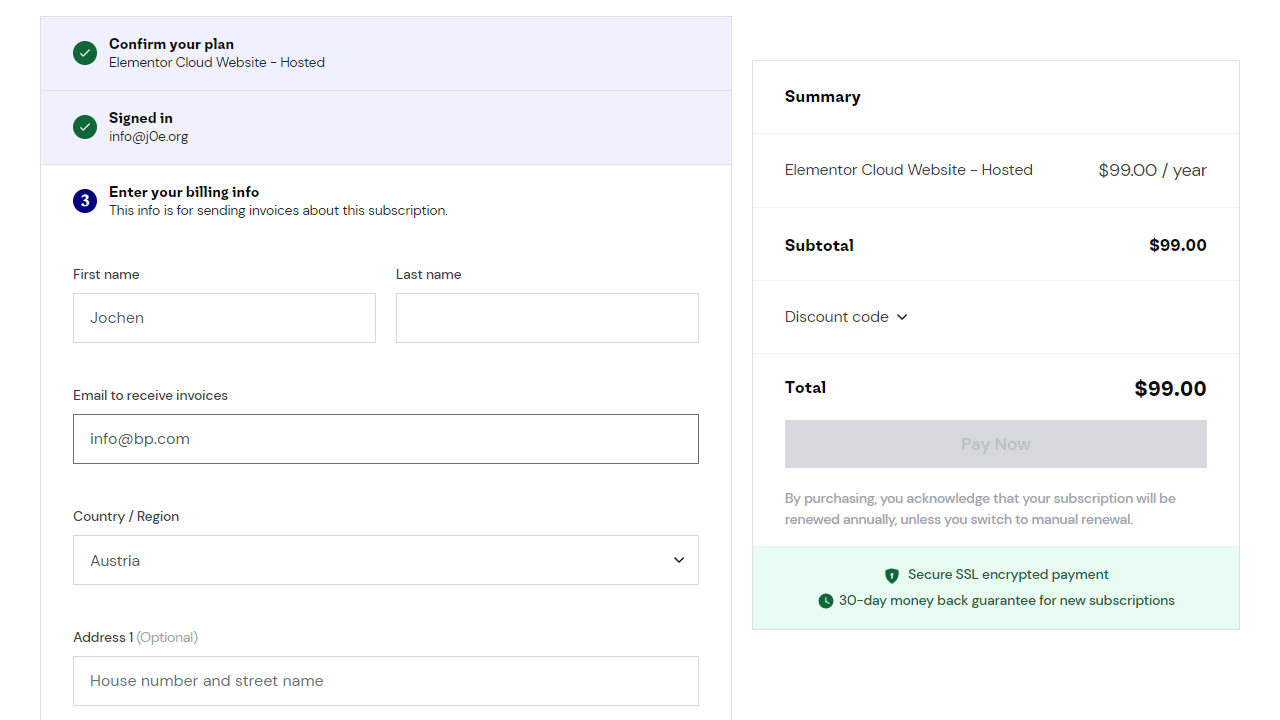
If you haven’t subscribed yet, you will be redirected to the appropriate store website where you can subscribe for $120.00 annually. That currently equals about $9.99 per month for managed WordPress hosting incl. Elementor Pro. A great offer!
Now the actual setup begins.
Step 2: Choose a name
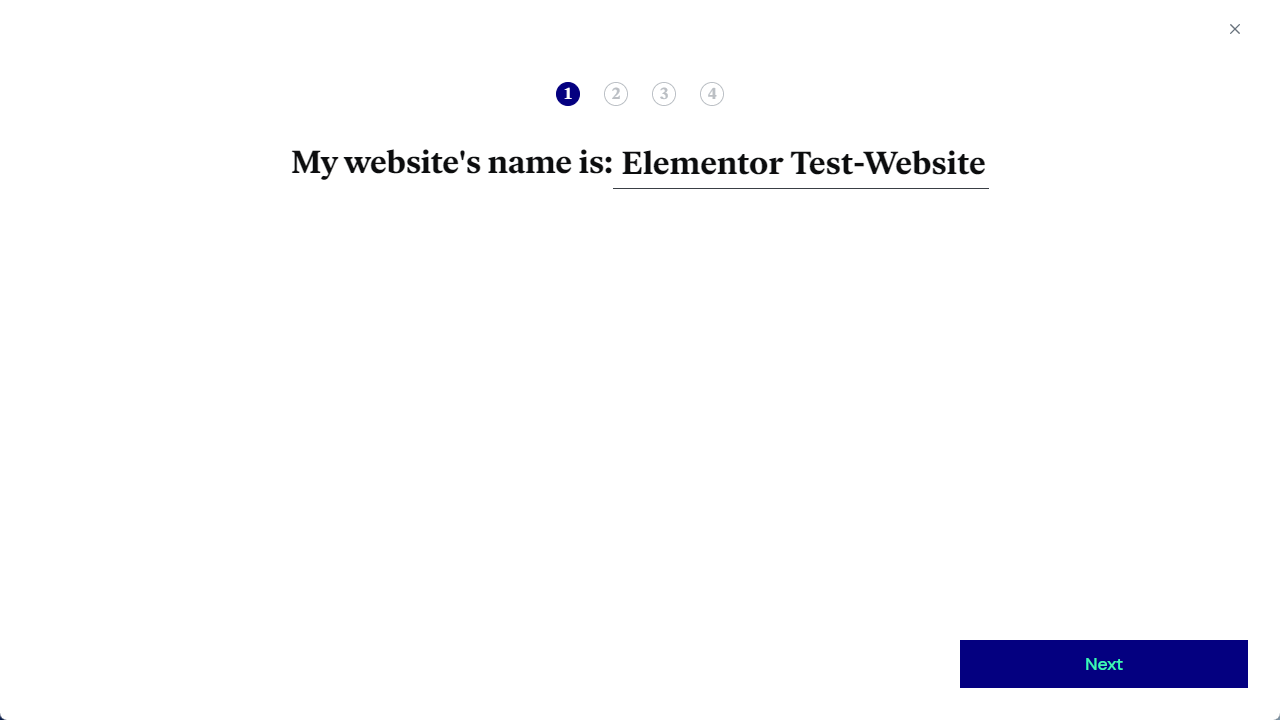
If you have booked an Elementor Cloud Website for a fee, you assign a name for your new blog. I have entered “Elementor Test Website” here. Of course you can change all entries later.
Click on “Next”.
Step 3: Choose a subdomain
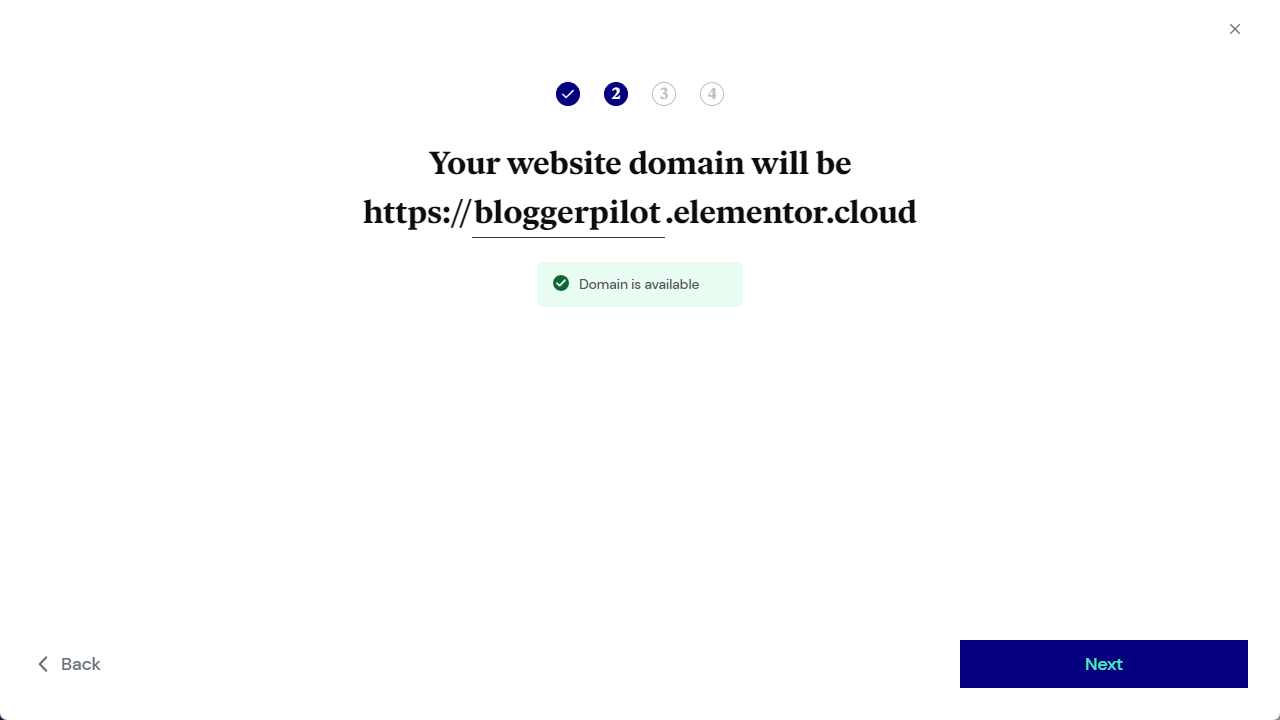
The setup wizard will first suggest the website name you entered earlier as the subdomain. You should change this to a name that is as short and memorable as possible. Preferably the same name that your real domain has.
After that you have to click on “Check Domain Availability”. If you get the response “Domain is available” you can continue with “Next”.
Otherwise this name is already taken and you have to choose another one. It doesn’t really matter, because later you will set up your own domain anyway.
Step 4: Select website type
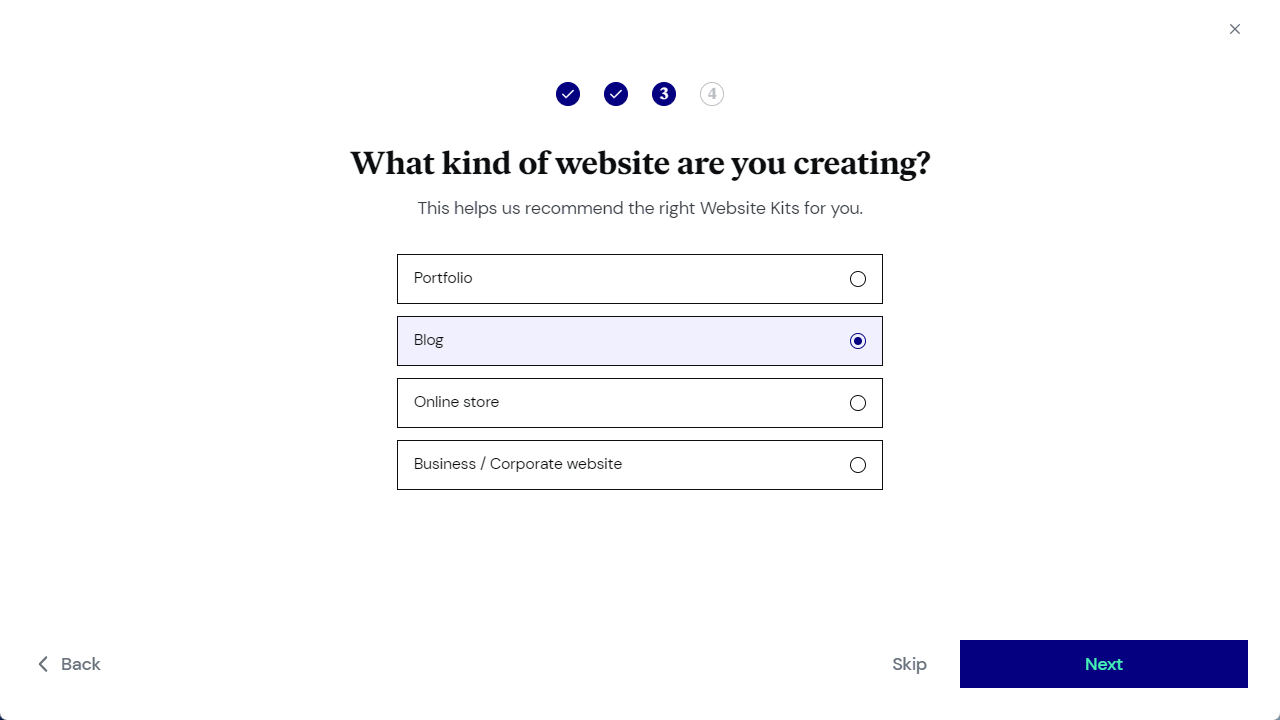
In this setup step you choose what type of website you want to create. You have the choice between:
- Portfolio
- Blog
- Online Store
- Business / Corporate Website
Based on this selection, Elementor presents you with the appropriate website kits, from which you can then choose one for your new project. You can also switch between the categories later.
Since I am a blogger, I have selected “Blog”.
Click on “Next”.
Step 5: Choose your design
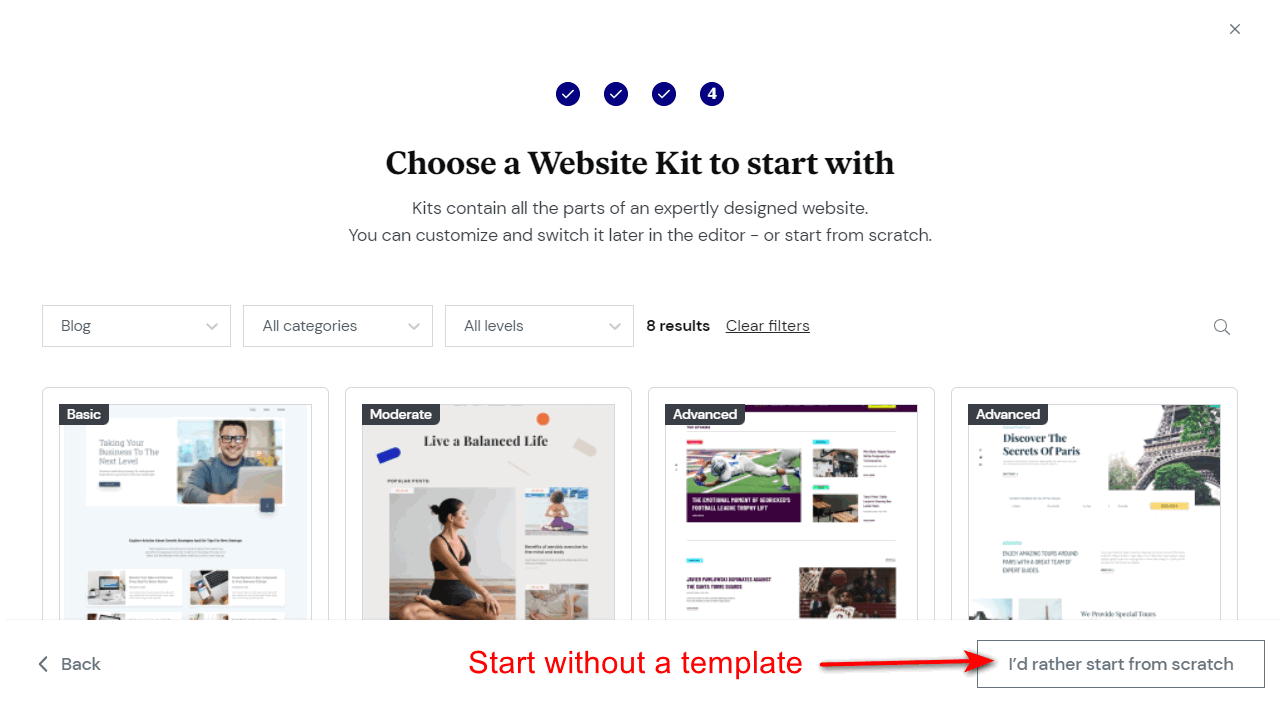
This is about the design of your website. At the time of this writing, there are 108 site kits available. There’s sure to be something for you.
The three levels Basic, Moderate and Advanced indicate how elaborate each Elementor kit is designed. The kits contain all the parts of an expertly designed website. You can customize and modify it later in the editor – or start from scratch.
When you hover over a kit, you’ll see the “What’s inside?” button. Click it to see a live preview. Additionally you will see all included templates.
Since I want to create most of my design myself, I choose a template from the Basic category so I don’t have to start from scratch but can still implement my vision. My kit is called “Business Growth Advisor Blog.”
Alternatively, click on “I’d rather start from scratch” to start with a completely blank page.
Step 6: WordPress is installed
That’s it for the installation of your Elementor Cloud website.
Here you can watch your blog get ready in four stages. You can also close it.
About 10 minutes later, the setup process is finished and you will receive an email with all the important information.
Log in to the WordPress admin
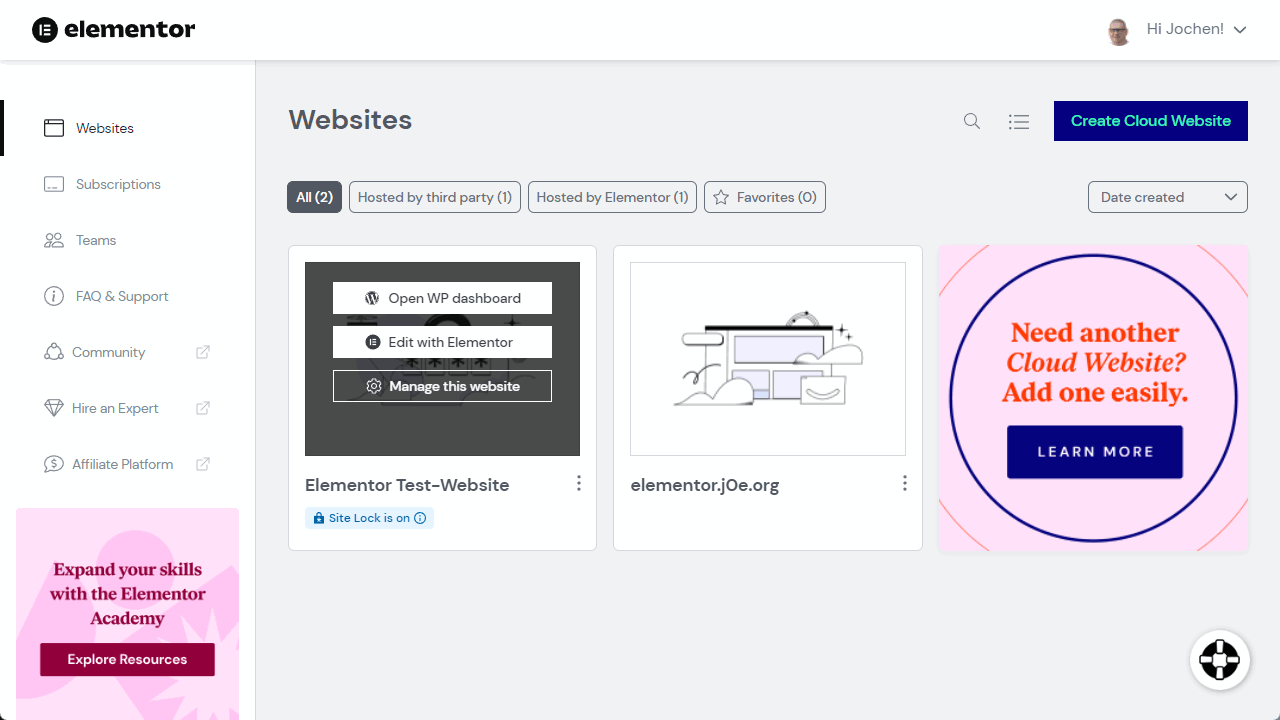
Back in my.elementor.com, you’ll see your new installation, with a blue badge that says “Site Lock is on”. This means that you need a code to access the new site, so visitors and Google can’t see your unfinished site. You should remove this lock only when you are done with the setup.
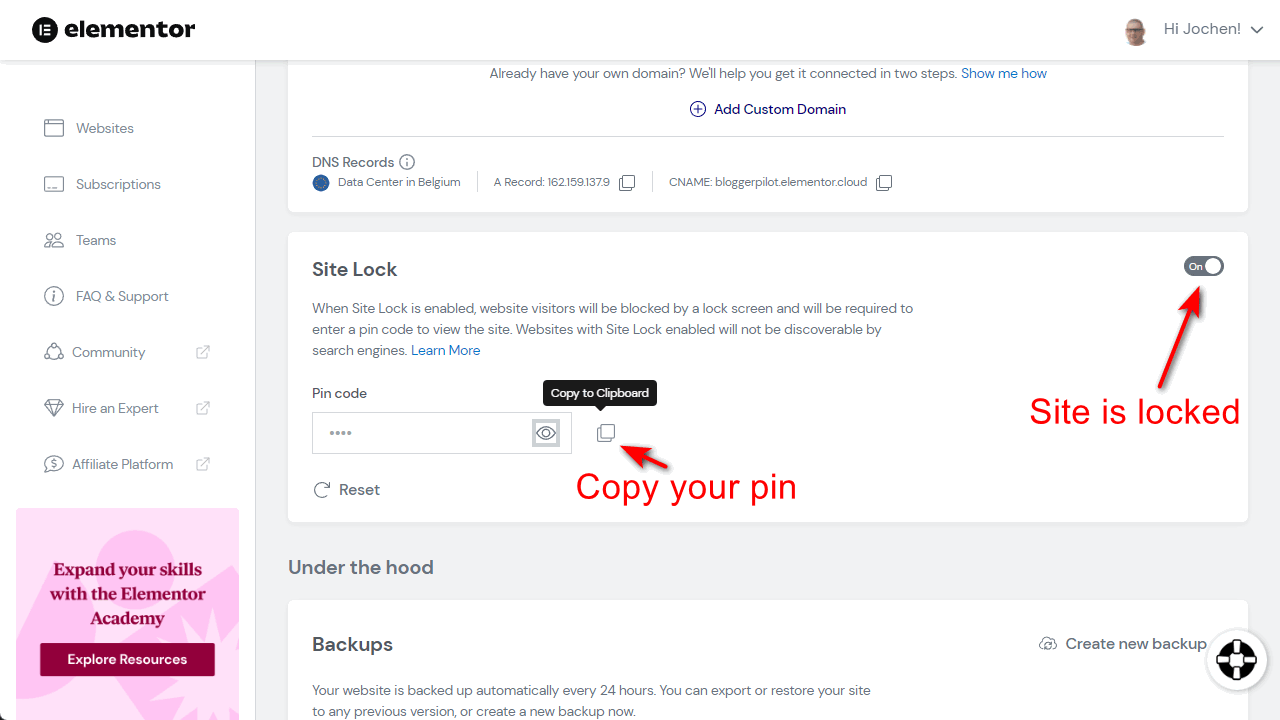
You can view or change the pin code by clicking on “Manage this Site” and scrolling down.
But since I first want to get into the WordPress Admin to finish setting up WordPress myself, I click on “Open WP dashboard”.
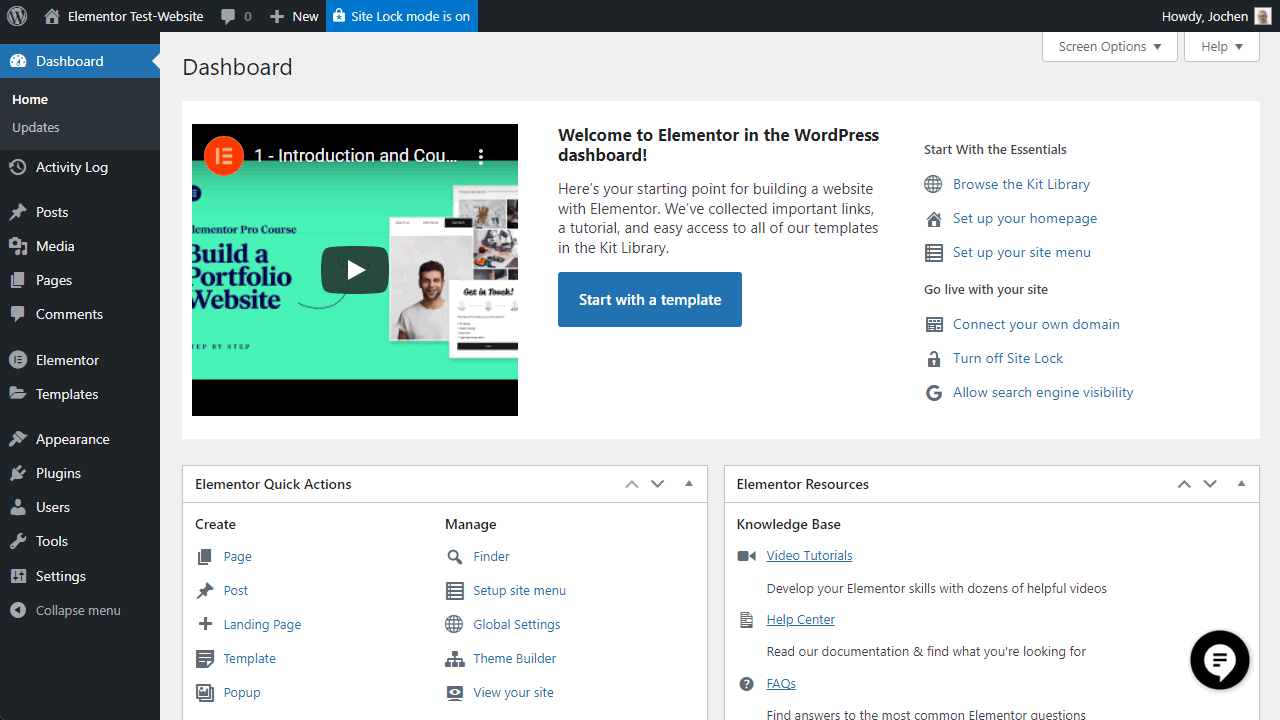
With a casual howdy, the familiar WordPress admin greets me. However, with some customizations from Elementor.
First, the “Site Lock Mode” stands out in blue at the top. A great feature.
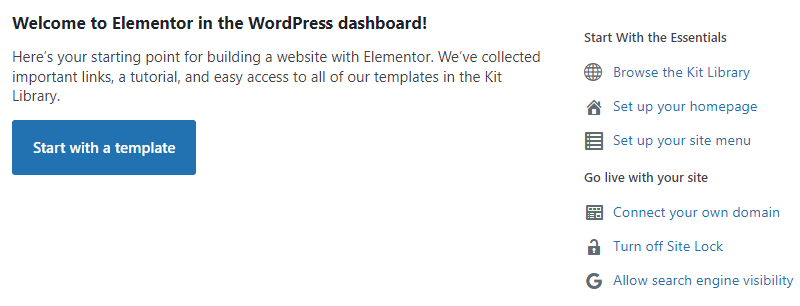
At the top of the dashboard you will find the most important links to set up the new sites.
- Site Kit Library (Browse the Kit Library)
- WordPress settings (Set up your homepage)
- Menu setup (Set up your site menu)
- Connect your own domain (Connect your own domain)
- Turn off site lock (Turn off Site Lock)
- Allow website indexing (Allow search engine visibility)
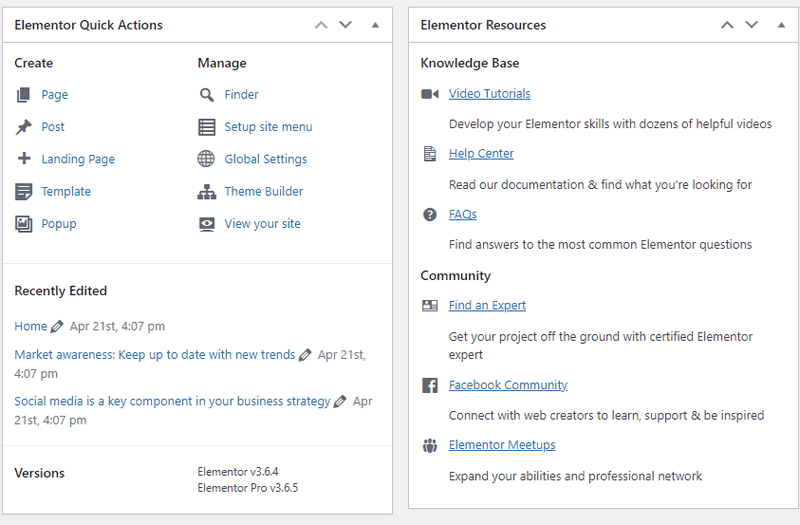
Just below that, the info goes even further. Especially for WordPress and Elementor beginners this is a cool thing.
Finish setting up WordPress
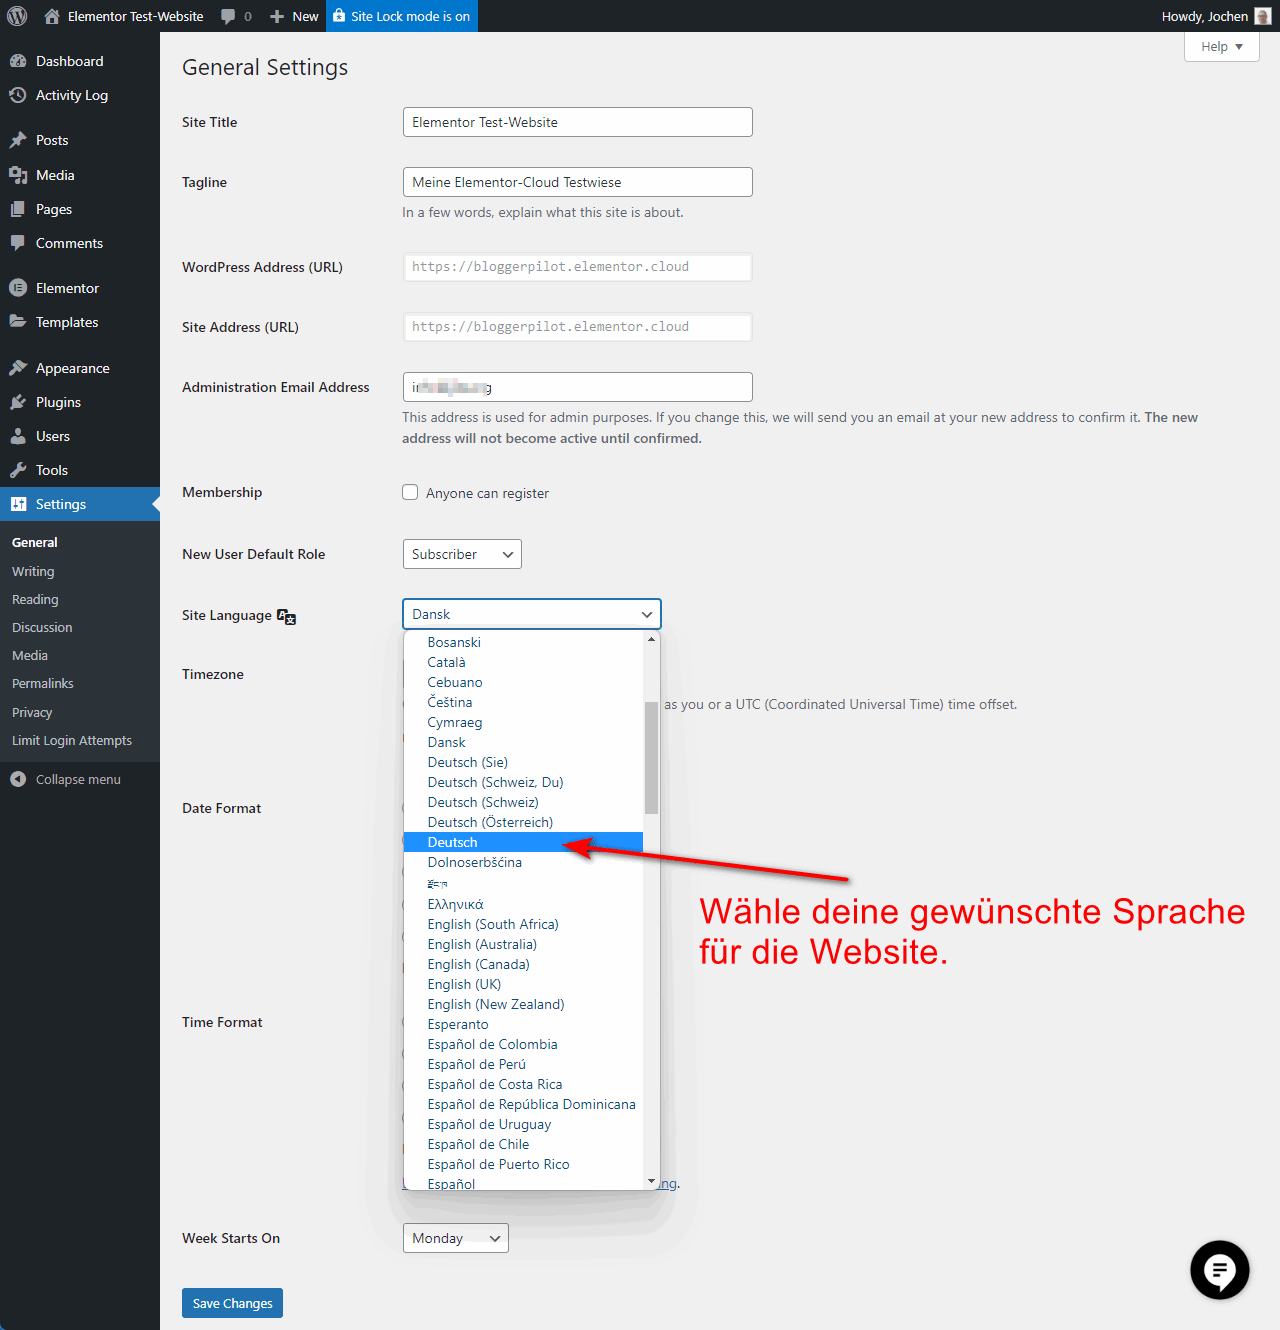
Before I get into the design, I first take care of the basic WordPress settings.
Since all websites are initially installed in English with Elementor Cloud, this is also the right point to switch to German in Settings > General.
WordPress is super translated. So now you will find the complete backend in perfect German.
Now you should go through all menu items in the settings and adjust them to your needs.
I have already written a detailed tutorial on how to set up WordPress perfectly.
Clean up themes
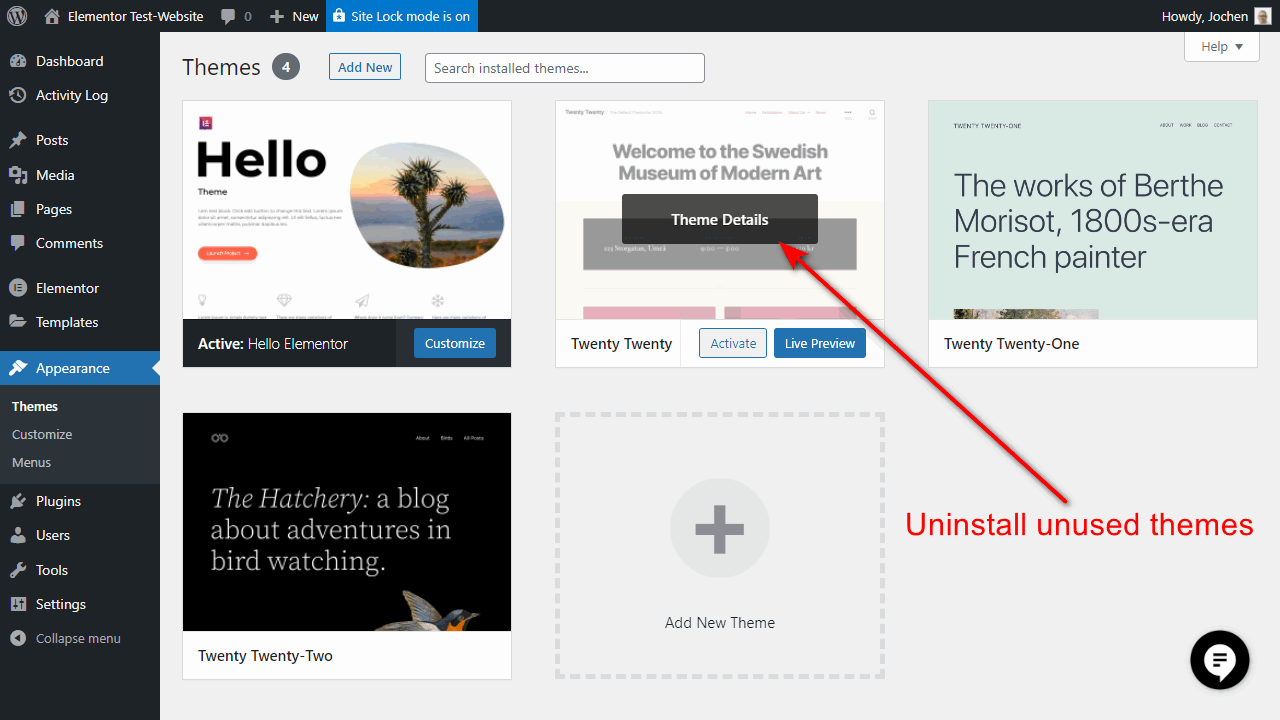
Now please jump to the menu item Design > Themes.
Here you can find Hello from Elementor and other WordPress default themes. You can use Elementor with any theme, but I would recommend to stay with the active Hello Elementor. This will give you the best support and compatibility.
For all unused themes, click on “Theme Details” and then “Delete”.
Clean up and reinstall plugins
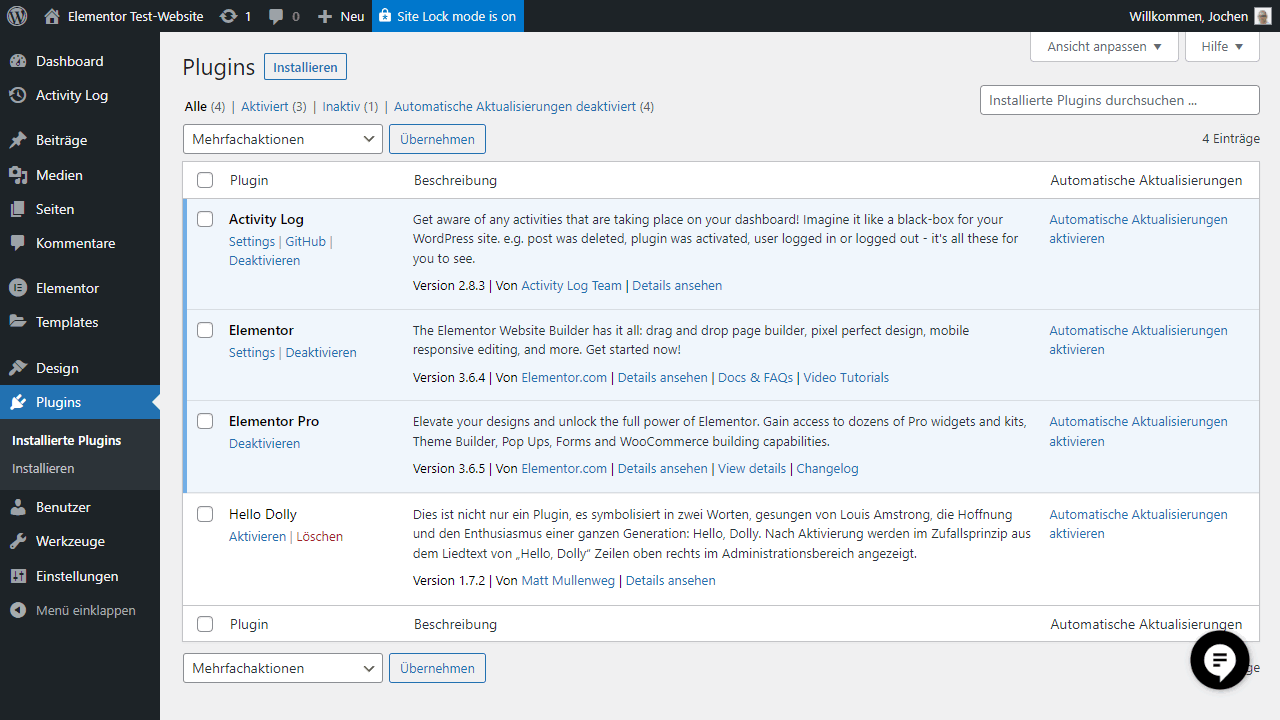
Moving on to the plugins. “Hello Dolly” you can delete, Activity Log and the two Elementor plugins we leave active.
As basics I would recommend the following plugins:
- Yoast SEO (free & premium) THE SEO plugin.
- AntiSpam Bee (free) helps very well against comment spam.
- Enable Media Replace (free) replaces images in your media library. Super handy when you need to replace images.
- Site Kit from Google (free) adds the Google Analytics code to your blog and brings the statistics to your dashboard.
All other plugins you choose according to your needs.
Finish the design
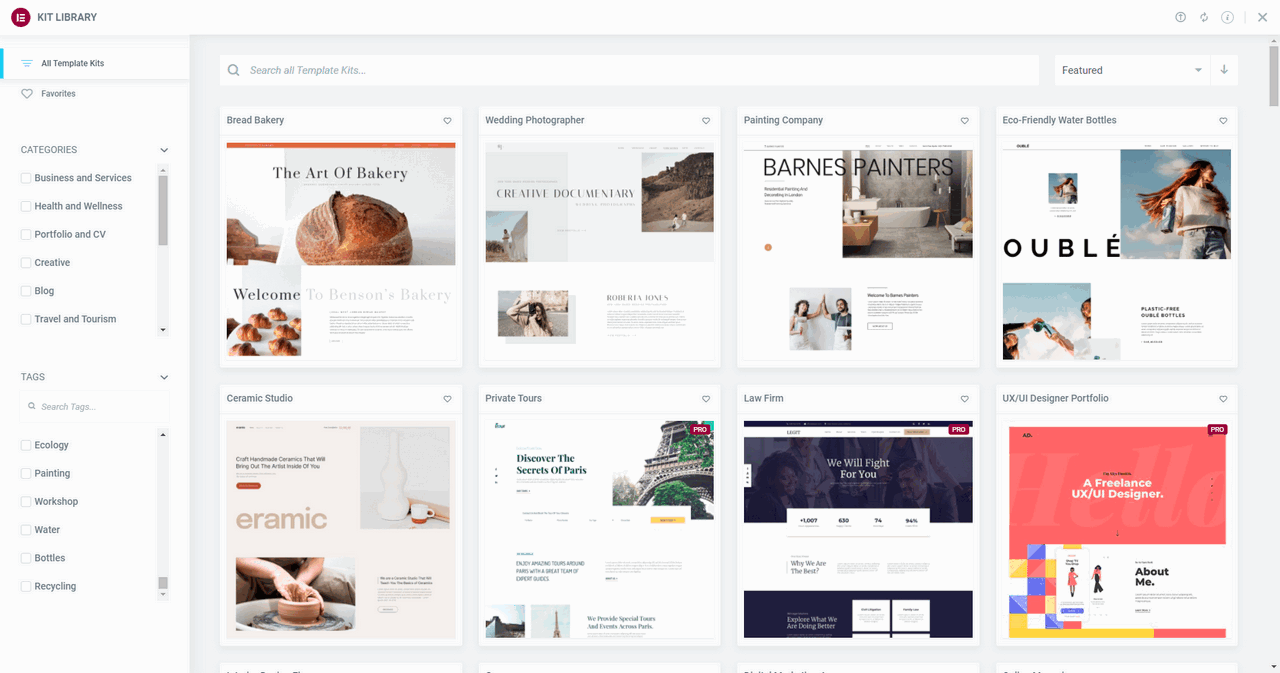
If you are not satisfied with the Elementor Site Kit you selected earlier, you can either go to the Kits via the Dashboard > Browse the Kit Library or via the sidebar Templates > Kit Library and select a new one. Only when you have decided on a template fix, you should proceed with the detail changes.
Use the preview (View Demo) to get an exact picture.
Theme Builder
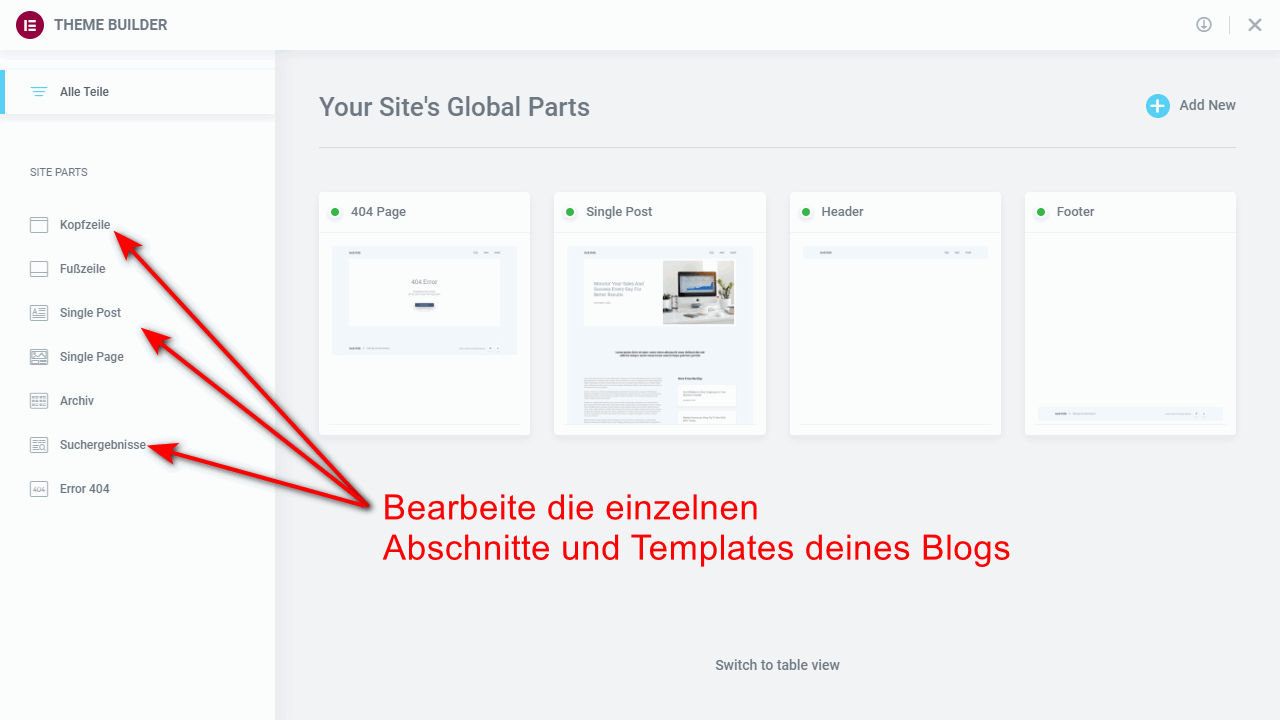
In the Templates > Theme Builder you will find the templates for the individual areas, such as header, footer or archives of your website.
You style these areas here once for the whole website and not on each page separately. You need to know this to work effectively with Elementor.
Editing individual pages and posts
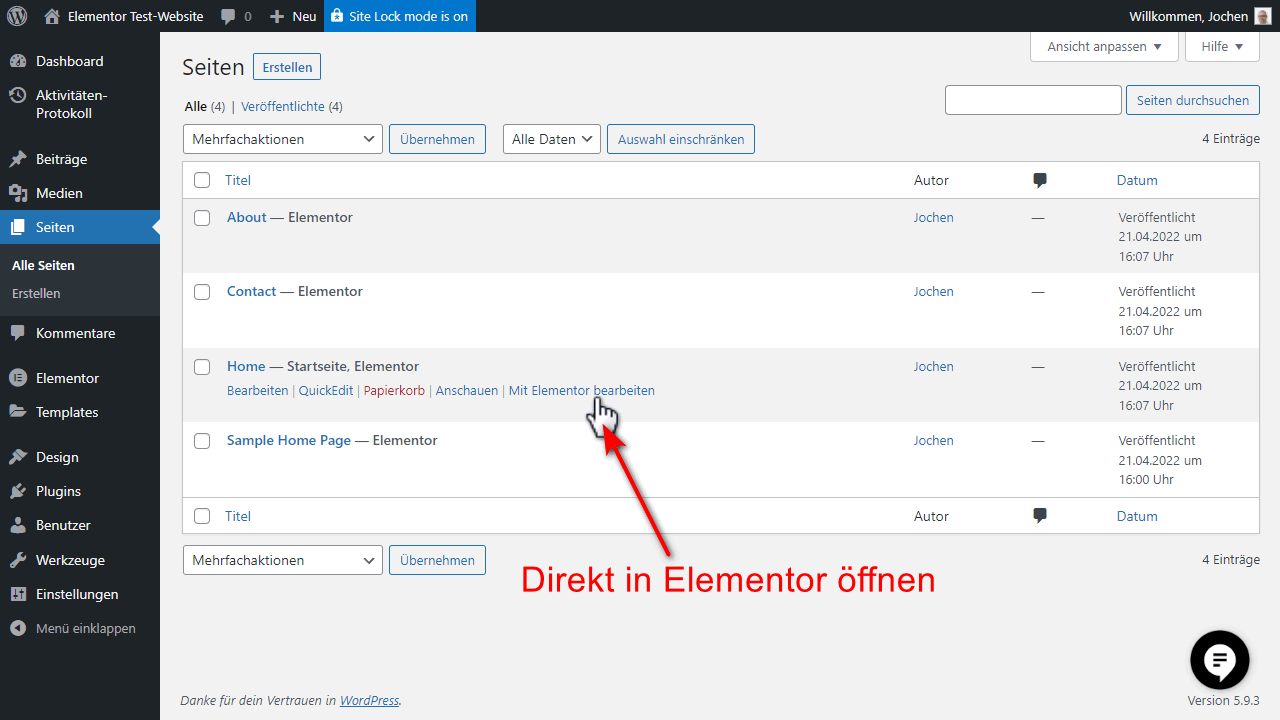
- Posts are chronologically sorted news or information.
- Pages contain the start page, contact forms or the imprint.
In the menu of the same name you will find your posts or pages listed. If you hover your mouse over the article, you can edit it directly with Elementor.
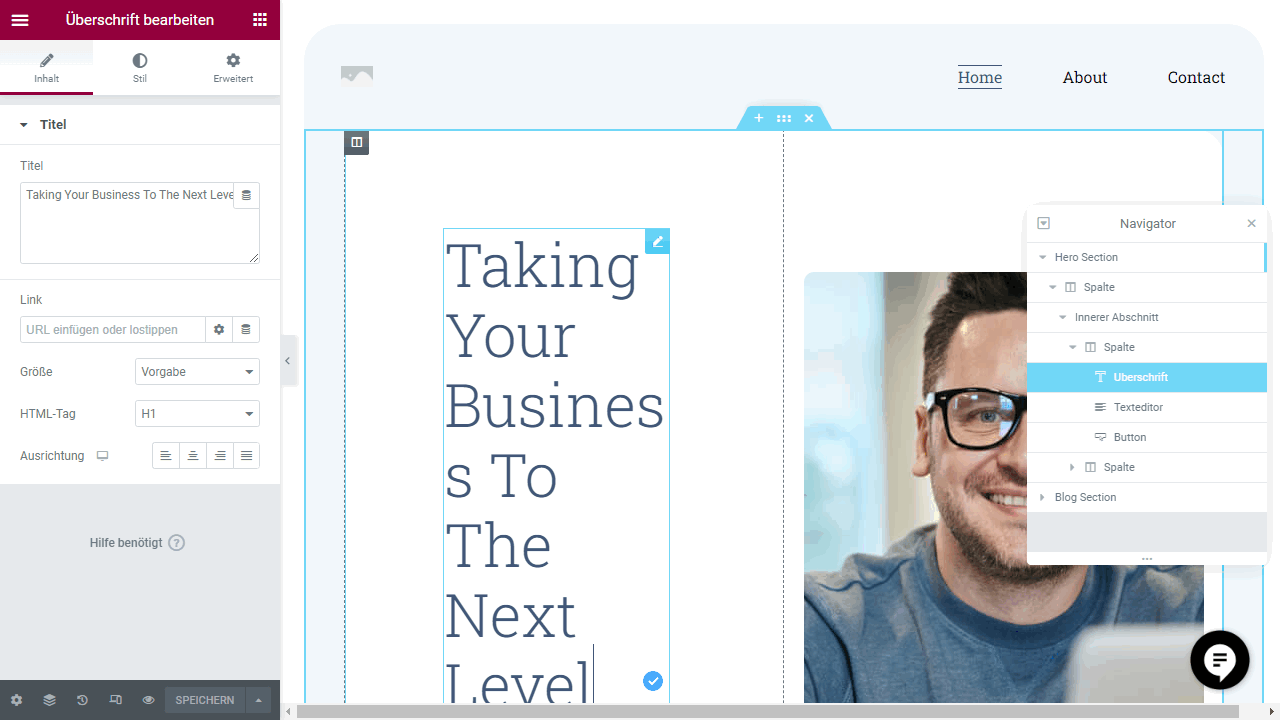
Now the real journey begins with the Elementor Page-Builder.
The Elementor Layout article explains the system of Sections and Columns, if you haven’t looked into it yet.
Elementor Cloud Installation Conclusion
My experience with the Elementor Cloud all-in-one solution has been positive so far. The loading times are really fast in the backend and on the website. I will continue to report about it.
With this text, you have the perfect introduction to setting up your own Elementor Cloud website. This how-to has taken you to the point where you start using Elementor Page-Builder to design your website and add your text.
The rest is fun tinkering around and putting your very own thing on the web.
Good luck!
